
Building web apps can feel like playing with digital building blocks. You connect small parts together to make complete, working programs. Angular is a strong toolkit that helps coders create fast web applications. You can learn these essential skills easily with beginner guides from debug.school. This learning platform breaks large coding topics into friendly, hands-on lessons.
Reading about code is a fine start, but building real tools helps you learn best. When you complete real projects, you understand how each moving piece connects. Soon, you will design your own applications and share them proudly.
What Exactly Is Angular?
Angular is a complete coding framework built by software engineers to run in web browsers. It provides everything you need in one unified package right out of the box. You get built-in routing tools, form helpers, and communication systems without downloading extra software.
Under the hood, Angular uses a language called TypeScript. TypeScript is simply JavaScript with helpful rules and labels attached. These safety labels catch small typing mistakes before you ever run your code.
Because of this built-in safety net, teams trust Angular to build large platforms. The system guides you into organized habits from your very first line of code.
Plain JavaScript: Fast to write, but small typos slip past easily.
TypeScript:      Adds helpful checks to stop errors early.
The Core Parts of an App
Every Angular application relies on a few fundamental building blocks. The most common block is called a component. A component controls a specific area of your computer screen.
Each component holds three essential files working side by side. One file sets the logic, one defines the visual layout, and one controls the colors. Separating these jobs keeps your workspace tidy and easy to read.
When you assemble multiple components, you create a complete web experience. Understanding this basic structure makes building your first project completely straightforward.
- TypeScript File: Contains the thinking rules and data values for the screen.
- HTML Template: Shows the text, buttons, and pictures to the user.
- CSS Styles: Adds colors, margins, and beautiful fonts to the page.
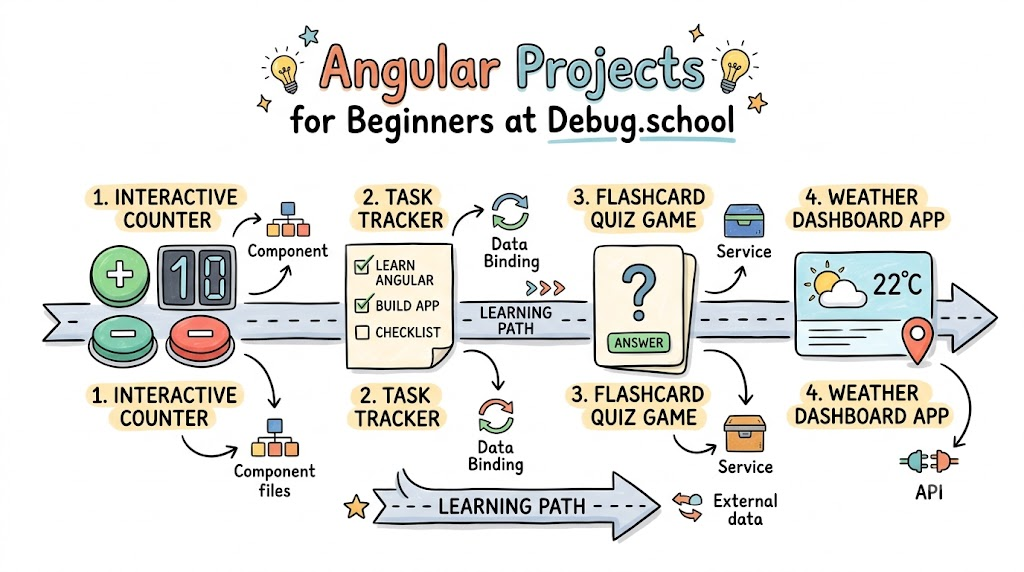
Project 1: The Interactive Counter
The best starting project is a classic number counter. This tiny tool lets users click buttons to make a number go up or down. It teaches you how to display information and listen for user clicks.
First, you store a starting number inside your component file. Next, you show that number inside an HTML tag using double curly braces. Coders call this friendly display trick interpolation.
Then, you create two simple buttons labeled plus and minus. You attach click listeners to both buttons. When someone clicks a button, your code changes the number, and the screen updates instantly.
// Inside your counter component logic
export class CounterComponent {
  totalCount: number = 0;

  increaseNumber() {
    this.totalCount = this.totalCount + 1;
  }

  decreaseNumber() {
    this.totalCount = this.totalCount - 1;
  }
}
Understanding Data Binding
Angular makes it easy to pass messages between your code and your visual screen. This communication link is called data binding. It keeps your visual display perfectly aligned with your internal data.
Sometimes you want data to travel from your code down to the screen. Other times you need information from a typed text box to travel back into your code. Angular handles both paths smoothly.
You can even combine both paths into a powerful feature called two-way binding. When a visitor types their nickname into a box, the page greets them by name instantly.
| Binding Type | How It Looks | What It Does |
|---|---|---|
| Interpolation | {{ value }} |
Prints a variable onto the web page. |
| Event Binding | (click)="doWork()" |
Runs a function when a user clicks. |
| Two-Way Binding | [(ngModel)]="name" |
Syncs a form field with your data. |
Project 2: The Task Tracker
Once your counter works smoothly, you can create a daily task tracker. A task tracker lets you type chores into an input box and save them to a list. This project shows you how to manage collections of items.
You create a list array inside your component code. When a user enters a chore and hits enter, your code appends that text into the list. Angular then displays each item neatly on the screen.
To display every chore, you use a special display rule called a repeater. This helper loops through your chore list and stamps out a new row for every single item.
<!-- Displaying the chores on the screen -->
<ul>
  <li *ngFor="let chore of choreList">
    {{ chore }}
  </li>
</ul>
Adding Style and Structure
A great app needs to look clean and inviting. Angular lets you style each component separately without affecting other parts of the site. Your task list can have bright blue borders without accidentally turning your header blue.
You can also use conditions to change how elements appear based on your data. For example, when your chore list is empty, you can display a friendly message that says, "All done for today!"
Once a user adds an item, that placeholder message hides automatically. These smart display rules make your app feel polished and responsive.
- Create a simple text input box and an "Add" button.
- Read the typed text and store it in your component list.
- Show each task using an automated display loop.
- Add a delete button next to each chore to clear it when finished.
Project 3: A Flashcard Quiz Game
The third great project for beginners is a flashcard study game. This project introduces basic game logic and conditional display states. Users read a question on a virtual card and click to reveal the correct answer.
You can store a collection of question-and-answer pairs inside your code. A simple true-or-false flag tracks whether the card is currently flipped over. When the user taps the card, your code flips the flag.
Angular reads that flag and shows either the front or the back of the card. This project builds deep confidence with component logic and user interactions.
User sees Question
   --> User taps card
   --> Hidden flag turns true
   --> Card reveals Answer!
Organizing Code with Services
As your applications grow, you will want to share information across multiple screens. Angular uses smart helpers called services to handle this job. A service is like a central storage locker for your data.
Instead of keeping data locked inside one single component, you place it inside a service. Any component on the page can open that locker to read or update the information.
This setup prevents messy duplicate code. It also keeps your components light and focused on displaying content cleanly.
- Component: Manages what the visitor sees on the screen.
- Service: Handles background tasks, calculations, and data storage.
- Dependency Injection: The system that delivers services to components automatically.
Project 4: Weather Dashboard App
The weather dashboard project teaches you how to talk to real-world web servers. Real applications rarely keep all their data stored inside local files. Instead, they fetch live updates from external web databases.
Angular provides a built-in internet client that sends web requests safely. You can type a city name and ask an online weather database for the current temperature.
When the forecast data returns, your component displays the temperature and a sun or rain icon. This project shows you how modern software talks across the global internet.
User types "London"
   --> App sends web request
   --> Server sends back sunny weather data
   --> Screen displays sun icon!
Why Debug.school Makes Angular Simple
Starting a large framework like Angular can sometimes feel intimidating. Complex setup files and long command lines can puzzle new coders. That is why having clear, beginner-friendly instruction makes such a big difference.
The tutorials guide you through every command step by step. You never get left wondering why a certain file exists or what an error message means. Each concept connects naturally to the next one.
By focusing on small wins, you build momentum quickly. You spend less time wrestling with setup errors and more time building creative software.
- Plain Explanations: Every technical word gets explained in simple everyday terms.
- Practical Steps: You build real mini-apps instead of reading dry manual pages.
- Error Helpers: Clear tips show you how to read error messages and fix typos fast.
Common Mistakes to Watch Out For
Every software developer makes mistakes while learning. Being aware of frequent pitfalls helps you solve problems quickly when they appear.
One common mistake is forgetting to import required tool modules. If you want to use input boxes, you must import the forms module into your project configuration. Without that import, your input tags will not link to your code.
Another common slip is misspelling variable names between your logic file and your template file. If your logic file uses userScore but your HTML displays userscore, the page will show blank spaces. Always double-check your spelling when data fails to appear.
| Frequent Mistake | Why It Happens | How to Fix It |
|---|---|---|
| Missing Module | Forgetting to import form tools. | Add the required module to your configuration file. |
| Spelling Errors | Mismatched variable casing in files. | Verify letter capitalization across all related files. |
| Unclosed Tags | Leaving off an ending HTML tag. | Check that every opening tag has a matching closing tag. |
How to Set Up Your Local Machine
You can set up a local workspace on your own computer in just a few minutes. First, install the Node.js tool from its official website. Node provides the engine that runs web development scripts locally.
Next, open your computer's terminal window and install the Angular command tool. This tool acts like a magic wand for your projects. Typing one simple command creates all the necessary starter files and folders for you.
Finally, install a clean text editor where you can write your code comfortably. Now you have a complete development workstation ready to build modern software.
# Install the Angular command tool
npm install -g @angular/cli

# Create a brand new project
ng new my-first-app

# Run your app inside the browser
cd my-first-app
ng serve
Tips for Daily Practice
Becoming great at building software is a steady journey. Practicing for twenty focused minutes every day works better than studying for hours once a week. Frequent practice keeps commands fresh in your mind.
Start by rebuilding the beginner projects without glancing at the answer keys. When you get stuck, look up the solution, fix the problem, and keep moving forward.
After that, try adding one brand-new feature to each project. Add a reset button to your counter, or add priority color tags to your chore list. Small experiments turn basic lessons into permanent skills.
- Code Daily: Spend a little time coding every morning or evening.
- Change the Code: Tweak color settings and numbers to see what happens on screen.
- Ask Questions: Research confusing concepts until the ideas feel clear and simple.
Summary and Next Steps
Angular provides a complete toolbox for creating reliable web applications. By understanding components, data binding, and services, you hold the keys to modern web development.
Start your coding journey with small projects like the counter and the task tracker. These small victories build the foundation you need for larger applications like the weather dashboard.
Keep experimenting, building, and having fun with your code. With helpful lessons and steady practice, you will become a confident application creator.



Top comments (0)