Reference1
Reference2
Reference3
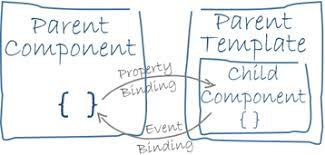
Understanding binding
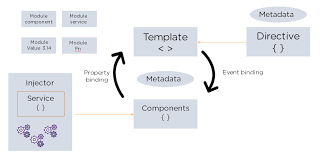
In an Angular template, a binding creates a live connection between a part of the UI created from a template (a DOM element, directive, or component) and the model (the component instance to which the template belongs). This connection can be used to synchronize the view with the model, to notify the model when an event or user action takes place in the view, or both. Angular's Change Detection algorithm is responsible for keeping the view and the model in sync.
Examples of binding include:
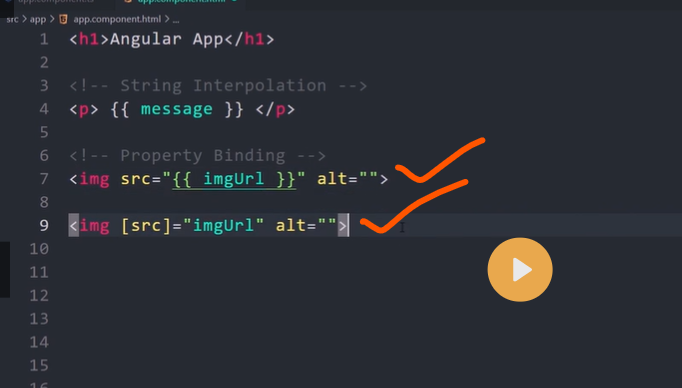
- text interpolations(one-way binding)
- property binding(one-way binding)
- event binding(one-way binding)
- two-way binding Bindings always have two parts: a target which will receive the bound value, and a template expression which produces a value from the model.
One-Way Data Binding
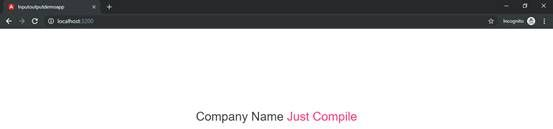
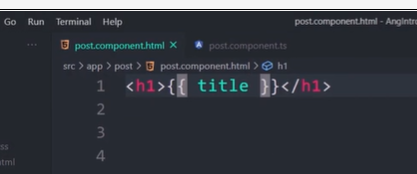
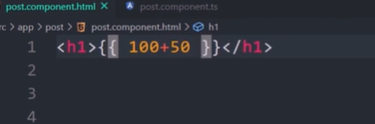
text interpolations(one-way binding)
One-way data binding is unidirectional. You can only bind the data from component to the DOM or from DOM to the component.
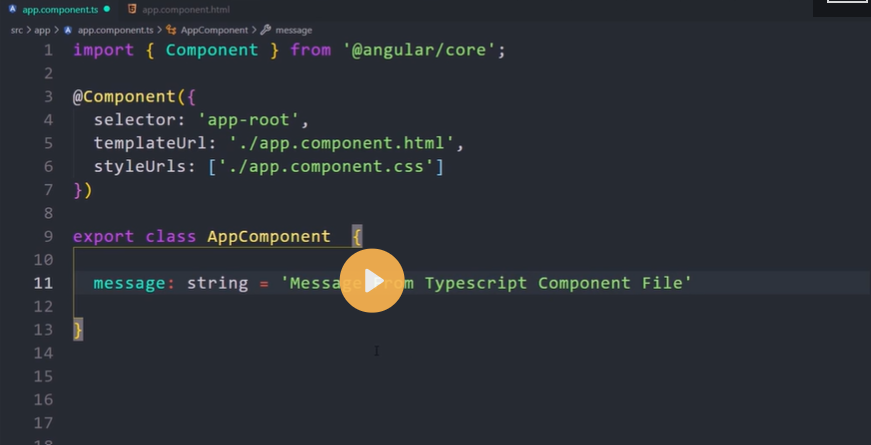
import { Component } from '@angular/core';
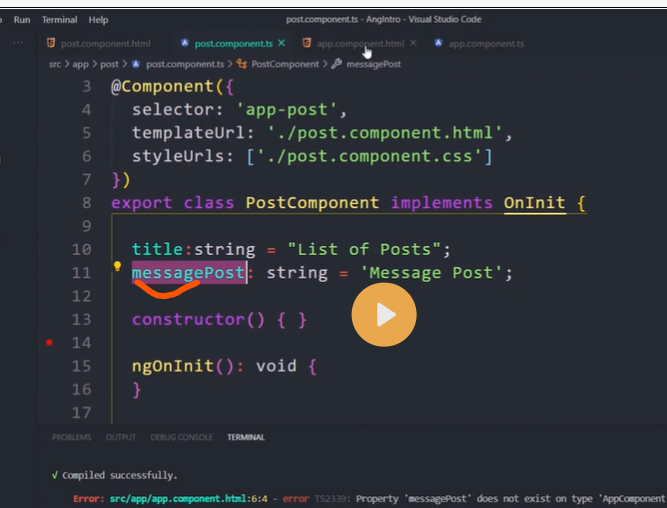
@Component({
selector: 'app-root',
templateUrl: './app.component.html',
styleUrls: ['./app.component.css']
})
export class AppComponent {
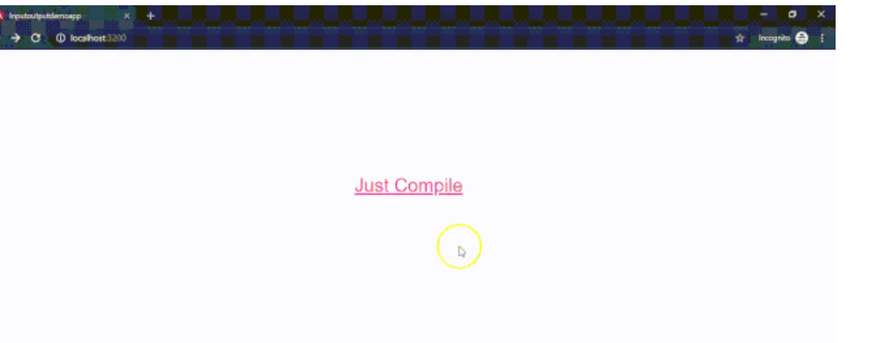
companyName:string='Just Compile';
}
<div class="container" style="margin-top: 180px;text-align: center">
   <h2>Company Name
      <span style="color:#ff4081;">
         {{ companyName }}
      </span>
   </h2>
</div>

property binding(one-way binding)
Property Binding [property]=’value’
Property binding is used to bind values to the DOM properties of the HTML elements.
Let’s consider an example for Property Binding which will create a property named as ‘companyWebsite’ of type string and assign value to that string.
import { Component } from '@angular/core';

@Component({
   selector: 'app-root',
   templateUrl: './app.component.html',
   styleUrls: ['./app.component.css']
})
export class AppComponent {
   companyWebsite:string='https://justcompile.com/';
}
 <div class="container" style="margin-top: 180px;text-align: center">
   <h2><a [href]='companyWebsite'style="color:#ff4081;" target="_blank">
   Just Compile</a></h2>
</div>
property binding
Property Binding [property]=’value’
Property binding is used to bind values to the DOM properties of the HTML elements.
Let’s consider an example for Property Binding which will create a property named as ‘companyWebsite’ of type string and assign value to that string.
import { Component } from '@angular/core';

@Component({
   selector: 'app-root',
   templateUrl: './app.component.html',
   styleUrls: ['./app.component.css']
})
export class AppComponent {
   companyWebsite:string='https://justcompile.com/';
}
<div class="container" style="margin-top: 180px;text-align: center">
   <h2><a [href]='companyWebsite'style="color:#ff4081;" target="_blank">
   Just Compile</a></h2>
</div>

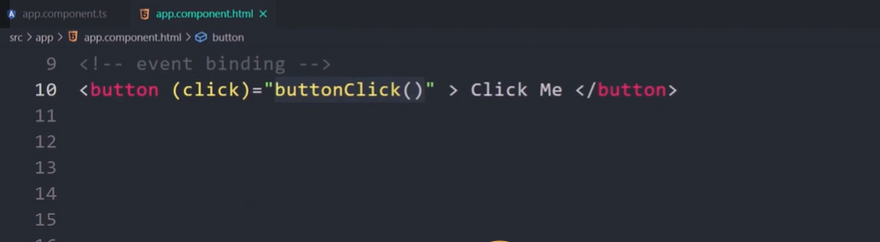
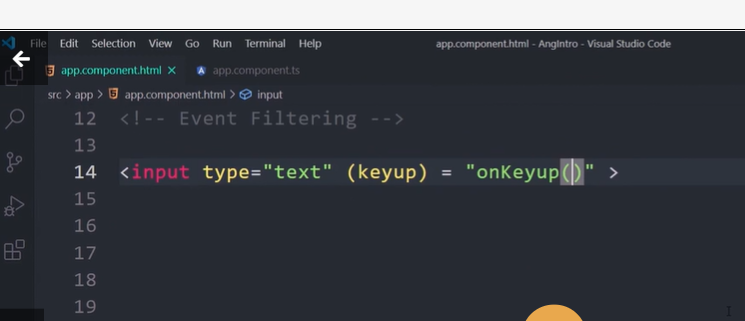
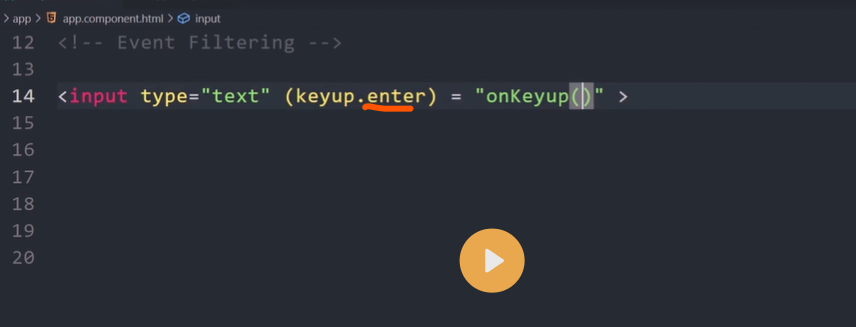
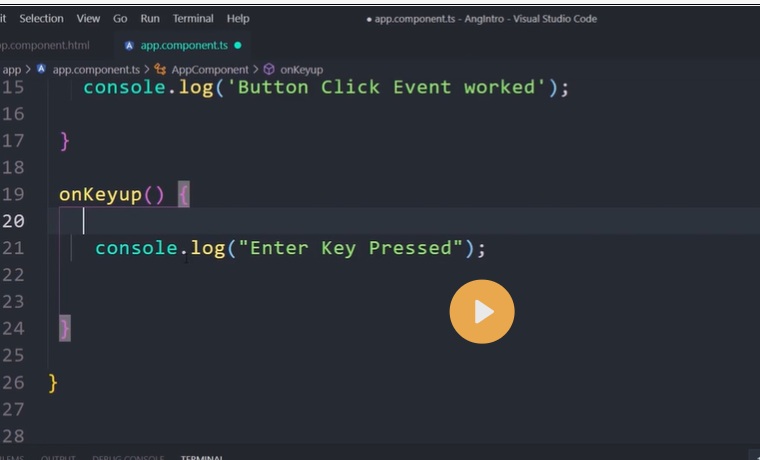
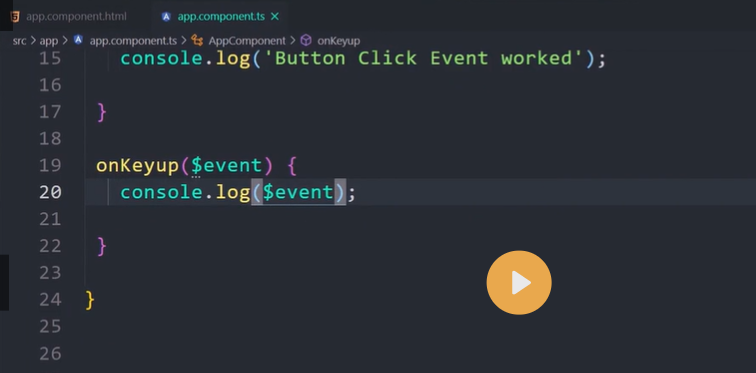
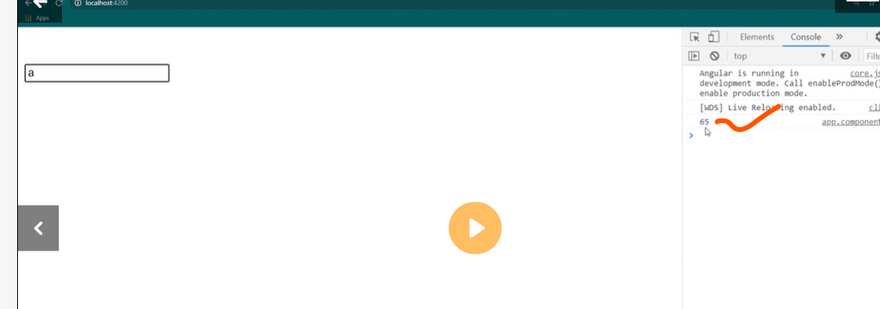
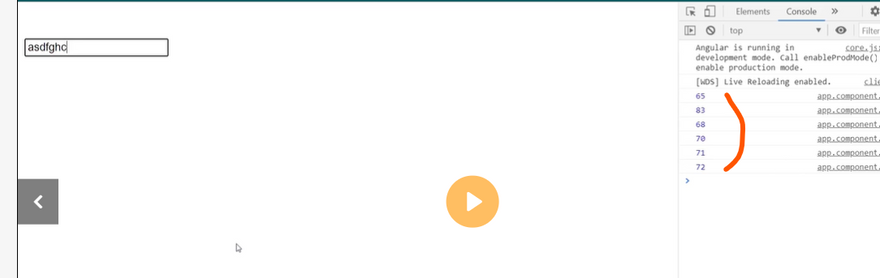
Event binding
Event binding lets you listen for and respond to user actions such as keystrokes, mouse movements, clicks, and touches.
Binding to events
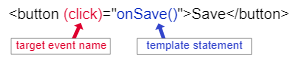
To bind to an event you use the Angular event binding syntax. This syntax consists of a target event name within parentheses to the left of an equal sign, and a quoted template statement to the right.
Create the following example; the target event name is click and the template statement is onSave().
Event binding syntax
<button (click)="onSave()">Save</button>
The event binding listens for the button's click events and calls the component's onSave() method whenever a click occurs.
Event Binding :(event)=”fun()”
With the help of Event Binding, we can bind data from DOM to Component.
Let’s consider an example.
import { Component } from '@angular/core';

@Component({
   selector: 'app-root',
   templateUrl: './app.component.html',
   styleUrls: ['./app.component.css']
})
export class AppComponent {
   companyWebsite:string='https://justcompile.com/';
   companyBlogs:string;
   isShow:boolean;
constructor(){
   this.isShow=false;
}
show(){
   this.companyBlogs='http://blogs.justcompile.com/';
   this.isShow=true;
   }
}
<div class="container" style="margin-top: 180px;text-align: center">
    <div class="row">
        <h2>
            <a [href]='companyWebsite'style="color:#ff4081;" target="_blank">Just Compile</a>
        </h2>
    </div>
    <div class="row">
        <button (click)='show()'class="btn btn-defualt">Show Blogs</button>
    </div>
    <div class="row">
        <h2>
            <a *ngIf='isShow'[href]='companyBlogs'style="color:#ff4081;" target="_blank">{{companyBlogs}}</a>
        </h2>
    </div>
</div>
Let’s explore the above code line by line.
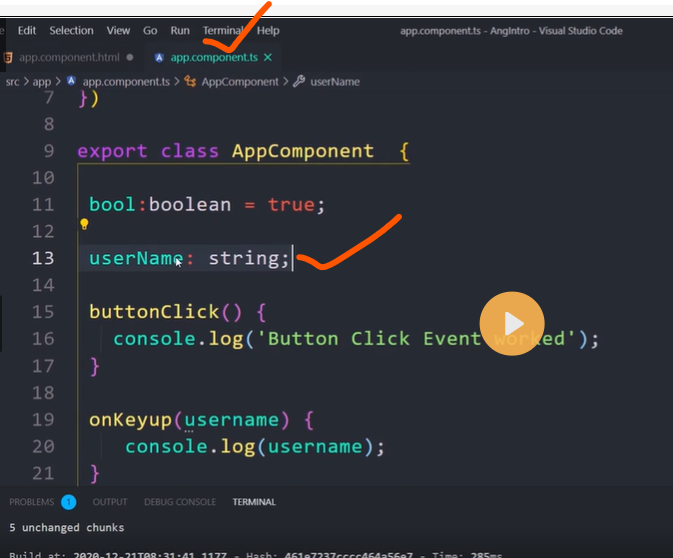
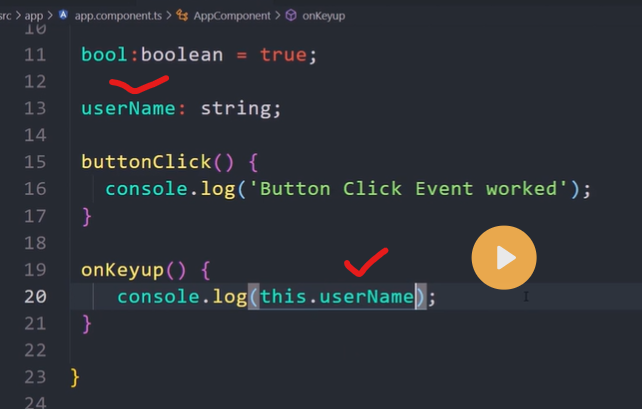
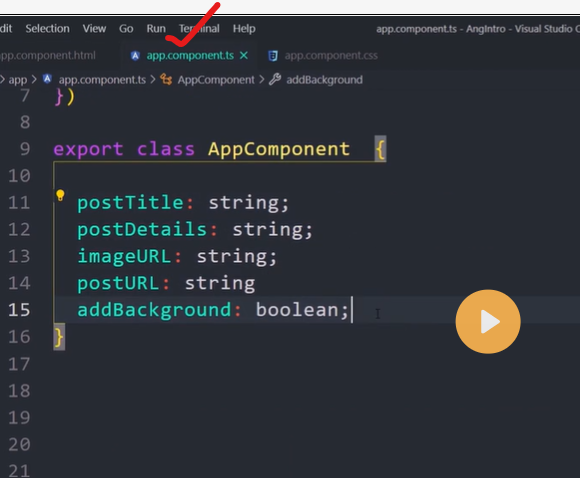
- In the TypeScript file, I have two properties - ‘companyBlogs’ of type string and ‘isShow’ of type boolean.
- After that, in the HTML file, I have one click event, i.e., show().
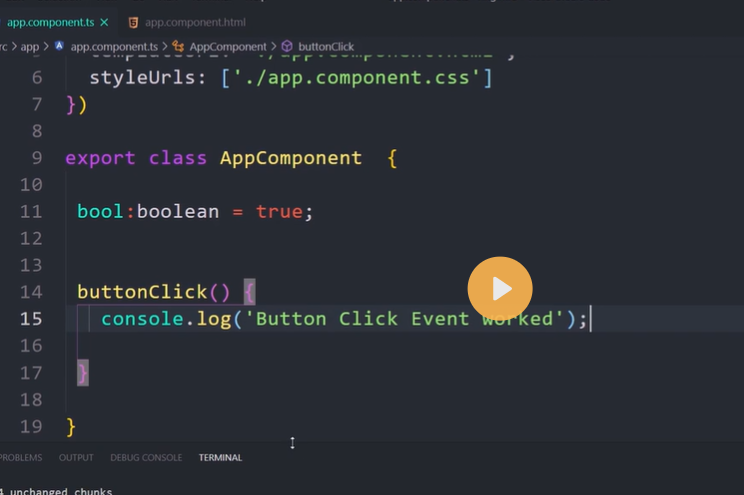
- We need to handle the show() event into TS file.
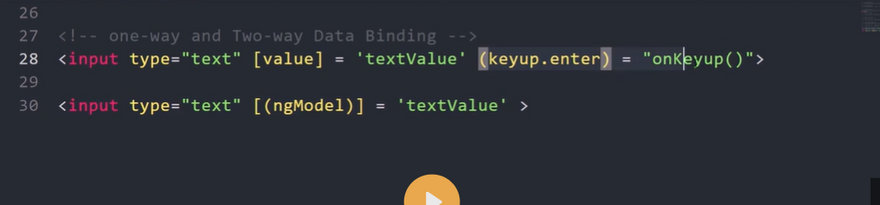
- When the button is clicked, I am displaying the ‘companyBlogs’ value. *Two-Way Data Binding * Two-Way Data Binding helps us to exchange data from both sides, i.e., from component to view and from view to the component.
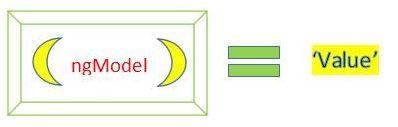
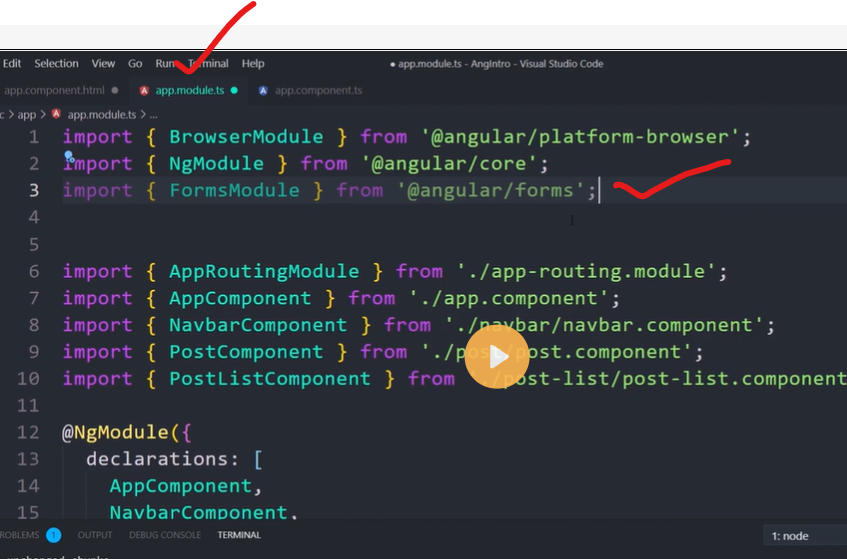
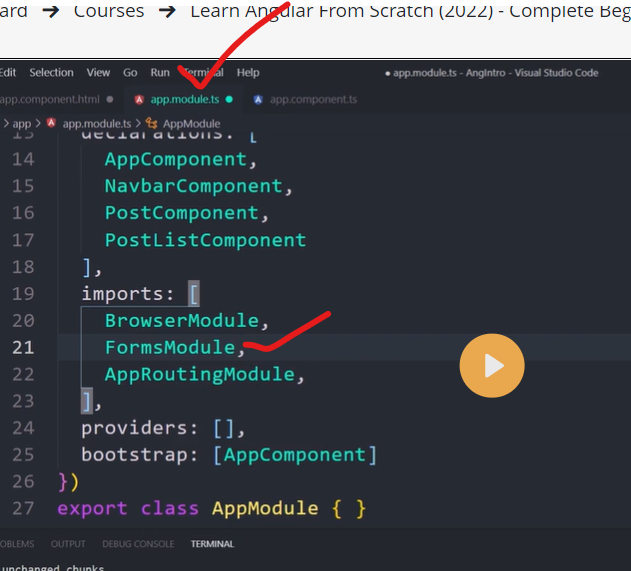
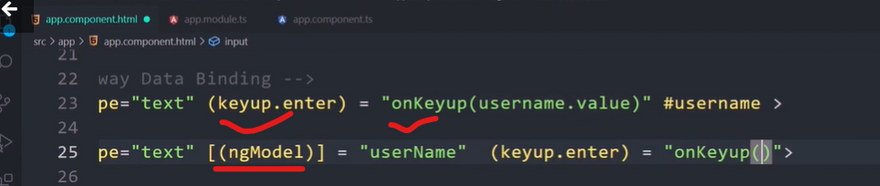
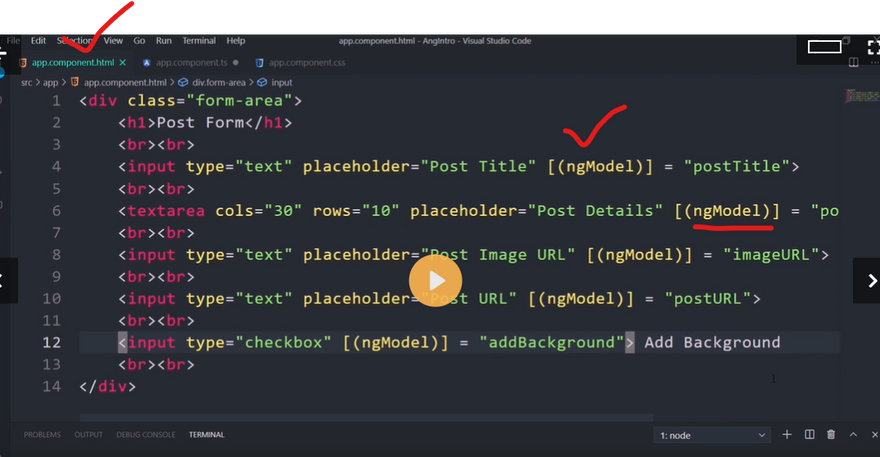
Have you ever heard the word ngModel and its famous ‘Banana In The Box’ syntax? The syntax helps us quickly recognize how to properly write two-way data binding.
Let’s consider the below figure, which describes Banana In The Box syntax.
import { Component } from '@angular/core';

@Component({
   selector: 'app-root',
   templateUrl: './app.component.html',
   styleUrls: ['./app.component.css']
})
export class AppComponent {
   email:string='';
   constructor(){
   }
}
app.component.html file
<div class="container" style="margin-top: 180px;text-align: center">
    <div class="form-group row col-md-12">
        <label for="Email" class="col-md-4">Email</label>
        <div class="col-md-8">
            <input type="text" class="form-control" [(ngModel)]='email' placeholder="Enter Your Email.">
            </div>
            <br/>
            <br/>
            <span>
                <h4 >Your Email is :
                    <span style="color:#ff4081;"> {{email}}</span>
                </h4>
            </span>
        </div>
    </div>
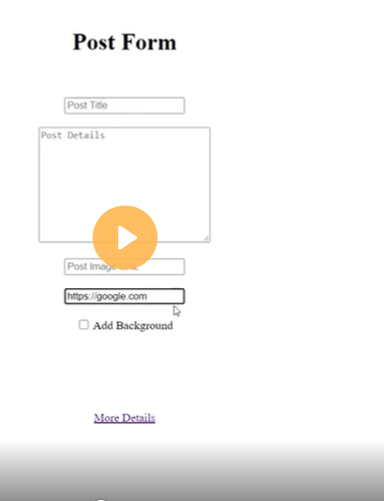
Real Example

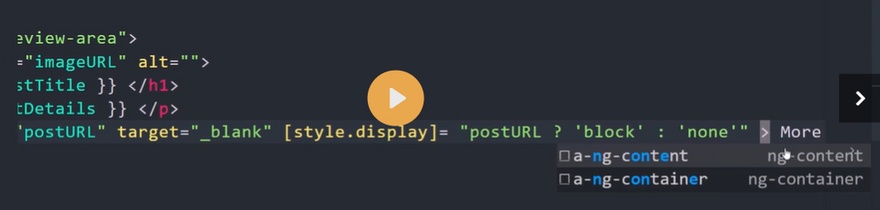
Some More Example
Class binding with ClassName
The ClassName is the property name of HTML Element. Hence we can make use of Property binding to assign the class name to any HTML element.
The following example assigns CSS Class red to the div element.
<div [className]="'red'">Test</div>
You can also add more than one class by separating them using the
<div [className]="'red size20'">Test</div>
Conditionally apply Classes
We can also bind the class name dynamically.
To do that first create a variable in your component class.
cssStringVar: string= 'red size20';
And then use it in the Template as shown below.
<div [className]="cssStringVar">Test</div>
You can create a function, which returns the class based on some condition.
getClass() {
  return 'red';
}
and then use it in the template as shown below.
getClass
The following example uses the Conditional (Ternary) Operator.
conditonal operator
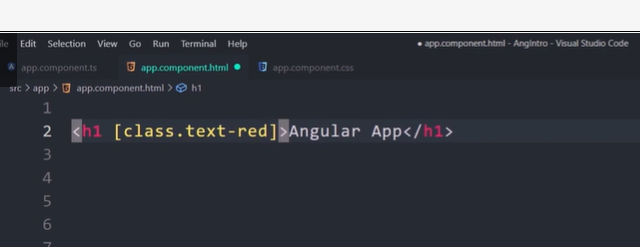
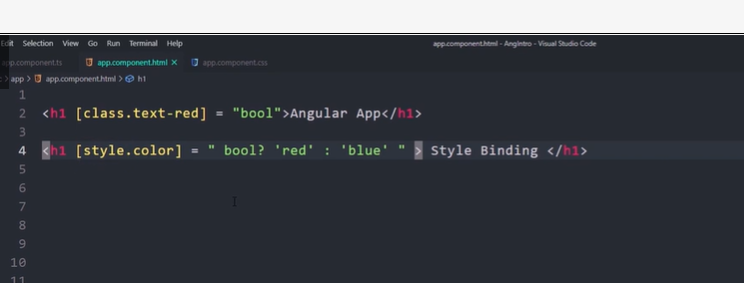
Class binding with Class
There are another shorthand way to bind CSS Class to HTML element.
<div [class.<className>]="condition"></div>
Where
className is name of the class, which you want to bind to.
condition must return true or false. A return value of true adds the class and a false removes the class.
In the following example, the class red and size20 is added to the div element.
<div [class.red]="true" [class.size20]="true">Test</div>
Conditionally binding class
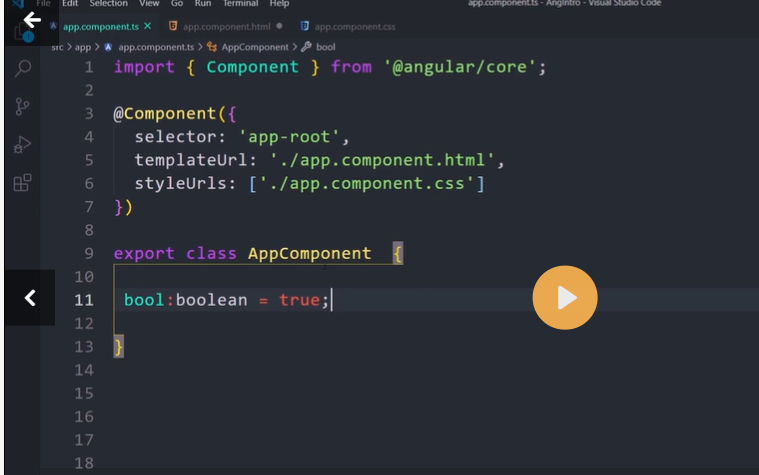
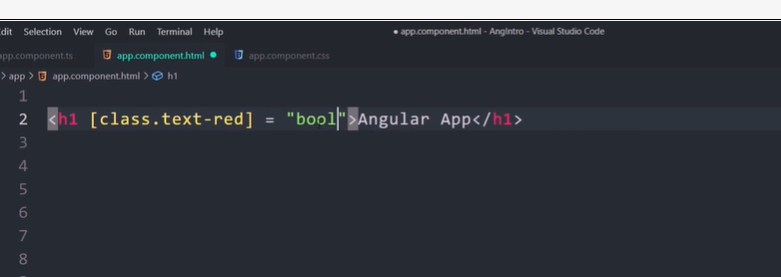
To dynamically or conditionally bind a class, First create a variable in the component class as shown below.
hasError:false;
<div [class.red]="hasError" [class.size20]="hasError">Test</div>
You can also create a function hasError(), which should return true or false as shown below.
hasError() {
   return false
}
And use it in the template as shown below.
<div [class.red]="hasError()" [class.size20]="hasError()">Test</div>
HTML Class attribute
You can also add class using the normal HTML way.
<div class="red">red</div>
but, mixing both class and [className] results in removal of class attribute. You cannot use both.
<div class="red" [className]="'size20'">red</div>
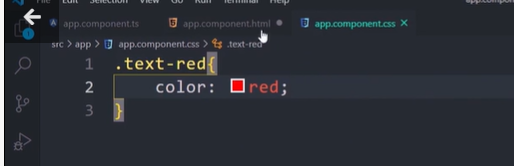

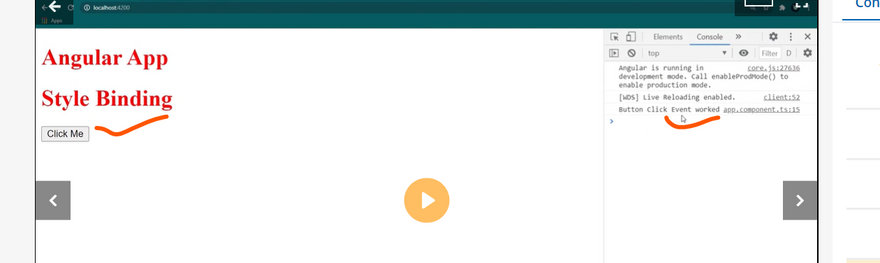
Style binding in Angular
The syntax of the style binding is similar to the property binding.
[style.style-property] = "style-value"
The Style Binding uses the [] brackets. Place the CSS Style property (binding target) inside the square bracket. The CSS Style property must begin with ‘Style’ followed by a dot (.) and then style name.
For Example, to set the color of p element.
<p [style.color]="'red'">Give me red</p>
Style binding Example
Setting the background color of a paragraph
<p [style.background-color]="'grey'">some paragraph with grey background</p>
Setting the border style of a button.
<button [style.border]="'5px solid yellow'">Save</button>
Conditionally setting the styles
Define a variable status in the component
status:string='error';
And use that variable in the template to set the color of button either to red and blue depending on the value of the status variable.
<button [style.color]="status=='error' ? 'red': 'blue'">Button 1</button>
Another way is to create the getColor() method and use it in the template as shown below.
getColor() {
  return 'yellow';
}
<button [style.color]="getColor()">Button 2</button>
Setting the units
The styles like font-size, width etc have unit extension. The following example conditionally sets the font-size in “px” unit
<button [style.font-size.px]="'20'" >Big Button</button>
The style property name can be written in either dash-case (font-size), as shown in above example, or camelCase (fontSize) as shown below.
<button [style.fontSize.px]="'20'" >Big Button</button>
Setting Multiple styles
To change the multiple styles, we need to add each one separately as shown below.
<p [style.color]="getColor()"
   [style.font-size.px]="'20'"
   [style.background-color]="status=='error' ? 'red': 'blue'">
   paragraph with multiple styles
</p>
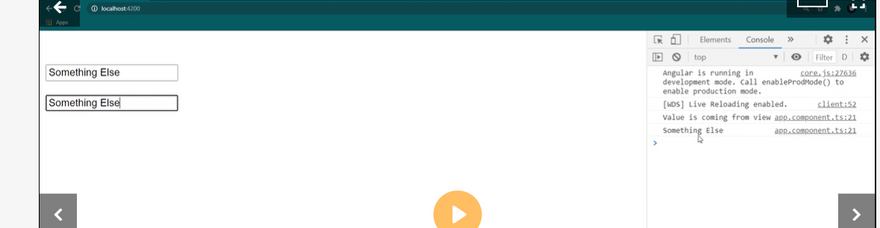
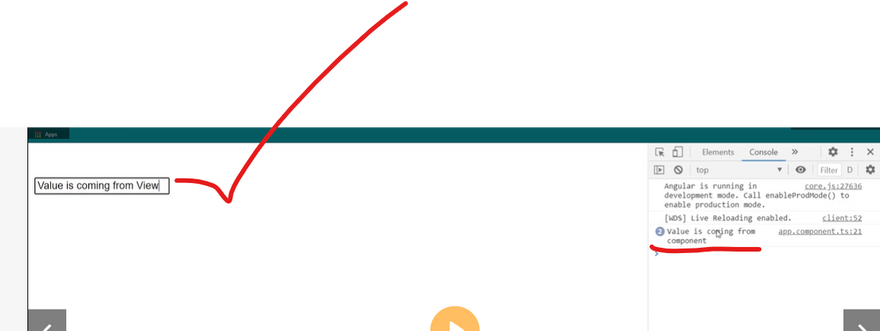
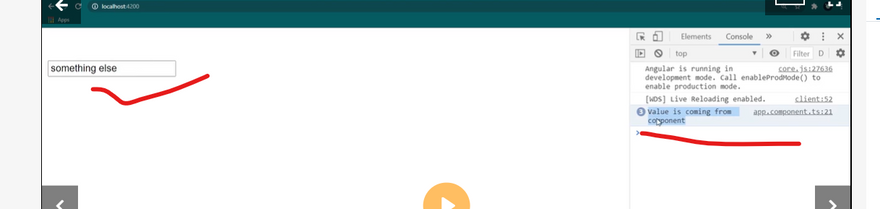
Template Variable
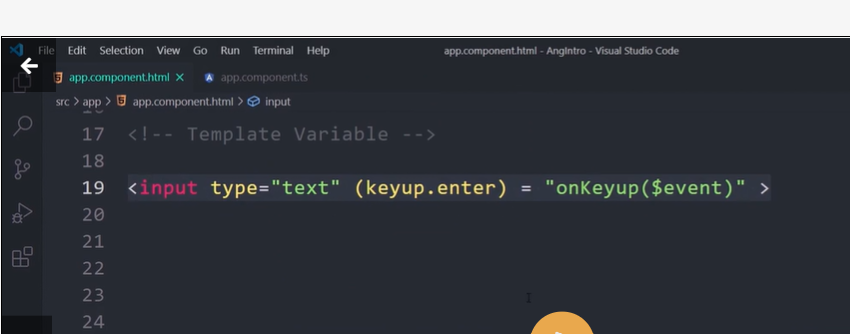
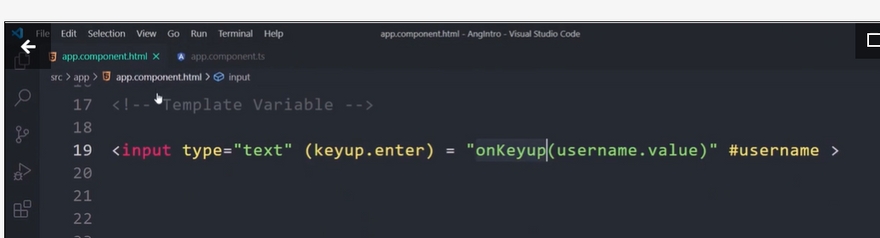
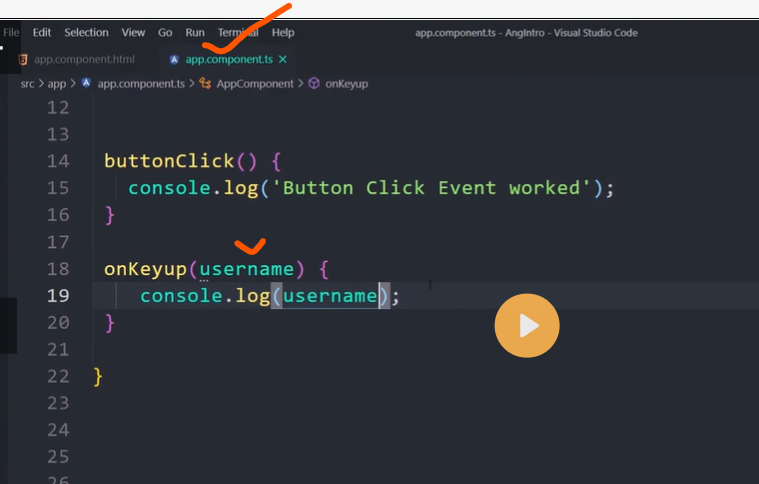
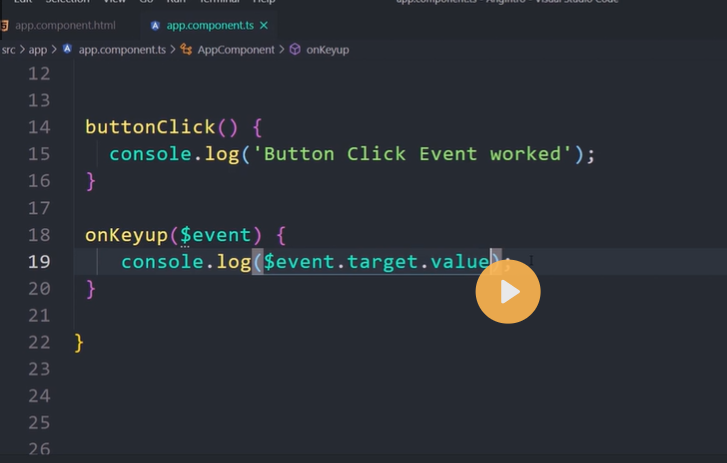
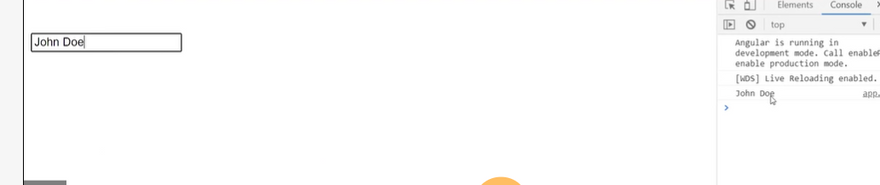
Sharing Data Binding

Small Binding Example


Top comments (0)