Refer here
Reference1
Reference2
Reference3
Reference4
For better understanding, you should have a basic knowledge about what are components and how to build an application using that.
Components are the building blocks of Angular. So we need to understand how components communicate with each other.
There are three ways:
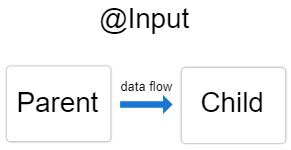
- parent to child - sharing data via input
- child to parent - sharing data via viewChild with AfterViewInit
- child to parent - sharing data via output and EventEmitter
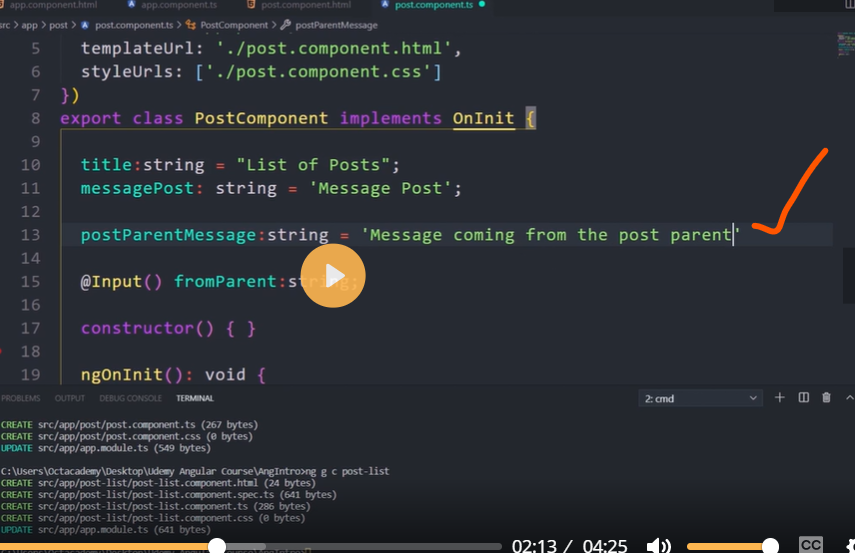
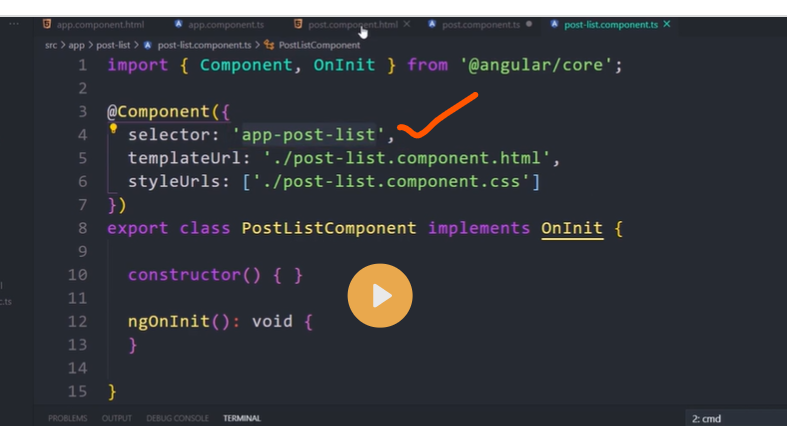
Parent to child - sharing data via input
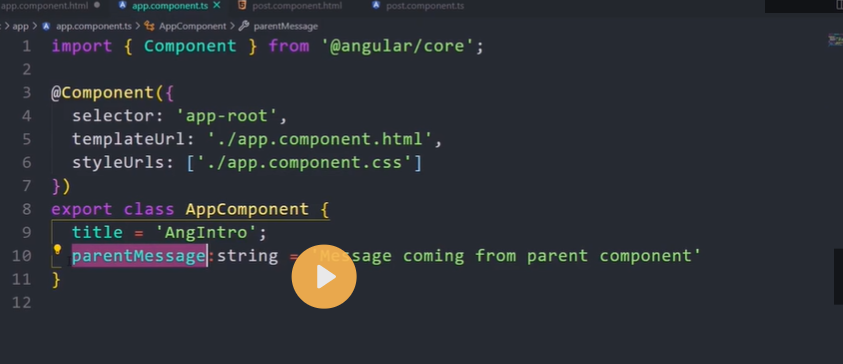
To share data from parent component to child component we use@input decorator.
Let’s configure the parent component and child component,
import { Component } from '@angular/core';

@Component({
  selector: 'app-parent',
  template: ` <app-child [childMessage]="message"></app-child> `,
  styleUrls: ['./parent.component.css']
})

export class ParentComponent {
  message = “I am a parent"
  constructor() { }
}
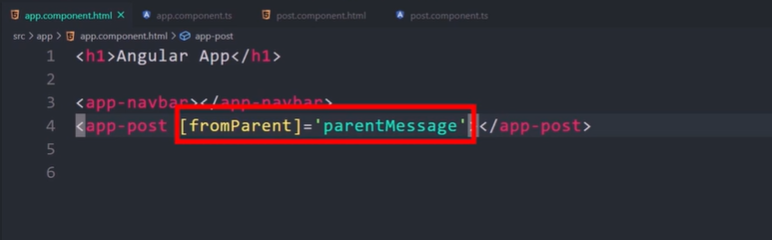
If you see the above code, is used as a directive in the parent component. we are using property binding to bind the properties between child and parent, Binding child’s childMessage property with message property from the parent component.
import { Component, Input } from '@angular/core';
@Component({
selector: 'app-child',
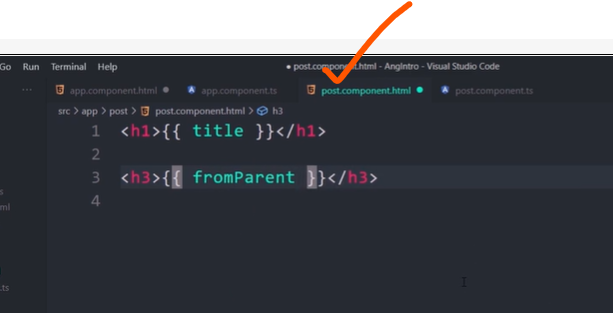
template: ` {{ message }} `,
styleUrls: ['./child.component.css']
})
export class ChildComponent {
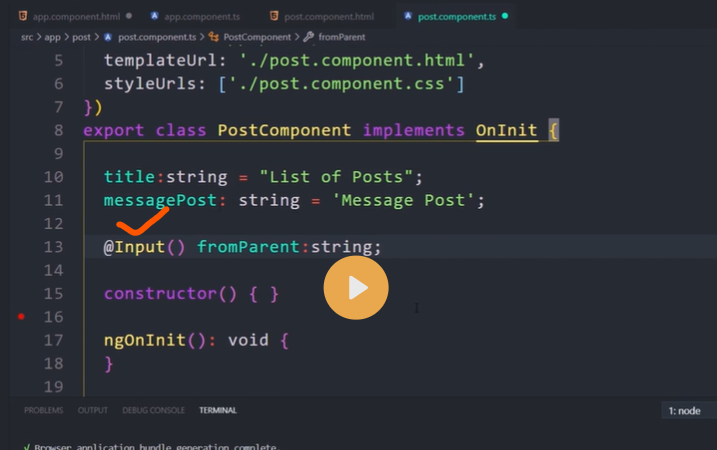
@Input() childMessage: string;
constructor() { }
}
To use@input decorative, we have to first import it from @angular/core . Next will decorate childMessage with @input decorative with type string. Lastly, display the message from the parent into the child template using string interpolation.
Child to parent - sharing data via ViewChild and AfterViewInit
It allows the child component to be injected into parent competent so that the parent component gets access to its child’s attributes and functions. We must note that parents will get access only after the view is initialized.
Let’s configure the parent component and child component
import { Component, ViewChild, AfterViewInit } from '@angular/core';
import { ChildComponent } from "../child/child.component";

@Component({
  selector: 'app-parent',
  template: `
    Message: {{ message }}
    <app-child></app-child>
  `,
  styleUrls: ['./parent.component.css']
})

export class ParentComponent implements AfterViewInit {

  @ViewChild(ChildComponent) child;
  constructor() { }

  Message:string;

  ngAfterViewInit() {
    this.message = this.child.message
  }
}
import { Component} from '@angular/core';

@Component({
  selector: 'app-child',
  template: `  `,
  styleUrls: ['./child.component.css']
})

export class ChildComponent {
  message = 'Hello Angular!';
  constructor() { }
}
We have to import ViewChild,AfterViewInit from angular/core, and the child component and use AfterViewInit life cycle hook so that we get access to the attributes in the child component. In the child component, we are passing the value for the message.
Child to parent - sharing data via output and EventEmitter
You use this approach when you want to share the data on button clicks or other events. The child component uses @output to send the data to the parent by creating an event with the help of an EventEmitter which is imported from @angular/core.
Let’s configure the parent component and child component.
import { Component, Output, EventEmitter } from '@angular/core';

@Component({
  selector: 'app-child',
  template: `
      <button (click)="message()">Send Message</button>
 `,
  styleUrls: ['./child.component.css']
})
export class ChildComponent {
  message: string = "Hey I am child !"
  @Output() messageEvent = new EventEmitter<string>();
 constructor() { }
  sendMessage() {
    this.messageEvent.emit(this.message)
  }
}
import { Component } from '@angular/core';

@Component({
  selector: 'app-parent',
  template: `
    Message: {{message}}
    <app-child (messageEvent)="receiveMessage($event)"></app-child>
  `,
  styleUrls: ['./parent.component.css']
})
export class ParentComponent {
    constructor() { }
    Message:string;
    receiveMessage($event) {
        this.message = $event
    }
}
First, we have to import output and EventEmitter from the @anguar/core , then we are creating an event messageEvent using EventEmitter . when the button is clicked it calls the function sendMessage and calls the emit with the message. we are using event binding property with the child selector . The parent can now subscribe to this messageEvent that’s outputted by the child component, then run the receive message function whenever this event occurs.
Sharing data between child and parent directives and components
A common pattern in Angular is sharing data between a parent component and one or more child components. Implement this pattern with the @Input() and @Output() decorators.
The serves as the context for the .
@Input() and @Output() give a child component a way to communicate with its parent component. @Input() lets a parent component update data in the child component. Conversely, @Output() lets the child send data to a parent component.
Sending data to a child component
The @Input() decorator in a child component or directive signifies that the property can receive its value from its parent component.
To use @Input(), you must configure the parent and child.
Configuring the child component
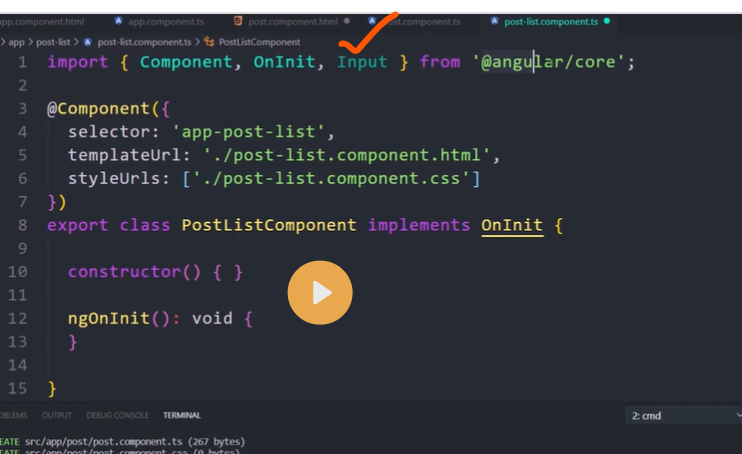
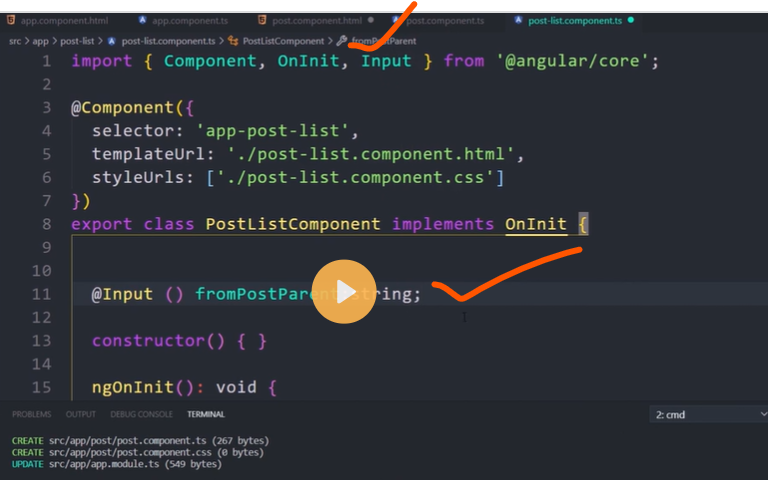
To use the @Input() decorator in a child component class, first import Input and then decorate the property with @Input(), as in the following example.
import { Component, Input } from '@angular/core'; // First, import Input
export class ItemDetailComponent {
  @Input() item = ''; // decorate the property with @Input()
}
n this case, @Input() decorates the property item, which has a type of string, however, @Input() properties can have any type, such as number, string, boolean, or object. The value for item comes from the parent component.
Next, in the child component template, add the following
<p>
  Today's item: {{item}}
</p>
Configuring the parent component
The next step is to bind the property in the parent component's template. In this example, the parent component template is app.component.html.
Use the child's selector, here , as a directive within the parent component template.
Use property binding to bind the item property in the child to the currentItem property of the parent.
<app-item-detail [item]="currentItem"></app-item-detail>
In the parent component class, designate a value for currentItem:
export class AppComponent {
  currentItem = 'Television';
}
With @Input(), Angular passes the value for currentItem to the child so that item renders as Television.
The following diagram shows this structure:
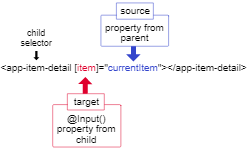
Property binding diagram of the target, item, in square brackets set to the source, currentItem, on the right of an equal sign
The target in the square brackets, [], is the property you decorate with @Input() in the child component. The binding source, the part to the right of the equal sign, is the data that the parent component passes to the nested component.
Watching for @Input() changes
To watch for changes on an @Input() property, use OnChanges, one of Angular's lifecycle hooks. See the OnChanges section of the Lifecycle Hooks guide for more details and examples.
Sending data to a parent component
The @Output() decorator in a child component or directive lets data flow from the child to the parent.
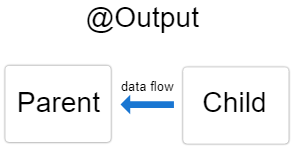
@Output() marks a property in a child component as a doorway through which data can travel from the child to the parent.
The child component uses the @Output() property to raise an event to notify the parent of the change. To raise an event, an @Output() must have the type of EventEmitter, which is a class in @angular/core that you use to emit custom events.
The following example shows how to set up an @Output() in a child component that pushes data from an HTML to an array in the parent component.
To use @Output(), you must configure the parent and child.
Configuring the child component
The following example features an where a user can enter a value and click a that raises an event. The EventEmitter then relays the data to the parent component.
Import Output and EventEmitter in the child component class:
import { Output, EventEmitter } from '@angular/core';
In the component class, decorate a property with @Output(). The following example newItemEvent @Output() has a type of EventEmitter, which means it's an event.
src/app/item-output/item-output.component.ts
@Output() newItemEvent = new EventEmitter<string>();


Top comments (0)