How to install or create your first react native project
Required dependency to install
How to hot reload and debug using inspect and cmd
Creating a CRUD (Create, Read, Update, Delete) application in React Native from scratch involves several steps, including setting up the development environment, creating the app, and implementing the CRUD operations. Here’s a complete step-by-step guide for setting up a CRUD app in React Native, including the installation process and emulator setup.
Step 1: Install Development Tools
Before starting with React Native, you need to install some development tools.
1.1 Install Node.js and npm (Node Package Manager)
React Native requires Node.js, npm, and watchman (for macOS). Download the latest stable version of Node.js from the official website:
Node.js Download
You can verify the installation using the following commands in your terminal:
node -v
npm -v
1.2 Install React Native CLI
React Native CLI is required for creating and managing React Native projects. You can install it globally using npm:
npm install -g react-native-cli
Step 2: Set Up a New React Native Project
npx react-native init CrudApp
===============or=======================
SECOND WAY TO CREATE REACT NATIVE PROJECT
npx @react-native-community/cli init Motosharereact
npm install -g @react-native-community/cli
npx react-native run-android
Navigate to the Project Folder
cd CrudApp
Run the Application on Emulator
For Android: If you have set up the Android emulator, run:
npx react-native run-android
For iOS (macOS only): If you have set up Xcode and an iOS emulator, run:
npx react-native run-ios
ANOTHER WAY
npx @react-native-community/cli init CrudApp
cd CrudApp
code .
npx react-native start
npx react-native run-android
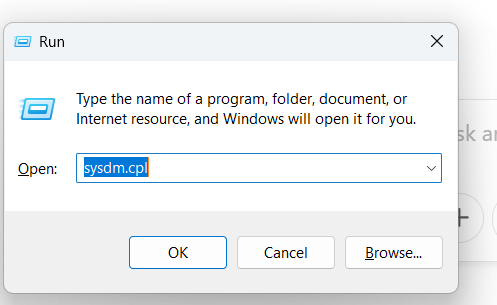
press window +R

How to open emulator using gitbash or cmd(if not work in gitbash)
first go to project path
/c/Project/CrudApp (main)
npx react-native start
====================or==============
npx react-native run-android
How to run Project
npx react-native run-android
MANUALLY RUN EMULATOR
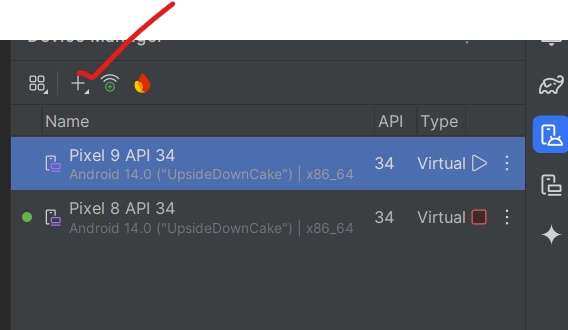
step 1In Android studio delete existing emultaor from device manager
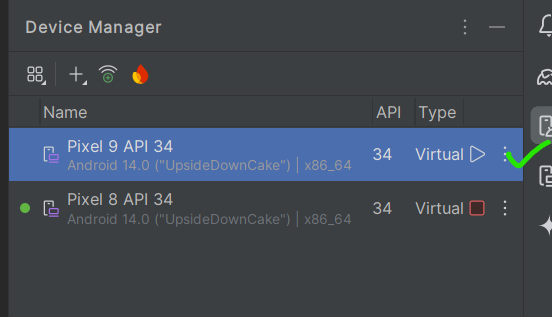
step 2create new virtual device manager
step 3not create higher version pixel 9- pro
step 4then in ur root project run command
emulator -avd Pixel_9_API_31

step 5then run below command
npx react-native run-android
NOTE
:if any bug come then run again in gitbash
npx react-native run-android
-
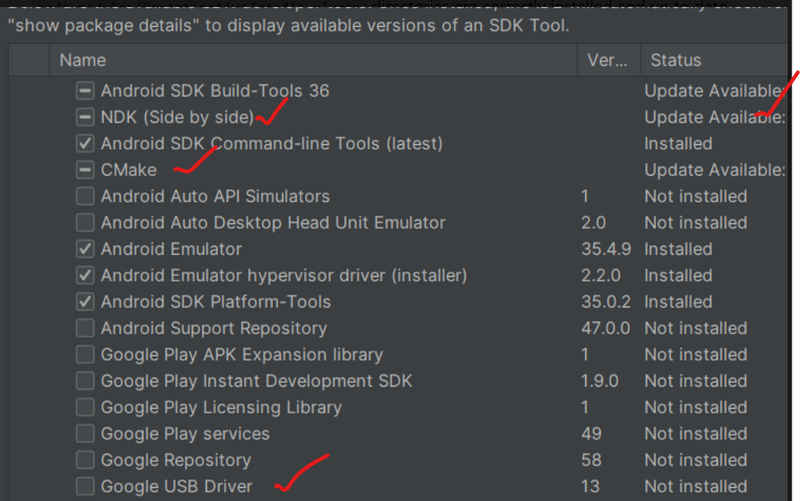
Install Missing Components:
NDK (Side by side): This is needed if your project requires the Native Development Kit. You should install it if it’s part of your setup.
Google Play services: Ensure this is installed, especially if you are using features related to Google APIs.
USB Driver: This is essential for connecting Android devices via USB for testing.
Google Repository and Android Support Repository: These are important for backward compatibility and dependency management.
-
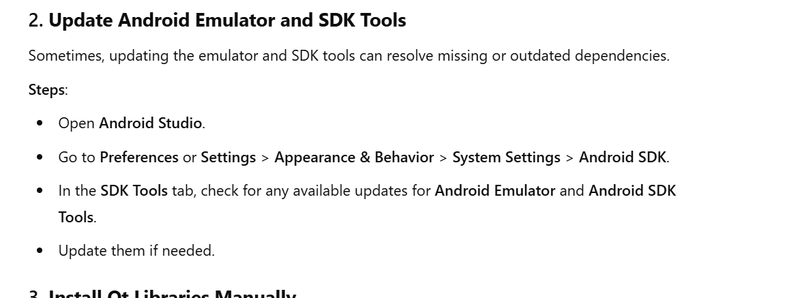
Check for Updates:
The Android SDK Build-Tools, NDK, and CMakehave updates available. Make sure to update these components to avoid issues with your build or dependencies
adb -s emulator-5554 emu kill
adb -s emulator-5556 emu kill
adb devices
cd C:\Users\rakes\AppData\Local\Android\Sdk\emulator
Run the following command to launch the emulator manually:
emulator -avd Pixel_9_API_31
How to hot reload
How to hot reload and debug using inspect and cmd

React Native MVC File Structure:
my-app/
├── android/                    # Android platform-specific code
├── ios/                        # iOS platform-specific code
├── app/                        # Main app folder
│   ├── controllers/            # Contains controller logic (business logic)
│   │   ├── PostController.js   # Example controller for handling posts
│   │   └── UserController.js   # Example controller for handling users
│   ├── models/                 # Contains data models (data structure)
│   │   ├── Post.js             # Example model for post data structure
│   │   └── User.js             # Example model for user data structure
│   ├── views/                  # Contains the view components (UI components)
│   │   ├── Home.js             # Home screen component (view)
│   │   ├── PostList.js         # Post list view component
│   │   └── UserProfile.js      # User profile view component
│   ├── services/               # Contains API or network request logic
│   │   ├── Api.js              # API service for making network requests
│   │   └── authService.js      # Authentication related API calls
│   ├── utils/                  # Utility functions/helpers
│   │   └── validation.js       # Example of validation utility
│   └── App.js                  # Main entry point of the app
├── assets/                     # Static assets like images, fonts, etc.
│   ├── images/                 # Images for the app
│   └── fonts/                  # Fonts for the app
├── node_modules/               # Dependencies
├── package.json                # Project metadata and dependencies
└── .gitignore                  # Git ignore file
Explanation of the Structure:
android/ and ios/
These directories contain platform-specific code for Android and iOS. You won’t typically need to modify this unless you're dealing with native modules or platform-specific configurations.app/:
This is the main application folder where you will structure your app logic based on the MVC pattern.
controllers/:
This folder contains the controllers, which are responsible for handling the business logic of the app. In React Native, this could be where you define functions that interact with your models and update your views.
Example (PostController.js):
import { getPosts, createPost } from '../services/Api';
import Post from '../models/Post';

export const fetchPosts = async () => {
    const data = await getPosts();
    return data.map(post => new Post(post.id, post.title, post.body));
};

export const createNewPost = async (title, body) => {
    const data = await createPost(title, body);
    return new Post(data.id, data.title, data.body);
};
models/: This folder contains the models, which represent the data structure. Models typically hold data and any methods related to that data.
Example (Post.js):
class Post {
    constructor(id, title, body) {
        this.id = id;
        this.title = title;
        this.body = body;
    }

    // Any methods related to the post data could go here
    displayTitle() {
        return `${this.id}: ${this.title}`;
    }
}

export default Post;
views/: This folder contains view components, which are the UI elements of the app. These components are responsible for rendering the data and interacting with the user.
Example (Home.js):
import React, { useEffect, useState } from 'react';
import { View, Text, Button, FlatList } from 'react-native';
import { fetchPosts } from '../controllers/PostController';

const Home = () => {
    const [posts, setPosts] = useState([]);

    useEffect(() => {
        const loadPosts = async () => {
            const postList = await fetchPosts();
            setPosts(postList);
        };

        loadPosts();
    }, []);

    return (
        <View>
            <Text>Posts:</Text>
            <FlatList
                data={posts}
                keyExtractor={item => item.id.toString()}
                renderItem={({ item }) => (
                    <View>
                        <Text>{item.displayTitle()}</Text>
                    </View>
                )}
            />
        </View>
    );
};

export default Home;
Services (Api.js)
This Api.js file contains functions that make the actual API calls using Axios.
import axios from 'axios';

const API_URL = 'https://motoshare.in/api/posts';

export const getPosts = async () => {
  try {
    const response = await axios.get(API_URL);
    return response.data;
  } catch (error) {
    console.error(error);
    throw error;
  }
};

export const getPostById = async (id) => {
  try {
    const response = await axios.get(`${API_URL}/${id}`);
    return response.data;
  } catch (error) {
    console.error(error);
    throw error;
  }
};

export const createPost = async (title, content) => {
  try {
    const response = await axios.post(API_URL, { title, content });
    return response.data;
  } catch (error) {
    console.error(error);
    throw error;
  }
};

export const updatePost = async (id, title, content) => {
  try {
    const response = await axios.put(`${API_URL}/${id}`, { title, content });
    return response.data;
  } catch (error) {
    console.error(error);
    throw error;
  }
};

export const deletePost = async (id) => {
  try {
    await axios.delete(`${API_URL}/${id}`);
    return { message: 'Post deleted successfully' };
  } catch (error) {
    console.error(error);
    throw error;
  }
};
utils/: Utility functions or helper methods that can be reused across the app. For example, form validation, date formatting, etc.
Example (validation.js):
export const isValidEmail = (email) => {
    const regex = /\S+@\S+\.\S+/;
    return regex.test(email);
};
App.js: This is the entry point of the React Native application. You would typically define your app’s navigation and main layout here.
Example (App.js):
import React from 'react';
import { View, Text, Button } from 'react-native';
import Home from './views/Home';

const App = () => {
    return (
        <View>
            <Text>Welcome to the React Native App</Text>
            <Home />
        </View>
    );
};

export default App;
assets/
This folder contains static assets like images, fonts, and other files that are used throughout the app.node_modules/
This directory holds all the dependencies installed via npm or yarn.
backend
Setting Up Laravel Backend (API)
First, create the necessary API endpoints in Laravel for CRUD operations. We'll assume you already have a basic Laravel project set up.
Example of a simple Post model:
namespace App\Models;

use Illuminate\Database\Eloquent\Factories\HasFactory;
use Illuminate\Database\Eloquent\Model;

class Post extends Model
{
    use HasFactory;

    protected $fillable = ['title', 'content'];
}
Create a Controller for Handling CRUD Operations:
namespace App\Http\Controllers;

use App\Models\Post;
use Illuminate\Http\Request;

class PostController extends Controller
{
    // Get all posts
    public function index()
    {
        $posts = Post::all();
        return response()->json($posts);
    }

    // Get a single post by ID
    public function show($id)
    {
        $post = Post::findOrFail($id);
        return response()->json($post);
    }

    // Create a new post
    public function store(Request $request)
    {
        $post = Post::create($request->all());
        return response()->json($post, 201);
    }

    // Update a post
    public function update(Request $request, $id)
    {
        $post = Post::findOrFail($id);
        $post->update($request->all());
        return response()->json($post);
    }

    // Delete a post
    public function destroy($id)
    {
        $post = Post::findOrFail($id);
        $post->delete();
        return response()->json(['message' => 'Post deleted successfully']);
    }
}
Define Routes for CRUD Operations:
use App\Http\Controllers\PostController;

Route::get('posts', [PostController::class, 'index']);
Route::get('posts/{id}', [PostController::class, 'show']);
Route::post('posts', [PostController::class, 'store']);
Route::put('posts/{id}', [PostController::class, 'update']);
Route::delete('posts/{id}', [PostController::class, 'destroy']);
=====================================================================
Required dependency to install
npm install @react-navigation/native
npm install @react-navigation/stack
npm install @react-navigation/drawer
npm install @react-navigation/bottom-tabs

# Required peer dependencies
npm install react-native-gesture-handler react-native-reanimated react-native-screens react-native-safe-area-context @react-native-community/masked-view
Then add the necessary setups (especially for React Native CLI users):
Update babel.config.js for Reanimated:
module.exports = {
  presets: ['module:metro-react-native-babel-preset'],
  plugins: ['react-native-reanimated/plugin'], // This must be listed last
};
import 'react-native-gesture-handler';
/**
 * @format
 */

import 'react-native-gesture-handler'; // ✅ Must be at the top
import { AppRegistry } from 'react-native';
import App from './App';
import { name as appName } from './app.json';

AppRegistry.registerComponent(appName, () => App);
🧠 Your Navigation Logic Summary
Initial screen: CountrySelectionScreen (only in Stack Navigator)
After country selection: MainDrawerNavigator, which includes:
Drawer Menu with Home, Login
Inside Home, a Bottom Tab Navigator (Home, Profile, Search)
🚀 How to Pass the Country Name to Next Screen
In CountrySelectionScreen, once a country is selected:
📁 Folder Structure Recommendation
/screens
  CountrySelectionScreen.js
  HomeScreen.js
  ProfileScreen.js
  SearchScreen.js
  LoginScreen.js
App.js
Install the missing preset
Run the following command in your project root:
npm install --save-dev @react-native/babel-preset
Start the React Native App from CMD
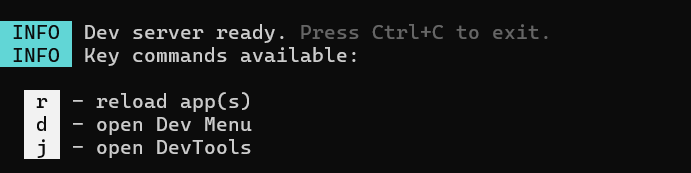
First run the development server.
Step 1 – Start Metro Bundler
Open CMD in your project folder.
npx react-native start
This starts the Metro server which bundles your React Native code.
Step 2 – Run the App
Android

npx react-native run-android

iOS

npx react-native run-ios
Now the app will install on your emulator/device.
- Enable Hot Reload / Fast Refresh
Hot reload allows your app to update instantly when you change code.
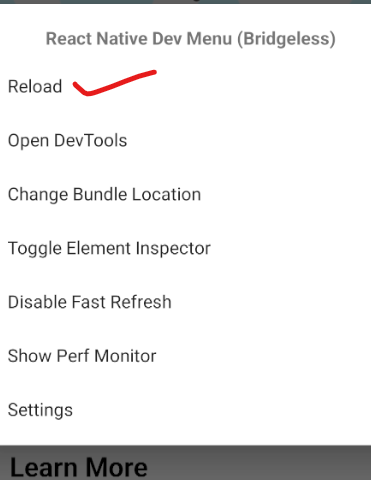
Open Developer Menu
Android emulator
Press
Ctrl + M

or

Cmd + M
Physical device
Shake the device.
React Native provides a developer menu that contains debugging and reload options.
Enable Fast Refresh

From Dev Menu choose:

Enable Fast Refresh
Now whenever you save your code, the app reloads automatically.
Example
If you change
<Text>Hello World</Text>
to
<Text>Hello React Native</Text>
The UI updates instantly without rebuilding.
-
Debug Using Inspect (Chrome DevTools)
Step 1
Open Dev Menu.
Step 2
Click
Debug JS Remotely
This opens Chrome DevTools where you can debug JavaScript code.
What You Can Do in Inspect
Inside Chrome DevTools you can:
• View console logs
• Add breakpoints
• Inspect variables
• Debug API calls
• Track errors
Chrome DevTools provides standard debugging features like breakpoints and console output inspection.
- Debug Logs from CMD
You can also see logs directly in terminal.
Android logs
npx react-native log-android
iOS logs
npx react-native log-ios
Example output
LOG Fetching users...
LOG API response received
ERROR Network request failed
- Use Console Logging in Code
Example in CRUD API
const fetchUsers = async () => {
  console.log("Fetching users from API");

  const response = await fetch(API_URL);
  const data = await response.json();

  console.log("Data received:", data);

  setUsers(data);
};
Logs will appear in
• Chrome Inspect console
• Terminal logs

Top comments (0)