refers
refers
refers
Refer here
To install Django, first visit to django official site
(https://www.djangoproject.com)
and download django by clicking on the download section. Here, we will see various options to download The Django.
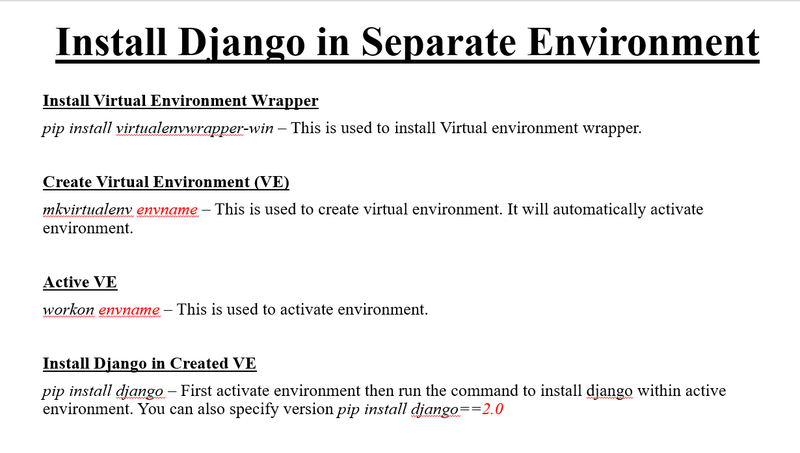
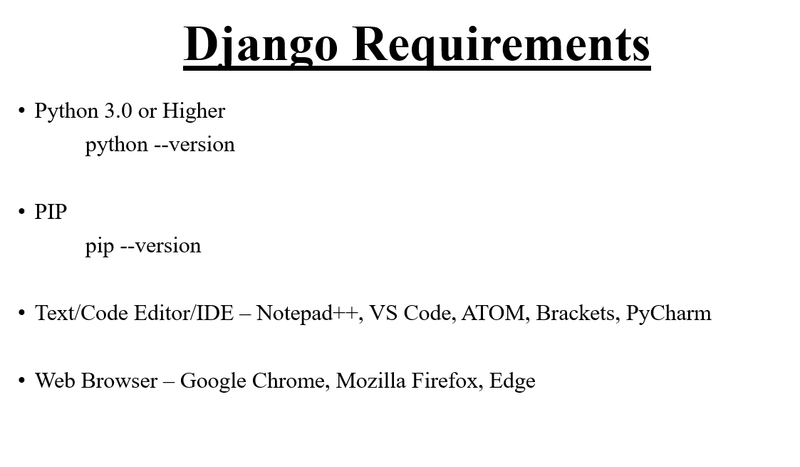
Django requires pip to start installation. Pip is a package manager system which is used to install and manage packages written in python. For Python 3.4 and higher versions pip3 is used to manage packages.
In this tutorial, we are installing Django in Ubuntu operating system.
The complete installation process is described below. Before installing make sure pip is installed in local system.
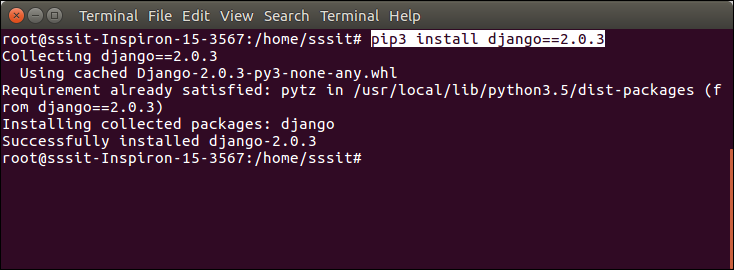
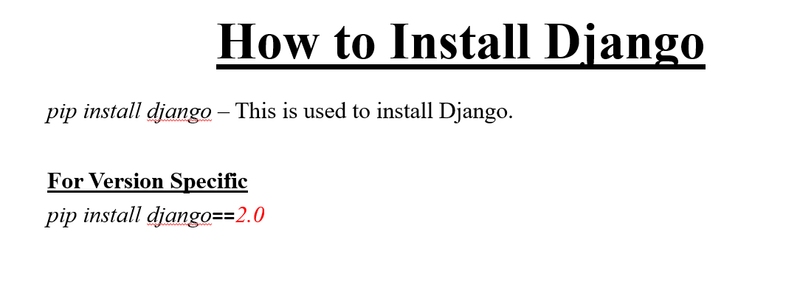
Here, we are installing Django using pip3, the installation command is given below.
$ pip3 install django==2.0.3
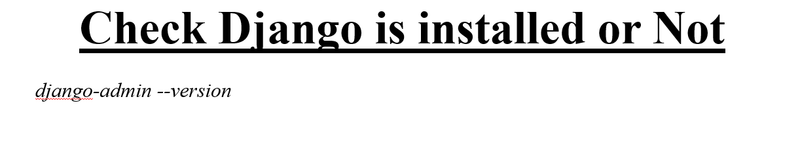
Verify Django Installation
After installing Django, we need to varify the installation. Open terminal and write python3 and press enter. It will display python shell where we can verify django installation.
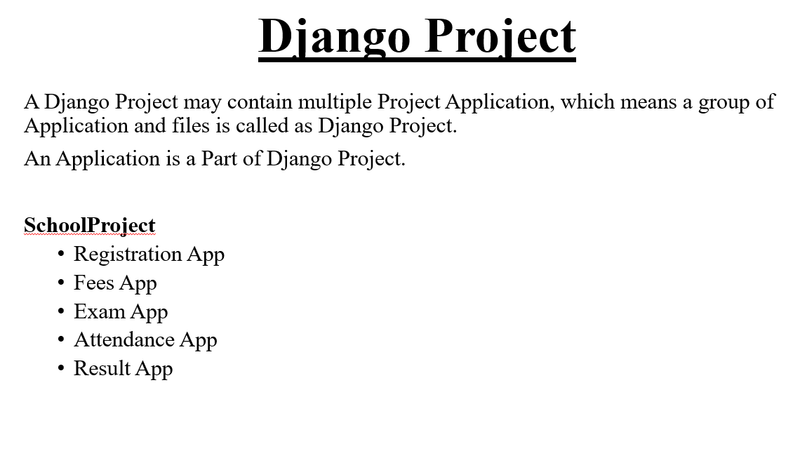
Django Project
In the previous topic, we have installed Django successfully. Now, we will learn step by step process to create a Django application.
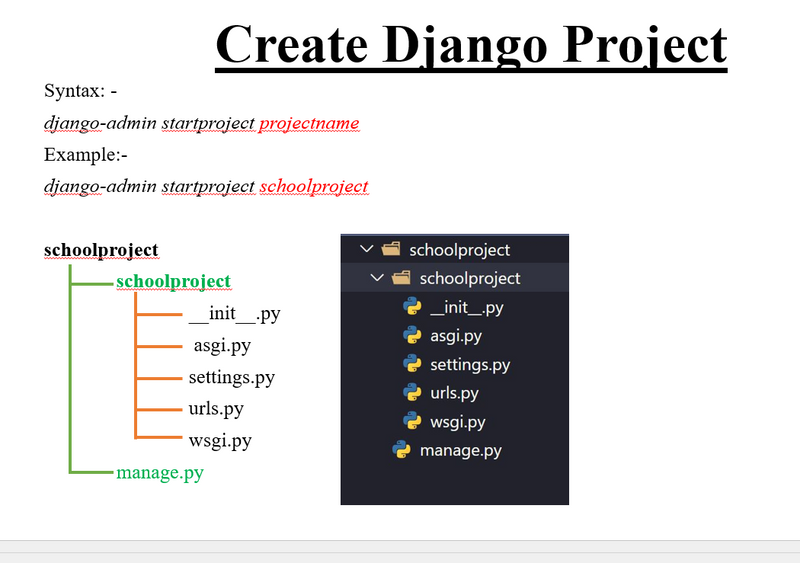
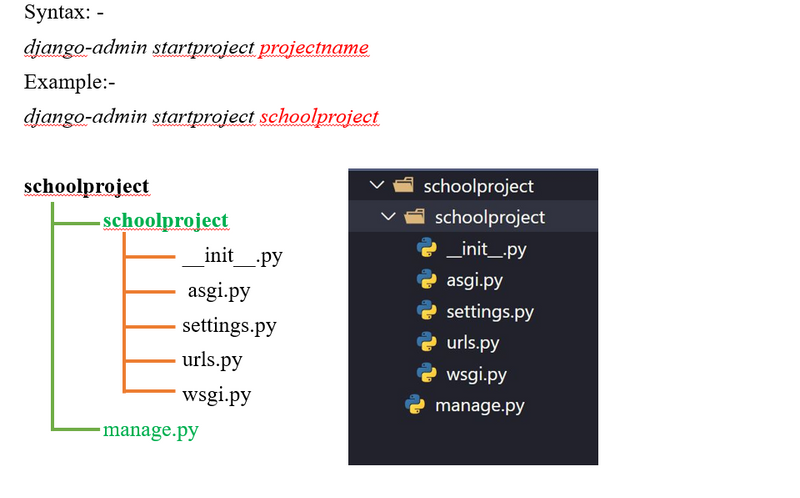
To create a Django project, we can use the following command. projectname is the name of Django application.
$ django-admin startproject projectname
Django Project Example
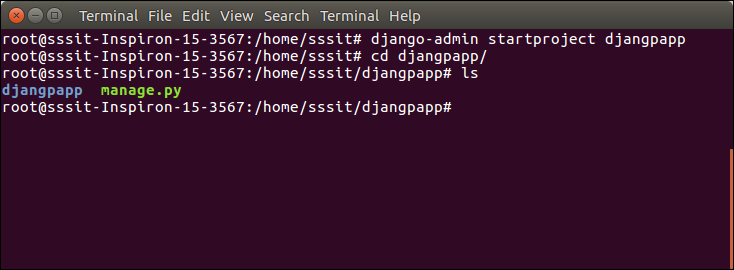
Here, we are creating a project djangpapp in the current directory.
$ django-admin startproject djangpapp

Locate into the Project
Now, move to the project by changing the directory. The Directory can be changed by using the following command.
cd djangpapp
To see all the files and subfolders of django project, we can use tree command to view the tree structure of the application. This is a utility command, if it is not present, can be downloaded via apt-get install tree command.
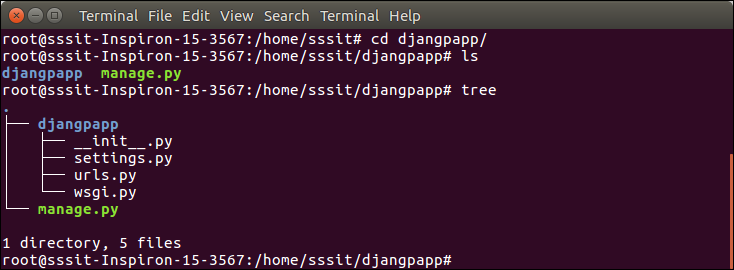
A Django project contains the following packages and files. The outer directory is just a container for the application. We can rename it further.
manage.py: It is a command-line utility which allows us to interact with the project in various ways and also used to manage an application that we will see later on in this tutorial.
A directory (djangpapp) located inside, is the actual application package name. Its name is the Python package name which we'll need to use to import module inside the application.
init.py: It is an empty file that tells to the Python that this directory should be considered as a Python package.
settings.py: This file is used to configure application settings such as database connection, static files linking etc.
urls.py: This file contains the listed URLs of the application. In this file, we can mention the URLs and corresponding actions to perform the task and display the view.
wsgi.py: It is an entry-point for WSGI-compatible web servers to serve Django project.
Initially, this project is a default draft which contains all the required files and folders.
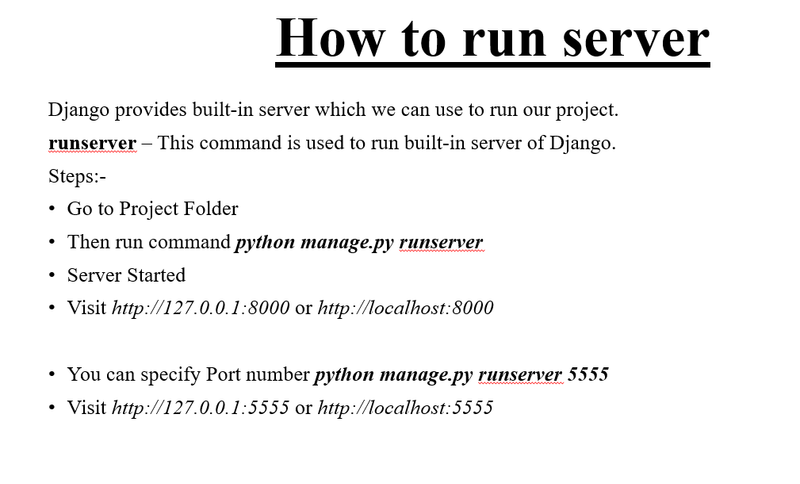
Running the Django Project
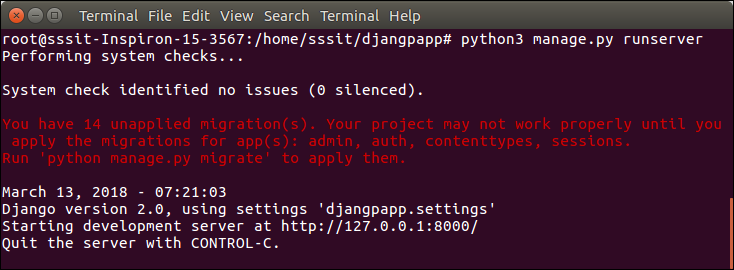
Django project has a built-in development server which is used to run application instantly without any external web server. It means we don't need of Apache or another web server to run the application in development mode.
To run the application, we can use the following command.
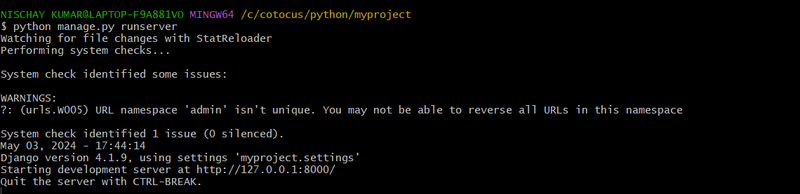
$ python3 manage.py runserver
Django App
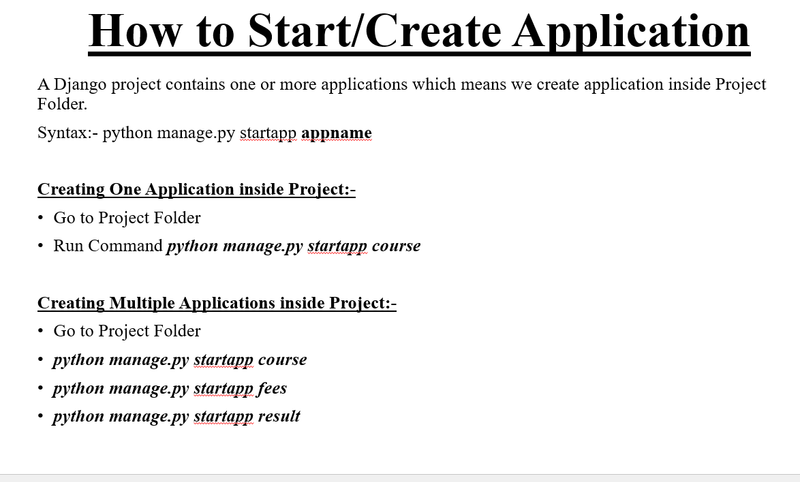
In the previous topics, we have seen a procedure to create a Django project. Now, in this topic, we will create app inside the created project.
Django application consists of project and app, it also generates an automatic base directory for the app, so we can focus on writing code (business logic) rather than creating app directories.
The difference between a project and app is, a project is a collection of configuration files and apps whereas the app is a web application which is written to perform business logic.
Creating an App
To create an app, we can use the following command.
$ python3 manage.py startapp appname
Django App Example
$ python3 manage.py startapp myapp
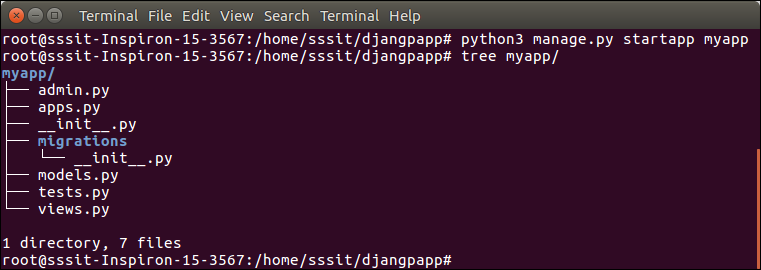
See the directory structure of the created app, it contains the migrations folder to store migration files and model to write business logic.
Initially, all the files are empty, no code is available but we can use these to implement business logic on the basis of the MVC design pattern.
To run this application, we need to make some significant changes which display hello world message on the browser.
Open views.py file in any text editor and write the given code to it and do the same for urls.py file too.
// views.py

from django.shortcuts import render

# Create your views here.
from django.http import HttpResponse

def hello(request):
    return HttpResponse("<h2>Hello, Welcome to Django!</h2>")
// urls.py

from django.contrib import admin
from django.urls import path
from myapp import views

urlpatterns = [
    path('admin/', admin.site.urls),
    path('hello/', views.hello),
]
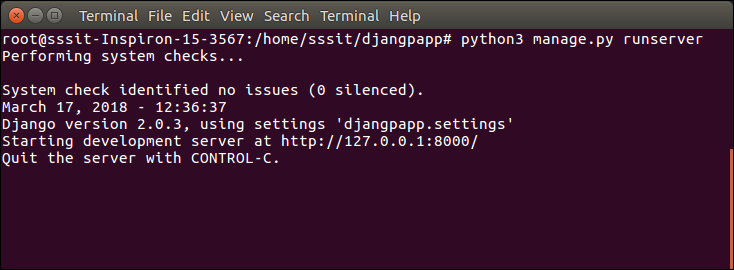
We have made changes in two files of the application. Now, let's run the it by using the following command. This command will start the server at port 8000.
Run the Application
$ python3 manage.py runserver
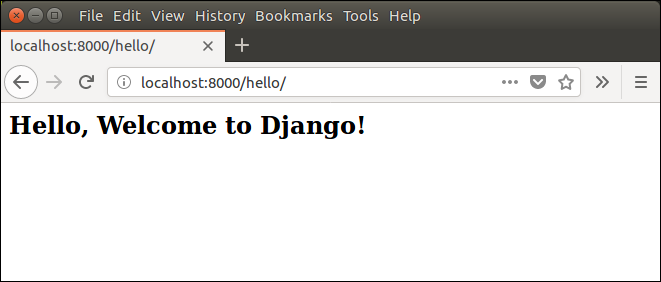
Open any web browser and enter the URL localhost:8000/hello. It will show the output given below.
you can run the following commands to create a new Django project and app.
> python -m pip install Django
> django-admin startproject <your_project_name>
> python manage.py migrate
> python manage.py runserver


Top comments (0)