django-virtual-environment-setup
django-virtual-environment-setup
Refer here
What are virtual environments in Django
Django virtual environments are isolated Python interpreters, Scripts, and Libraries separated from other virtual environments and/or the Python environment installed on the system.
When we create Django projects the basic approach might be to use the Python and Python packages installed on the machine for such a project. But with virtual environments, we are sure to use separate python and python versions, packages and packages versions for different applications.
Importance of using Virtual environments for Django
- You can use any package you want for your Django application without worrying about conflict or collision in the future.
- Virtual environment comes with Python by default and no other setups are necessary.
- Virtual environment also saves your system python library from lots of unnecessary or not so in use packages.
It is generally an acceptable approach to setup a Django project. If you are looking at working for a company or a team, you most probably need to use virtual environments.
Steps on how to setup Django with a virtual environment
Although we already have an article on how to create a Django project, today we are going to create one with a virtual environment. This is actually how I recommend creating a Django project.Install the python virtualenv package on your system.
Create a folder to house your project.
Create a virtualenv.
Activate the virtual environment.
Create a Django project.
Install Django
Start your project.
Install the python virtualenv package on your system.
To make use of virtual environment package commands on your system, you need to install the virtualenv package.
Simply open your command line and enter the below pip install command
pip install virtualenv
Create a folder to house your project.
On a directory you prefer, you can create a folder to house your Django project. In this folder, we will also set up the virtual environment.
Create a virtualenv for your Django project
After creating the project folder, open the terminal to the directory and create your virtualenv.
python -m venv environ
In the above command, environ is the name of the virtual environment. Notice how on the folder you created in step 3, an environ folder will be created also.
Virtual environment folder structure
\virtual_env_folder
   \Include
    \Lib
        \site-packages
     \Scripts
      pyvenv
Above is a brief description of the virtual environment directory structure,
Include: Contains extra contents that do not necessarily fit into other sibling folders.
Lib: In this folder, we have the site-packages which house all the packages this project is using.
Scripts: These are python activation, deactivation, and process scripts. Note, that the python interpreter exists in this folder.
Activate the virtual environment.
At this point, your virtual environment is created and is ready to be used. Firstly, we have to activate it.
Note: Without activating your virtual environment, any command you run will be executed on the system python environment and intepreter.
Generally, to activate a Django virtual environment, you simply execute the activate.bat file in the virtual environment Scripts folder.
In your command line opened to the project folder where the created virtual environment is,
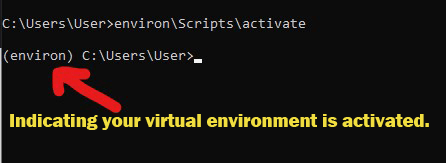
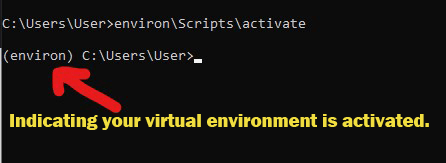
environ\Scripts\activate
Note: Here environ is the name of the virtual environment you specified in step 3
After activation of your virtual environment, your command-line will have an indicator before the directory path to show you are using a virtual environment.
Install Django
After installation and activation of the virtual environment, we could now install packages for our project. Since we are using Django(obviously), we could now install Django.
In the terminal opened to the created folder, enter the below pip installation code;
pip install django
Create a Django project.
Since we have Django installed on our virtual environment, we could now use the django-admin command to create a project.
In the terminal opened to the created folder, enter the below Django project creation code;
django-admin startproject project_name
.
Note:Notice the full-stop or period after the django-admin startproject project_name command. This is used to tell the process of not creating a separate folder for the Django project. This is necessary as we want the manage.py file and the virtual environment folder in the same directory.
Start your project.
At this point, our project and its virtual environment is ready for use. So we simply need to start the project.
In the terminal opened to the created folder, enter the below pip installation code;
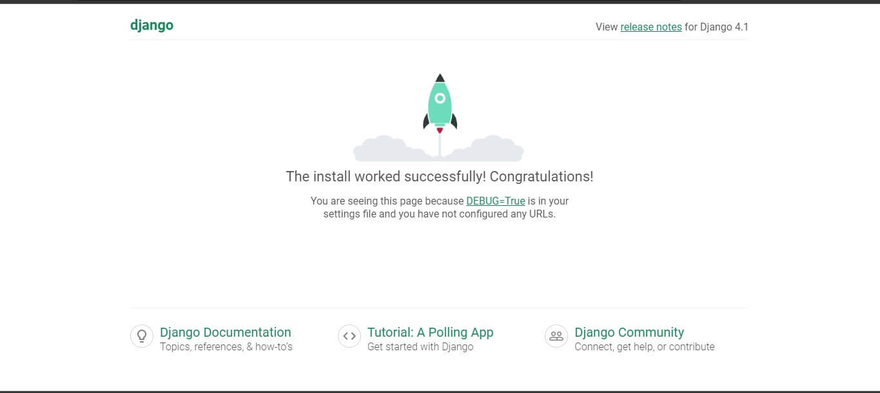
python manage.py runserver
How to deactivate Django virtual environment
For any reason you want to deactivate your virtual environment, maybe to continue with the system installed python.
In the terminal opened to the created folder, enter the below pip installation code;
deactivate
This deactivate command will destroy the virtual environment usage for your project.


Top comments (0)