AWS Lambda is a responsive cloud service that examines the steps followed within any application and responds to them by compiling the codes that have been defined by the users, also known as functions. The service automatically computes and manages the resources across multiple availability zones and functions through them whenever new actions are called. AWS Lambda supports languages like Java, Python, and Node.js for writing the codes, and the service can also launch its processes in languages that are supported by Amazon Linux (like Bash, Go & Ruby).
Some tips to keep in mind while using AWS Lambda:
- The lambda code must be written in a stateless style.
- No function variable must be declared outside the scope of the handler.
- Users must always have a set of +rx permissions on their files in the uploaded ZIP files to ensure that Lambda can execute the code on the user’s behalf.
- Always try to delete old Lambda functions when not required anymore .
Configuring AWS Lambda
AWS Console
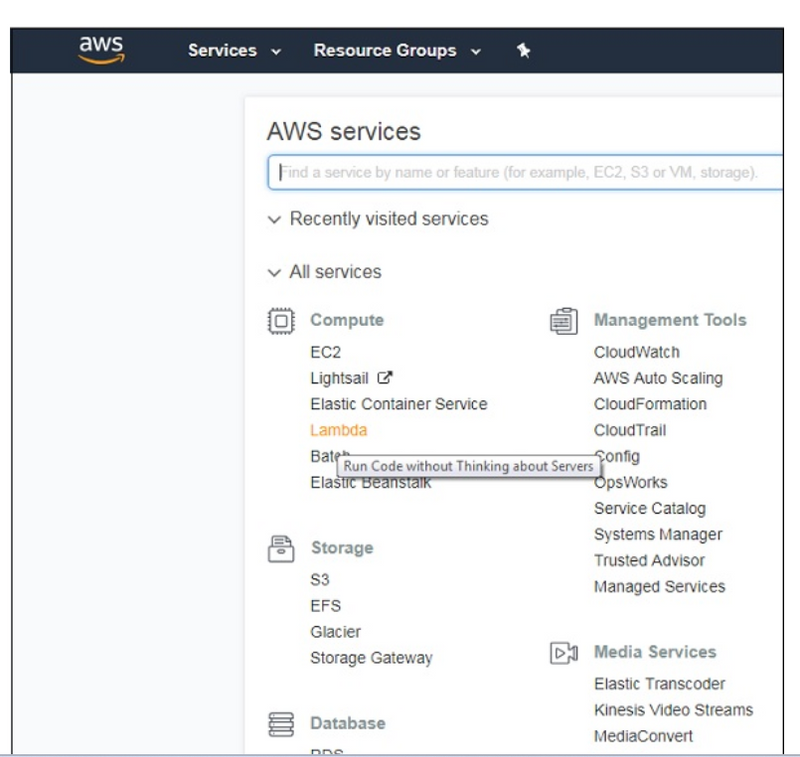
Login to AWS Console at the link https://aws.amazon.com/console. Once you login into it, it will redirect you to the screen where AWS services are displayed.
Example: Creating a Function
Let us understand the functionality of AWS Console with the help of an Example. Click on Lambda (marked above), it will redirect to create function as shown below −

Click Create function button and the screen displays following details
we are showing two way to create function
author from scratch
blueprint
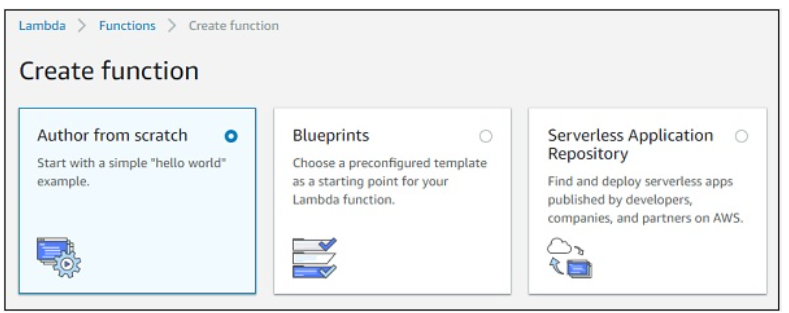
Author from scratch
Note that, by default, the option is Author from scratch. This option lets you to write the Lambda code from scratch. It will just have a simple function with hello world message.
The second option Blue prints has following details.
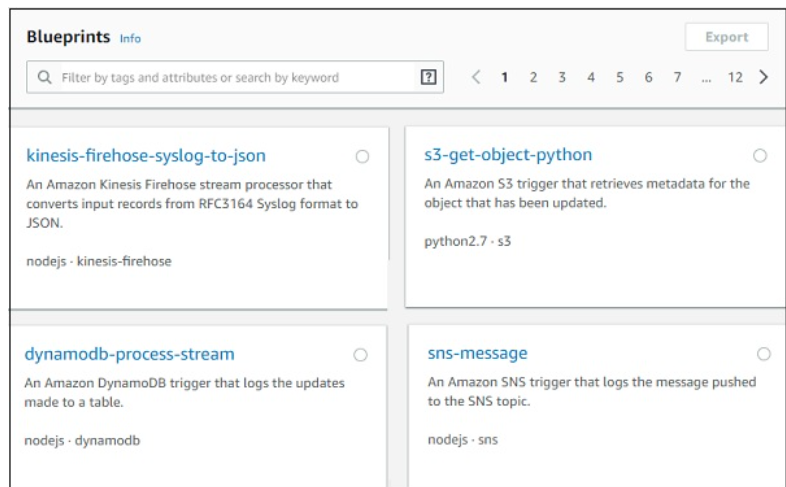
It gives details of code already written for some of the aws services in languages available with AWS Lambda. Incase you need to write AWS Lambda code for any services you can check in blue prints and get started.
The third option Serverless Application Repository has the setup of serverless application which will help to deploy the AWS Lambda code.
In the discussion further, we will work on the first option where we create the AWS lambda function using Author from scratch.
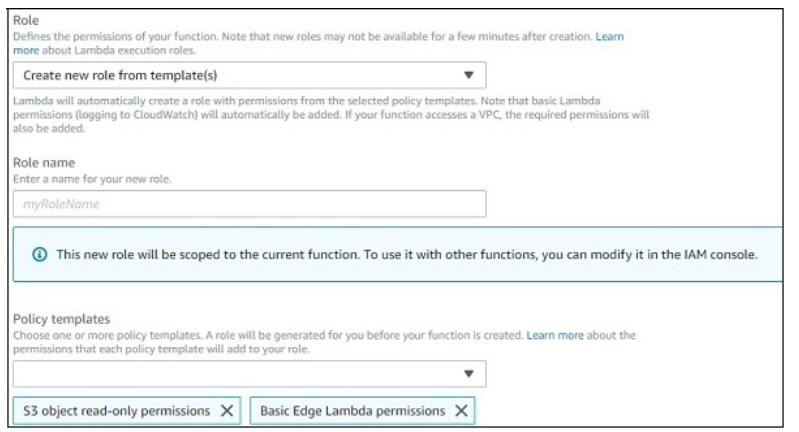
Before we create Lambda function, will need a role i.e, permission for working with AWS services and aws lambda. Later the Role has to be assigned to aws lambda function.
Role creation in AWS Console
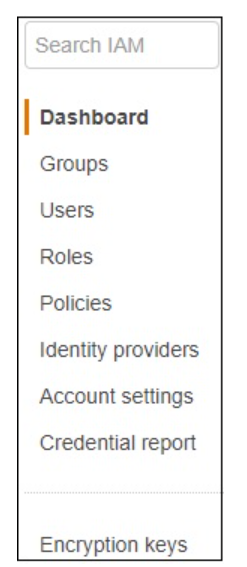
For creating a role in AWS Console, go to AWS console services and click on IAM as shown below −

Now, if you click IAM, you will the screen as shown below −
If you select Roles, you can see the following buttons on the screen −
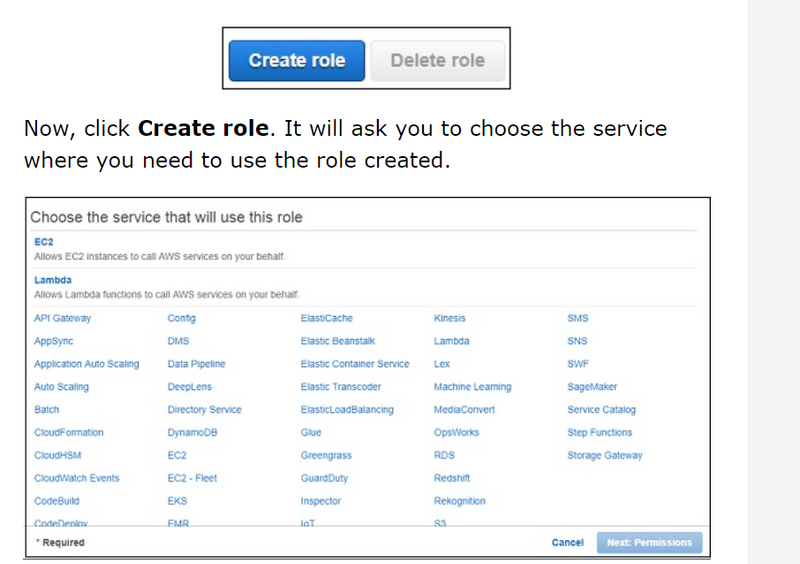
Since we need to use this role with AWS Lambda, select Lambda and click Next:Permissions button as shown above. The next screen displays the policy name which is available as per AWS services. You can select the policy from here −
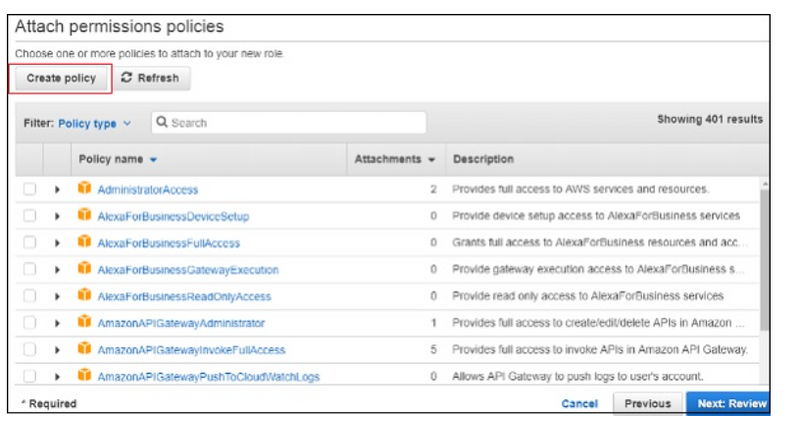
For Example, if you want permission for AWS Lambda to work with S3 and DynamoDB, you need to select the policy. In the search box, enter the AWS service and click on the checkbox. You can select multiple policies and later click on Next:Review.
It is also possible to create policy of your own. For Example, there is dynamodb table and you need to give permission only to that table, under such cases you can create policy.
Click on Create policy button as shown in the screen above. Following are the details displayed on screen.
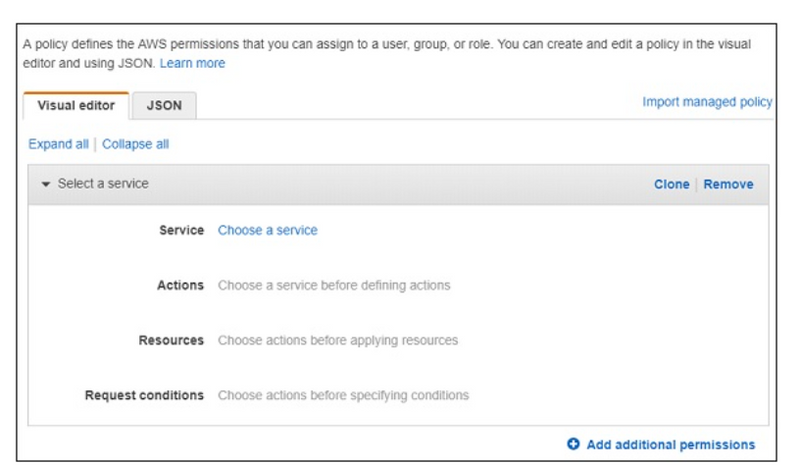
Choose a Service for which you are creating the policy. Later it will display data for Actions, resources and Request conditions.
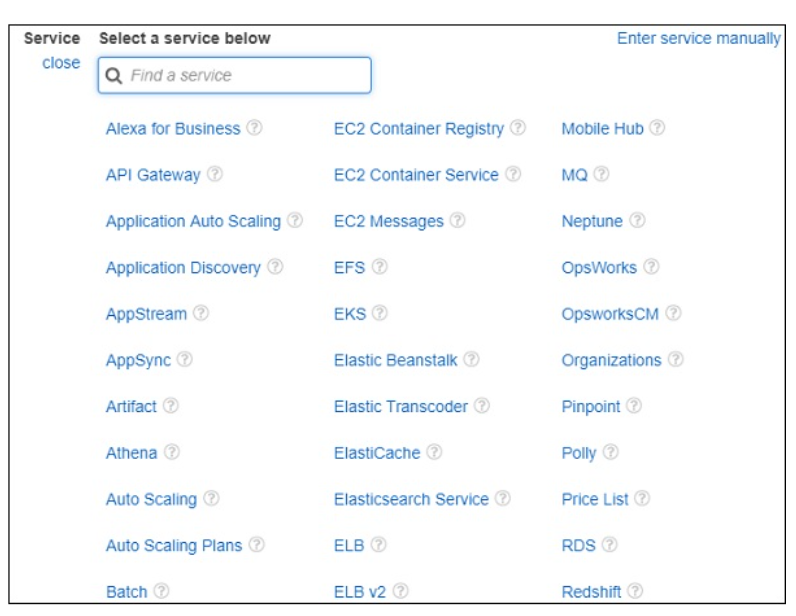
Now, we should choose the service. Let us select AWS Dynamodb from search. Actions has following details −
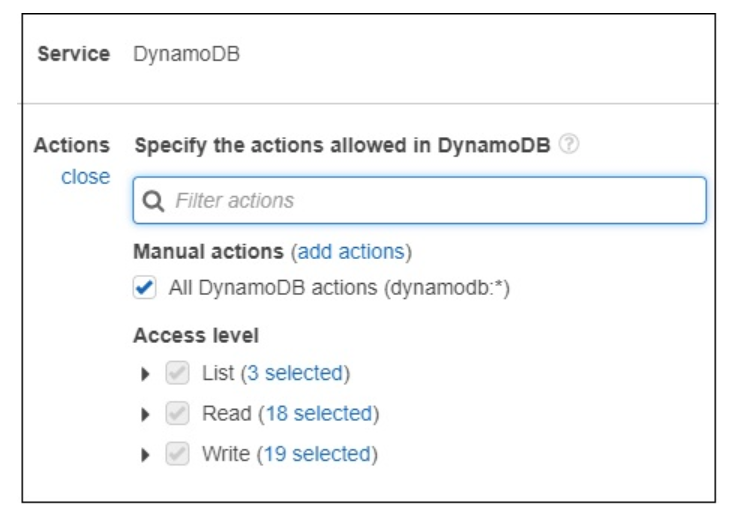
Now, enter the Access level you want to give to DynamoDB. Then, resources will display the following details −
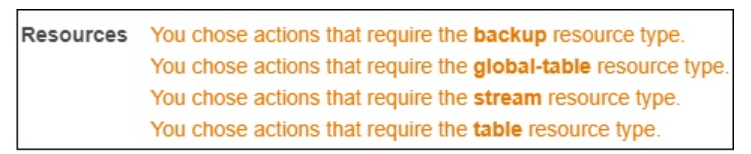
Now, select the table resource type. You can see the following output −
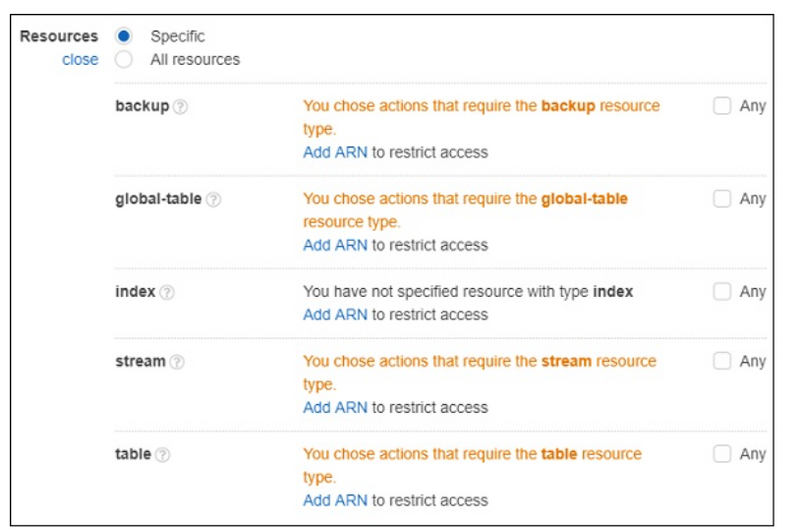
For permission on table, you need to Add ARN. ARN is the details which is unique to the table created in AWS DynamoDB. You will get the details when the table is created in dynamodb.
If you click Add ARN and it will display following details −
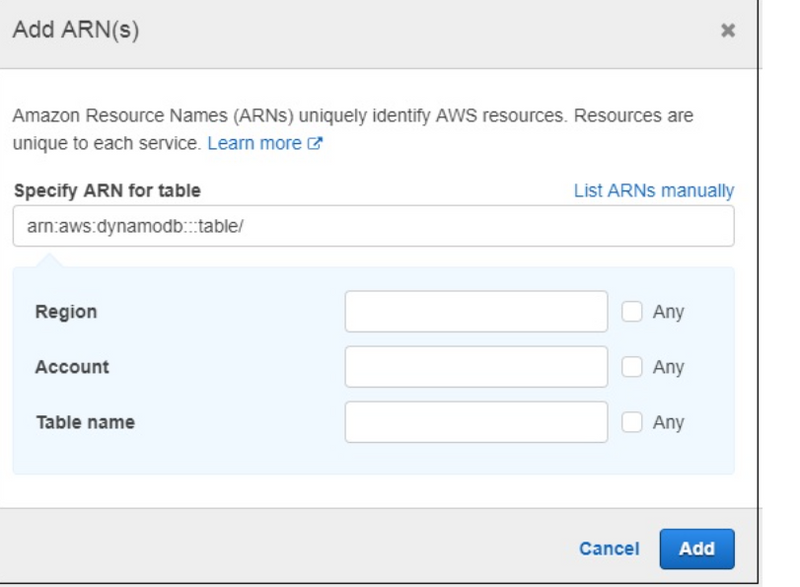
Now, if you enter the ARN and the Region, Account and Table name will get populated. You should click Add button to add the policy. Similarly, you can create policies for other services.
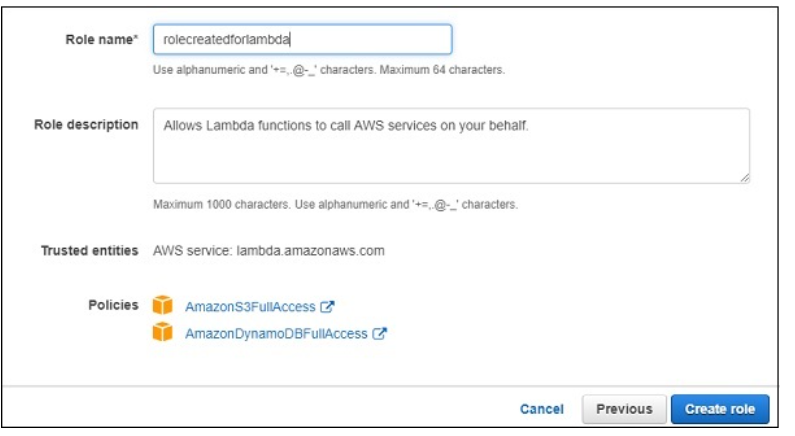
Here, we have selected two policies AmazonS3FullAccess and AmazonDynamoDBFullACcess. We have given full access to S3 and DynamoDB in that role. However, it is suggested that you give permission only to necessary buckets and tables.
You can follow the steps discussed earlier to create the policies using ARN.
Step 1
Click Create role button to create the role. All the roles created are displayed as shown −
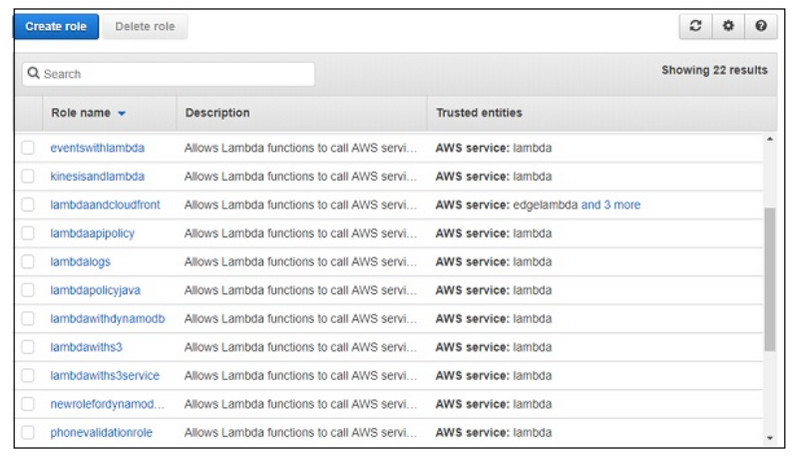
Step 2
Note that you can select the role you require incase you need any modification for the role created. If we select Author from scratch option, you have to enter Name, Runtime and Role.
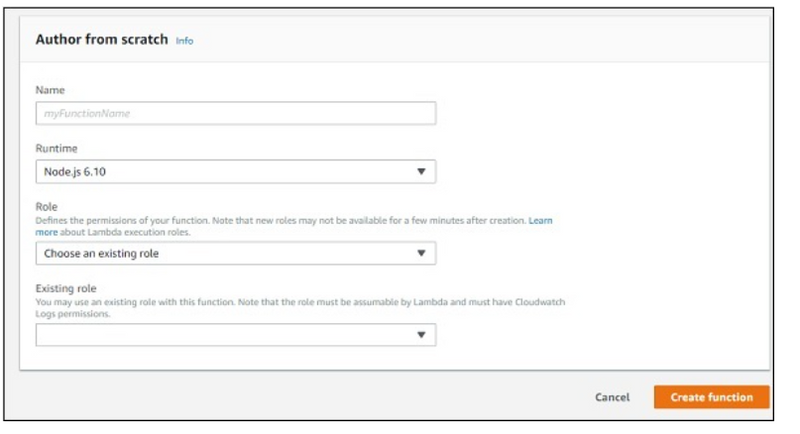
Step 3
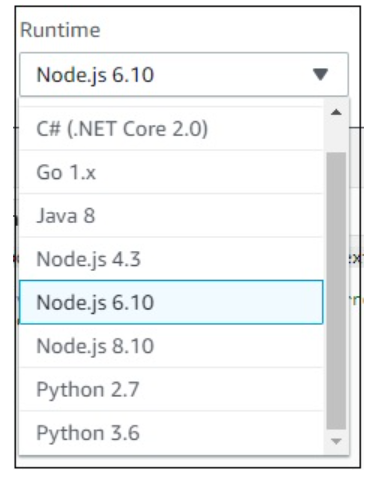
You can observe the following details in Runtime dropdown −
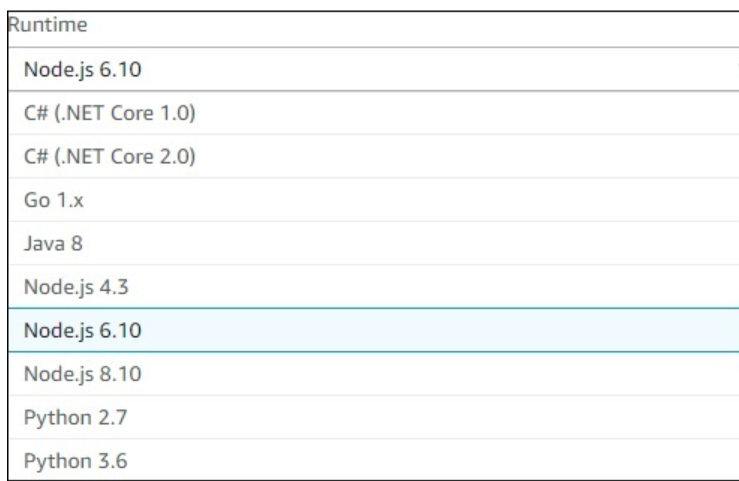
Step 4
You can select the runtime of your choice and proceed as shown.
Step 5
Select the runtime, role and add the function. Click on Create function button to create the lambda function. The next screen displayed is as follows −
Parts of AWS Lambda Function
There are two parts for AWS Lambda
- Configuration
- Monitoring
Let us discuss each in detail.
Configuration
The following functionalities are included in the Configuration.
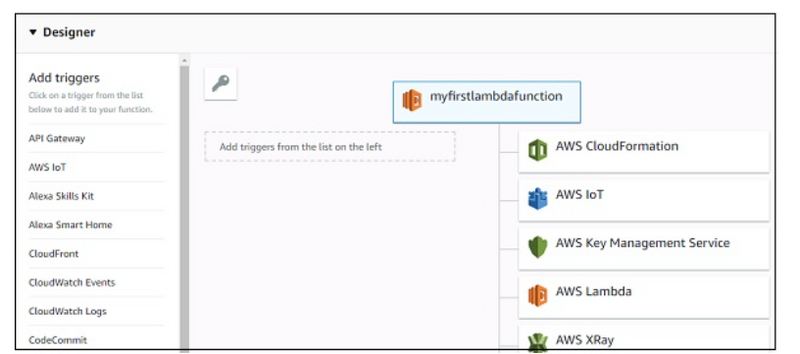
Add Triggers
The triggers that are needed to added to AWS Lambda function are displayed as follows −
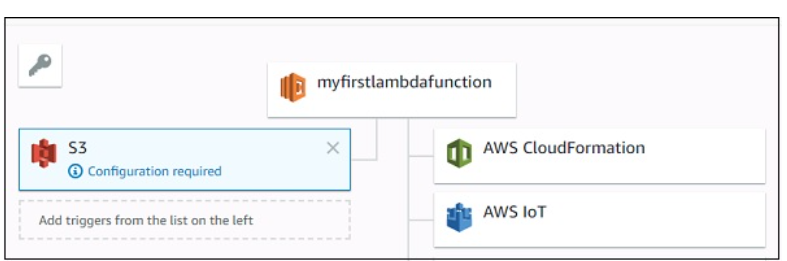
Note that when we select a trigger, we need to add the configuration details for that trigger. For Example for S3 trigger, we need to select the bucket name; for Dynamodb trigger we need to select the table name.
Example
Let us see an example of configuration details for a S3 trigger −
Now, add configuration details for S3 trigger added −
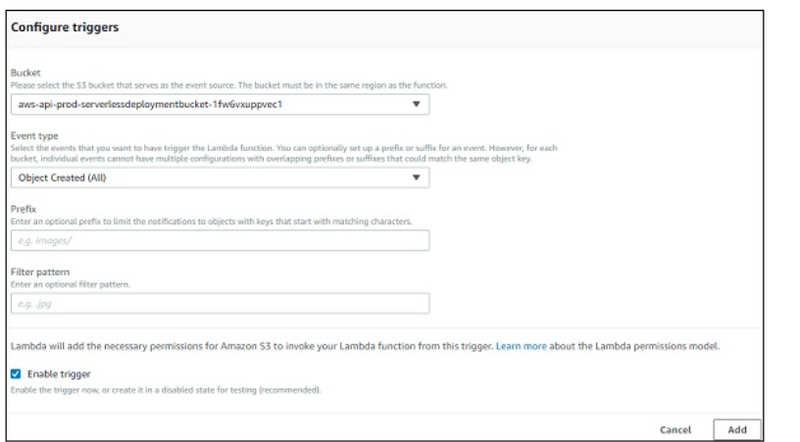
Here you need to select the bucket name, event type on which you want to trigger Lambda, prefix and filter pattern if any and Add the trigger.
Adding Code in Lambda
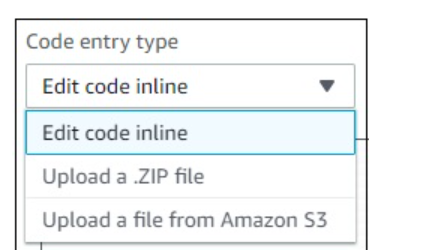
Now, we should focus on the Lambda code to be written. To add code in aws lambda there are three options −
- Using the inline editor
- Using .zip file
- Upload file from Amazon S3 It is shown in the screenshot given below −
Let us discuss each of them in detail.
Using the inline editor
The inline code editor where you can write you code is as follows −
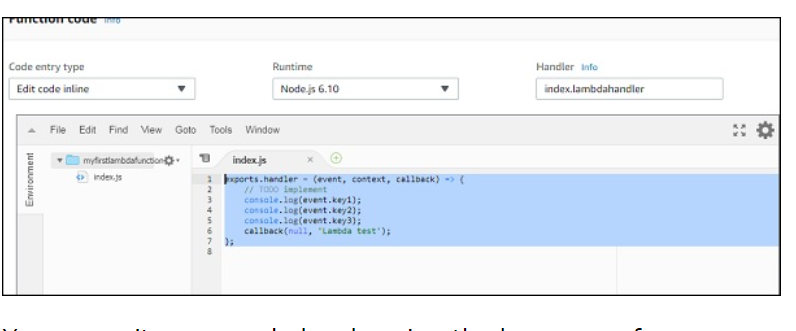
You can write your code by choosing the language of your choice. You are allowed to choose the runtime again here.
Observe the following screenshot for a better understanding −
The code has to be written in index.js.Handler. Details will differ based on runtime. For nodejs, it is filename.export function which is right now index.lambda handler.
Upload a .ZIP file
You can first write the code, zip it and upload the zip file by selecting Upload a .ZIP file.
Upload a file from Amazon S3
You can upload the file in S3 bucket and choose the option Upload a file from Amazon S3.
Note that for .ZIP and S3 it will not be possible to change the runtime.
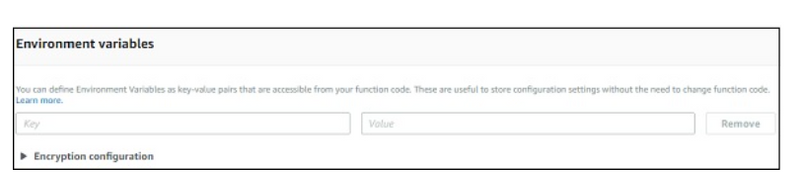
Environment variables
They take in key value pairs and share them with AWS Lambda code. We can use environment variables in AWS Lambda for storing the database connection details, file details as to store the output, log file details etc.
Environment variables
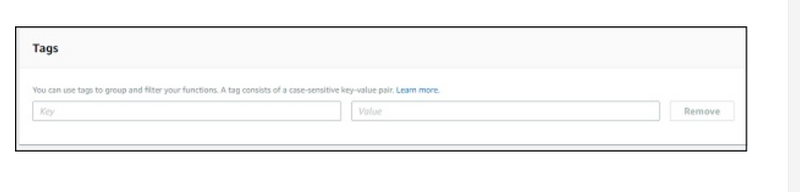
Tags
They are key-value pairs added to AWS Lambda for better organizing the function when used across different regions. For a simple use case, it is not required. When there are lot of Lambda functions created, the tagging helps in filtering and managing the Lambda functions.
Tags
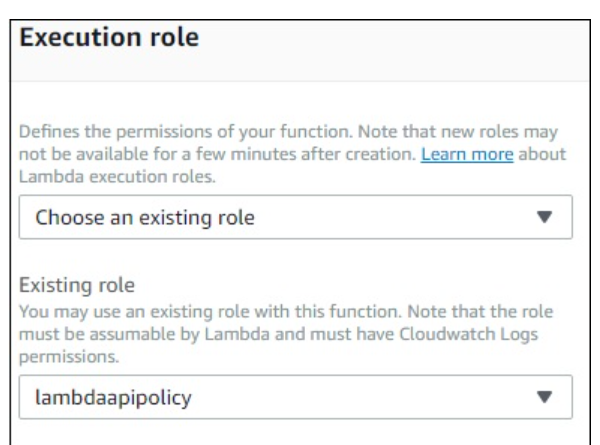
Execution role
You can change the role again here if not done properly at the start of creating Lambda function. You can update or create new role here. It provides same options which were displayed at the start of creating Lambda function.
Execution Role
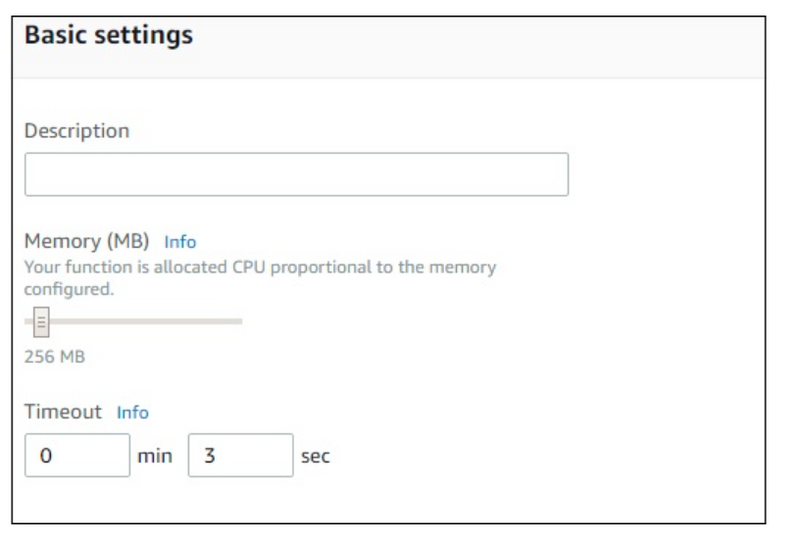
Basic Settings
Here you need to enter the short description of what your Lambda function is doing. Select the memory and timeout which are required for the Lambda function.
Basic Settings
Network
This allows you to select the VPC which will allow you to access the Lambda function from the VPC. By default, no VPC is selected.
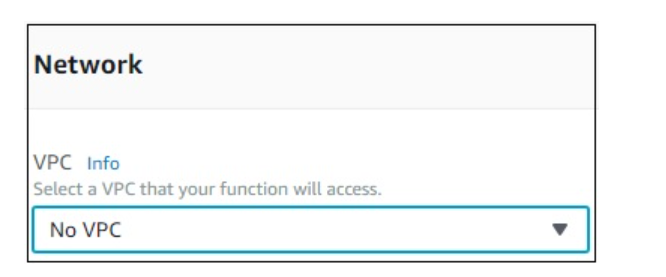
Network
Debugging and Error Handling
For debugging and errors handling, you can select AWS service to send the details. The options available are None, SNS and SQS.
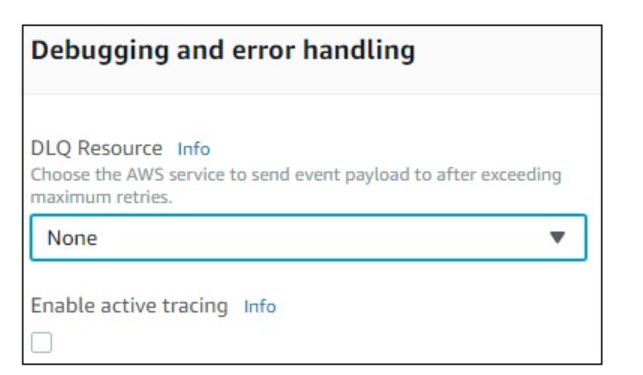
Debugging and Error Handling
Concurrency
This allows you to allocate a specific limit of concurrent executions allowed for this function.
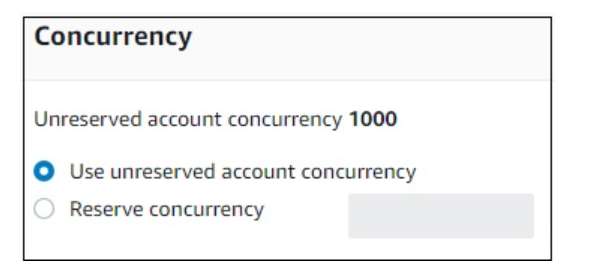
Concurrency
Auditing and Compliance
This contains logs which are managed with the help of AWS CloudTrail.
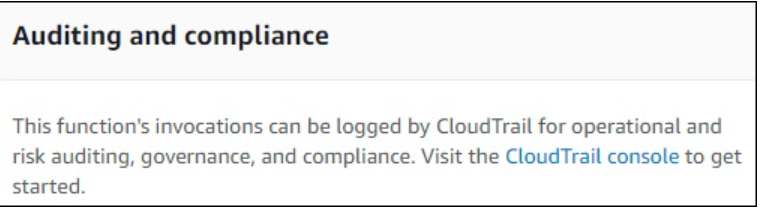
Auditing and Compliance
Once done you need to save the changes using the Save button as shown here −

Save Button.jpg
Now, if you click Test button, it will ask for a test event. You can pass a sample test event as follows −
The test event created is as shown here −
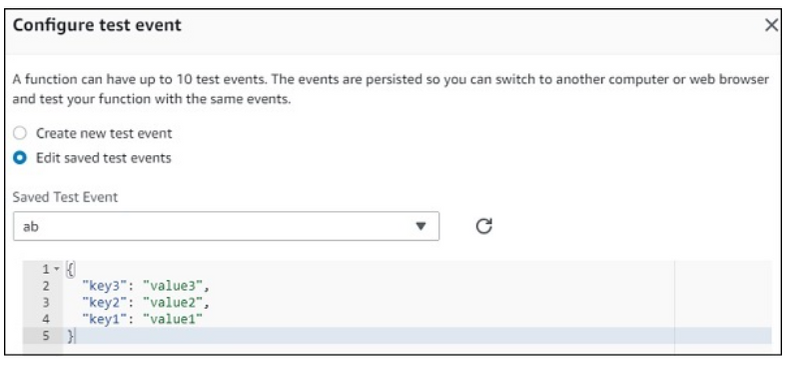
Configure Test Event
Now, save the test event and click the test button to see the execution of AWS Lambda function −
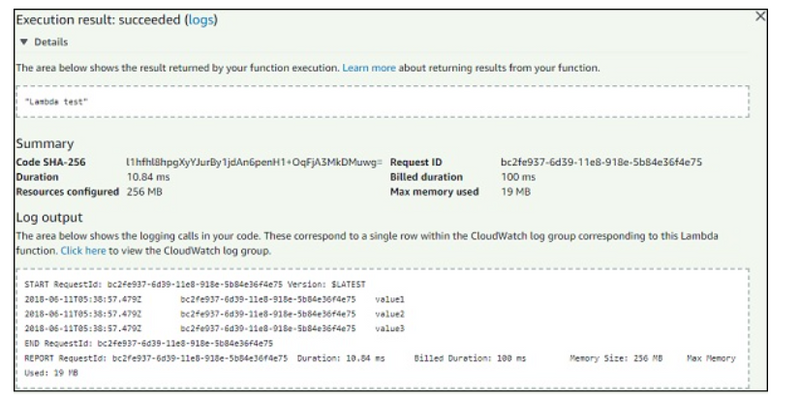
Execution Result
The code for index.js is as follows −
exports.lambdahandler = (event, context, callback) => {
   // TODO implement
   console.log(event.key1);
   console.log(event.key2);
   console.log(event.key3);
   callback(null, 'Lambda test');
};
Note that callback function is called when there is error or success. If success, you can see Lambda test will get displayed.
Monitoring
Select the monitoring tab to view the execution details of Lambda function. The graphs show the details of the execution time, errors occured etc.
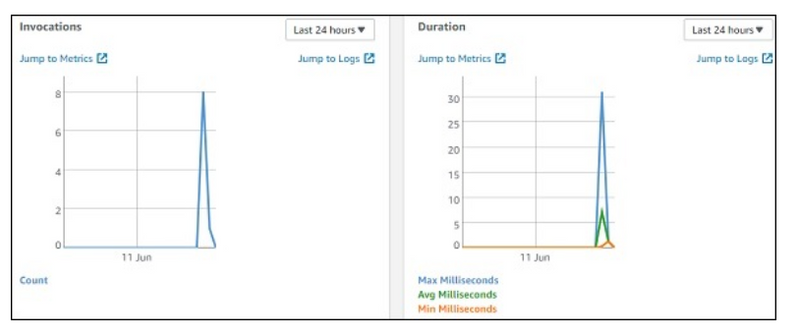
Monitoring*
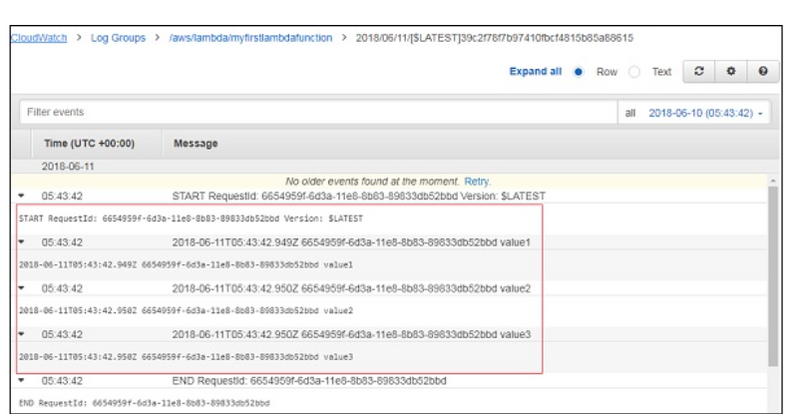
You can also view the logs in Cloudwatch. For this, go to AWS services and select cloudwatch as shown −

Management Tool
Now, select logs from left side and enter your function name in the filter −
Cloud Watch
Reference
aws_lambda_introduction
how-to-configure-aws-lambda

Top comments (0)