Third Party Library
Handling third-party libraries in Laravel Livewire involves integrating them into your Livewire components and managing their functionality within the component's lifecycle. Here are ten different methods to handle third-party libraries in Laravel Livewire:
Direct Usage: You can directly use the third-party library within your Livewire components by including its JavaScript or CSS files in your Blade views.
Custom Livewire Components: Create custom Livewire components to encapsulate the functionality of the third-party library. This allows you to abstract away the implementation details and use the component in multiple places.
Livewire Hooks: Utilize Livewire lifecycle hooks such as mount, updated, or updatedFoo to initialize, update, or destroy the third-party library instance. For example, you can initialize the library in the mount method and clean up in the destroy method.
Listeners and Events: Use Livewire listeners and events to communicate between Livewire components and the third-party library. You can emit events from Livewire components and listen for them in JavaScript to trigger actions in the library, and vice versa.
JavaScript Inline Directives: Use Livewire's @this directive to execute JavaScript code inline within the Blade template. You can interact with the third-party library directly from the template using this approach.
Livewire AlpineJS Bridge: Combine Livewire with AlpineJS to interact with the third-party library using AlpineJS directives. AlpineJS can handle client-side interactions while Livewire manages server-side interactions.
Livewire AlpineJS Plugin: Create custom AlpineJS plugins to encapsulate the functionality of the third-party library. This allows you to use AlpineJS directives to interact with the library while maintaining separation of concerns.
Livewire Custom JavaScript Methods: Define custom JavaScript methods within your Livewire components to interact with the third-party library. You can then call these methods from Livewire actions or lifecycle hooks.
Livewire JavaScript Hooks: Utilize Livewire JavaScript hooks such as initialized, refreshed, or destroyed to interact with the third-party library at different stages of the Livewire component lifecycle.
Livewire with Livewire UI Frameworks: If the third-party library provides a UI framework that integrates well with Livewire (e.g., Livewire UI libraries like Laravel Livewire UI), you can use components from these frameworks directly in your Livewire components.
Choose the method that best fits your use case and the requirements of the third-party library you're working with.
How to Create custom laravel Livewire components to encapsulate the functionality of the third-party library
To create custom Laravel Livewire components that encapsulate the functionality of a third-party library, let's consider an example where we want to integrate the Select2 library for enhanced dropdown select inputs. We'll create a custom Livewire component that wraps the Select2 functionality and allows us to use it easily throughout our application.
Here's how you can achieve this:
Install Select2:
First, install the Select2 library using npm or yarn:
npm install select2
Create a Custom Livewire Component:
Create a new Livewire component using Artisan:
php artisan make:livewire Select2Dropdown
Implement the Component:
Open the generated Select2Dropdown.php component file (app/Http/Livewire/Select2Dropdown.php) and implement the necessary functionality. We'll add methods to initialize Select2 and handle the selection changes.
<?php

namespace App\Http\Livewire;

use Livewire\Component;

class Select2Dropdown extends Component
{
    public $options;
    public $selected;

    public function mount($options)
    {
        $this->options = $options;
    }

    public function render()
    {
        return view('livewire.select2-dropdown');
    }

    public function updatedSelected($value)
    {
        // Handle selection changes here
    }
}
Create Blade View:
Next, create a Blade view for the Livewire component. This view will contain the HTML markup and JavaScript code to initialize the Select2 dropdown.
Create a new Blade view file named select2-dropdown.blade.php in the resources/views/livewire directory:
<div>
    <select wire:model="selected" class="js-select2">
        @foreach($options as $key => $option)
            <option value="{{ $key }}">{{ $option }}</option>
        @endforeach
    </select>
</div>

@push('scripts')
    <script>
        $(document).ready(function() {
            $('.js-select2').select2();

            $('.js-select2').on('change', function (e) {
                @this.set('selected', e.target.value);
            });
        });
    </script>
@endpush
Usage:
Now, you can use the Select2Dropdown Livewire component in your Blade views by including its tag and passing the options array as a parameter:
<!-- resources/views/welcome.blade.php -->

<div>
    @livewire('select2-dropdown', ['options' => ['value1' => 'Option 1', 'value2' => 'Option 2']])
</div>
Testing:
Finally, test the functionality of the custom Livewire component by interacting with the Select2 dropdown in your application. Ensure that selection changes are handled correctly and the component works as expected.
By encapsulating the functionality of the Select2 library within a custom Livewire component, you can easily integrate enhanced dropdown select inputs into your Laravel application while maintaining a clean and organized codebase. Additionally, this approach allows for reusability and modularity, making it easier to manage and maintain your application's frontend components.
How to interact with the third-party library directly from the template using Livewire's @this directive
Livewire lifecycle hooks to mount, updated, or updatedFoo to initialize, update, or destroy the third-party library instance
Below is an example of a Livewire component interacting directly with a third-party library from the template using Livewire's @this directive for CRUD operations:
<?php

namespace App\Http\Livewire;

use Livewire\Component;

class FooComponent extends Component
{
    // Property to store data
    public $data;
    // Property to store the instance of FooLibrary
    private $fooLibrary;

    // Lifecycle hook to initialize the component
    public function mount()
    {
        // Initialize your third-party library instance here
        $this->data = ['example' => 'data']; // Example initialization
        $this->fooLibrary = new FooLibrary($this->data); // Replace with actual implementation
    }

    // Custom method to create a record
    public function createRecord($recordData)
    {
        // Perform the action to create a record
        $this->fooLibrary->createRecord($recordData);
        // Optionally, you can emit an event or perform any other necessary actions after creation
    }

    // Custom method to read data
    public function readData()
    {
        // Perform the action to read data
        return $this->fooLibrary->getData();
    }

    // Custom method to update a record
    public function updateRecord($recordId, $updatedData)
    {
        // Perform the action to update a record
        $this->fooLibrary->updateRecord($recordId, $updatedData);
        // Optionally, you can emit an event or perform any other necessary actions after update
    }

    // Custom method to delete a record
    public function deleteRecord($recordId)
    {
        // Perform the action to delete a record
        $this->fooLibrary->deleteRecord($recordId);
        // Optionally, you can emit an event or perform any other necessary actions after deletion
    }

    public function render()
    {
        // Call readData method to retrieve data for rendering in the Livewire component view
        $data = $this->readData();
        return view('livewire.foo-component', ['data' => $data]);
    }
}
And here's how you can interact with this component from the Livewire template (foo-component.blade.php):
<div>
    <!-- Display Data -->
    <ul>
        @foreach($data as $record)
            <li>{{ $record['name'] }}</li>
        @endforeach
    </ul>

    <!-- Create Form -->
    <form wire:submit.prevent="createRecord">
        <input type="text" wire:model="newRecord.name">
        <button type="submit">Add Record</button>
    </form>

    <!-- Update Form (assuming $editRecordId and $updatedRecord are defined) -->
    <form wire:submit.prevent="updateRecord({{ $editRecordId }}, $updatedRecord)">
        <input type="text" wire:model="updatedRecord.name">
        <button type="submit">Update Record</button>
    </form>

    <!-- Delete Button (assuming $recordId is defined) -->
    <button wire:click="deleteRecord({{ $recordId }})">Delete Record</button>
</div>
How to emit events from Livewire components and listen for them in JavaScript to trigger the third-party library instance
To emit events from Livewire components and listen for them in JavaScript to trigger actions on the third-party library instance, you can use Livewire's event system along with JavaScript listeners. Below is an example of how to achieve this:
First, let's define the Livewire component FooComponent with CRUD operations and event emitting:
<?php

namespace App\Http\Livewire;

use Livewire\Component;

class FooComponent extends Component
{
    // Property to store data
    public $data;
    // Property to store the instance of FooLibrary
    private $fooLibrary;

    // Lifecycle hook to initialize the component
    public function mount()
    {
        // Initialize your third-party library instance here
        $this->data = ['example' => 'data']; // Example initialization
        $this->fooLibrary = new FooLibrary($this->data); // Replace with actual implementation
    }

    // Custom method to create a record
    public function createRecord($recordData)
    {
        // Perform the action to create a record
        $this->fooLibrary->createRecord($recordData);
        // Emit event to notify JavaScript listeners
        $this->emitTo('foo-component', 'recordCreated');
    }

    // Custom method to read data
    public function readData()
    {
        // Perform the action to read data
        return $this->fooLibrary->getData();
    }

    // Custom method to update a record
 public function updatedSelected($value)
    {
        // Save the selected value to the database
        YourModel::create([
            'selected_value' => $value,
        ]);

        // Optionally, you can emit an event or perform any other necessary actions here

        // For example, emitting an event to notify other components about the selection
        $this->emit('selectedValueUpdated', $value);
    }

    // Custom method to delete a record
    public function deleteRecord($recordId)
    {
        // Perform the action to delete a record
        $this->fooLibrary->deleteRecord($recordId);
        // Emit event to notify JavaScript listeners
        $this->emitTo('foo-component', 'recordDeleted');
    }

    public function render()
    {
        // Call readData method to retrieve data for rendering in the Livewire component view
        $data = $this->readData();
        return view('livewire.foo-component', ['data' => $data]);
    }
}
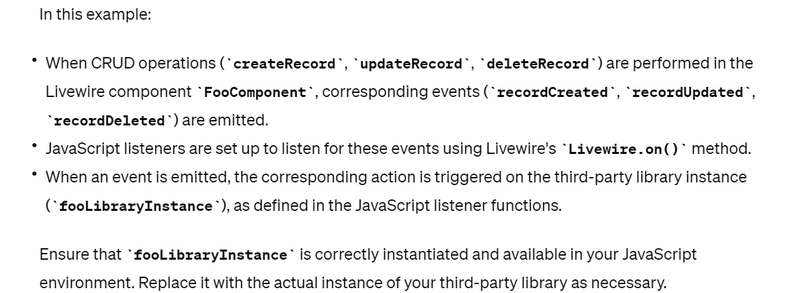
Next, let's listen for these events in JavaScript and trigger actions on the third-party library instance. Suppose we have a JavaScript file named foo-component.js:
document.addEventListener('livewire:load', function () {
    // Listen for recordCreated event
    Livewire.on('recordCreated', function () {
        // Trigger action on the third-party library instance
        fooLibraryInstance.doSomethingOnRecordCreated();
    });

    // Listen for recordUpdated event
    Livewire.on('recordUpdated', function () {
        // Trigger action on the third-party library instance
        fooLibraryInstance.doSomethingOnRecordUpdated();
    });

    // Listen for recordDeleted event
    Livewire.on('recordDeleted', function () {
        // Trigger action on the third-party library instance
        fooLibraryInstance.doSomethingOnRecordDeleted();
    });
});
Third Party Library
Here are some more third-party libraries that you can use in combination with Laravel Livewire to enhance your web applications:
Livewire Datepicker: A datepicker component for Livewire, allowing users to select dates easily. It provides a simple interface for date selection and integrates seamlessly with Livewire components.
npm install flatpickr
composer require fomantic/ui
Livewire Charts: A charting library for Livewire, enabling you to create interactive charts and graphs directly within your Livewire components. It supports various chart types and customization options.
composer require chartisan/chartisan
<div>
    <livewire:chartisan :chart-id="$chart->id" :chart="$chart->chart" />
</div>
Livewire Forms: A package that simplifies form handling in Livewire components. It provides helper methods and components for building dynamic and interactive forms with validation and error handling.
composer require exliveware/laravel-livewire-forms
Livewire File Upload: A package for handling file uploads in Livewire components. It offers features like progress tracking, file validation, and handling file uploads without page reloads.
composer require exliveware/laravel-livewire-forms
Livewire Notifications: A package for displaying notifications and alerts in Livewire components. It allows you to show success messages, error messages, and other notifications without using
JavaScript.composer require glhd/livewire-notifications
php artisan make:livewire NotificationManager
Livewire Tables: A package for creating dynamic and sortable tables in Livewire components. It provides features like pagination, searching, and filtering, making it easy to display tabular data in Livewire applications.
  protected $rules = [
        'name' => 'required|string|max:255',
        'email' => 'required|email|unique:users,email',
    ];
Livewire Modal: A package for creating modal dialogs in Livewire components. It simplifies the process of showing and hiding modals and allows you to pass data between the parent component and the modal.
Livewire Datatables: A package for integrating DataTables with Livewire components. It provides a seamless way to add advanced data tables with features like sorting, filtering, and pagination to your Livewire applications.
Livewire Select: A package for creating dynamic select dropdowns in Livewire components. It allows you to populate select dropdowns dynamically based on user input or server-side data.
Livewire Validation: A package for handling form validation in Livewire components. It provides a convenient way to define validation rules and display validation errors within Livewire forms.
These are just a few examples of third-party libraries and packages that can complement Laravel Livewire and extend its functionality. Depending on your specific requirements and use cases, you may find other packages that suit your needs. Always ensure to review the documentation and compatibility with your Laravel and Livewire versions before integrating any third-party library into your project.
Livewire Charts Coding Example
To implement CRUD operations with Livewire Charts using a third-party library like Laravel Chartisan, you can follow these steps:
Install Laravel Chartisan: First, you need to install Laravel Chartisan using Composer.
composer require chartisan/chartisan
Set up Livewire: If you haven't already, set up Livewire in your Laravel application.
composer require livewire/livewire
Create a Livewire Component: Create a Livewire component to handle the CRUD operations and render the chart.
php artisan make:livewire ChartComponent
Create Routes: Define routes for your Livewire component in routes/web.php.
use App\Http\Livewire\ChartComponent;

Route::get('/charts', ChartComponent::class)->name('charts');
Create Views: Create the views for your Livewire component. You'll need a view for displaying the chart and another view for the form to add new data.
Implement CRUD Operations: Inside your Livewire component (app/Http/Livewire/ChartComponent.php), implement the CRUD operations to handle adding, updating, and deleting data.
namespace App\Http\Livewire;

use Livewire\Component;
use App\Models\ChartData;

class ChartComponent extends Component
{
    public function render()
    {
        $chartData = ChartData::all();
        return view('livewire.chart-component', compact('chartData'));
    }

    public function addData()
    {
        // Logic to add new data to the database
    }

    public function editData($id)
    {
        // Logic to edit existing data
    }

    public function deleteData($id)
    {
        // Logic to delete data
    }
}
Render the Chart: Use Laravel Chartisan to render the chart in your Livewire view file (livewire/chart-component.blade.php).
<div>
    <livewire:chartisan :chart-id="$chart->id" :chart="$chart->chart" />
</div>
Trigger CRUD Operations: Use Livewire methods and events to trigger CRUD operations from your Livewire view file.
<div>
    <button wire:click="addData">Add Data</button>
    <button wire:click="editData({{ $data->id }})">Edit Data</button>
    <button wire:click="deleteData({{ $data->id }})">Delete Data</button>
</div>
Display Feedback: Show feedback messages or alerts to the user based on the result of the CRUD operations.
Testing: Test your CRUD operations and Livewire components thoroughly to ensure they work as expected.
That's a basic outline of how you can implement CRUD operations with Livewire Charts using a third-party library like Laravel Chartisan. Make sure to customize the code according to your specific requirements and use case.
Livewire Forms using third party library
To complete the code and use a form library in your Livewire views, let's assume you're using Laravel Livewire Forms Components as the third-party library. Here's how you can use it in your Livewire views:
Install Laravel Livewire Forms Components:
composer require exliveware/laravel-livewire-forms
Import the necessary components and directives in your Livewire views.
<!-- resources/views/livewire/user-component.blade.php -->

<div>
    <!-- Form to add or edit user -->
    <x-form wire:submit.prevent="{{ $selectedUserId ? 'updateUser' : 'createUser' }}">
        <x-form-input label="Name" name="name" wire:model="name" />
        <x-form-input label="Email" type="email" name="email" wire:model="email" />

        <x-form-submit>
            {{ $selectedUserId ? 'Update User' : 'Add User' }}
        </x-form-submit>
    </x-form>

    <!-- List of users -->
    <ul>
        @foreach($users as $user)
            <li>
                {{ $user->name }} - {{ $user->email }}
                <button wire:click="editUser({{ $user->id }})">Edit</button>
                <button wire:click="deleteUser({{ $user->id }})">Delete</button>
            </li>
        @endforeach
    </ul>
</div>
Livewire Notifications coding example using third party library
Here's how you can implement CRUD operations with Livewire Notifications:
Install the Laravel Livewire Notifications package:
composer require glhd/livewire-notifications
Set up the necessary configuration. Refer to the package documentation for detailed instructions on configuration.
Create a Livewire component for managing your notifications. Let's assume it's called NotificationManager.
php artisan make:livewire NotificationManager
Define the component class and its corresponding view.
// app/Http/Livewire/NotificationManager.php

namespace App\Http\Livewire;

use Livewire\Component;
use Illuminate\Support\Facades\Notification;
use App\Models\User;
use App\Notifications\ExampleNotification;

class NotificationManager extends Component
{
    public $users;
    public $selectedUserId;

    public function mount()
    {
        $this->users = User::all();
    }

    public function sendNotification()
    {
        $user = User::findOrFail($this->selectedUserId);
        Notification::send($user, new ExampleNotification());
        $this->emit('notificationSent');
    }

    public function render()
    {
        return view('livewire.notification-manager');
    }
}
<!-- resources/views/livewire/notification-manager.blade.php -->

<div>
    <select wire:model="selectedUserId">
        <option value="">Select User</option>
        @foreach($users as $user)
            <option value="{{ $user->id }}">{{ $user->name }}</option>
        @endforeach
    </select>

    <button wire:click="sendNotification">Send Notification</button>
</div>
Create the ExampleNotification class if it doesn't exist. This is a sample notification class that will be sent to users.
// app/Notifications/ExampleNotification.php


namespace App\Notifications;

use Illuminate\Bus\Queueable;
use Illuminate\Contracts\Queue\ShouldQueue;
use Illuminate\Notifications\Notification;
use Illuminate\Notifications\Messages\MailMessage;

class ExampleNotification extends Notification
{
    use Queueable;

    public function via($notifiable)
    {
        return ['mail'];
    }

    public function toMail($notifiable)
    {
        return (new MailMessage)
                    ->line('This is an example notification.')
                    ->action('View Notification', url('/'));
    }

    public function toArray($notifiable)
    {
        return [
            // Notification data if needed
        ];
    }
}
Use the NotificationManager Livewire component in your Blade views or other Livewire components to manage notifications.
With this setup, you have a Livewire component (NotificationManager) that allows you to select a user and send a notification to that user using the ExampleNotification class. Adjust the code as needed based on your specific notification requirements and the chosen third-party library.
Livewire Validation using third party library
// app/Http/Livewire/UserCrud.php

namespace App\Http\Livewire;

use Livewire\Component;
use App\Models\User;
use Illuminate\Validation\Rule;

class UserCrud extends Component
{
    public $name;
    public $email;
    public $user;

    protected $rules = [
        'name' => 'required|string|max:255',
        'email' => 'required|email|unique:users,email',
    ];

    public function render()
    {
        $this->user = new User(); // Initialize a new user instance
        $users = User::all(); // Fetch all users
        return view('livewire.user-crud', ['users' => $users]);
    }

    public function save()
    {
        $this->validate();

        // Create or update user based on the presence of user id
        if ($this->user->id) {
            $this->user->update([
                'name' => $this->name,
                'email' => $this->email,
            ]);
        } else {
            $this->user = User::create([
                'name' => $this->name,
                'email' => $this->email,
            ]);
        }

        $this->resetInputFields(); // Reset input fields after successful save
    }

    public function edit($id)
    {
        $this->user = User::findOrFail($id); // Find user by id
        $this->name = $this->user->name;
        $this->email = $this->user->email;
    }

    public function delete($id)
    {
        User::findOrFail($id)->delete(); // Find and delete user by id
    }

    private function resetInputFields()
    {
        $this->name = '';
        $this->email = '';
    }
}
Question
list out 3 party library examples

Top comments (0)