When user submit form which wire directive is called to perform action
which directive is used to perform confirm message
which directive is used when user types on search box
How to access html element that triggered the event via $event.target
how livewire handle third party library
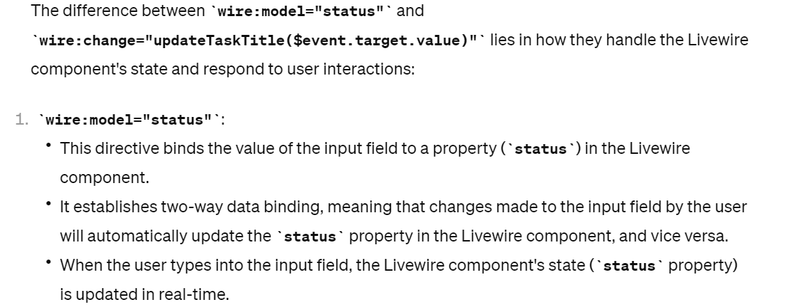
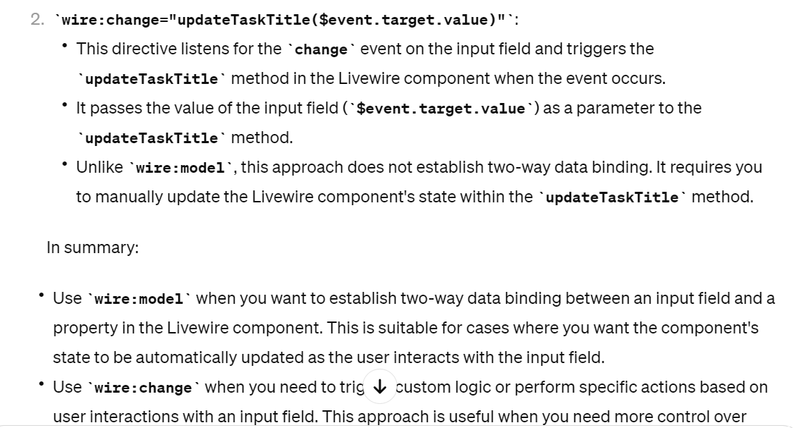
Difference between wire:model and wire:change directive in laravel livewire
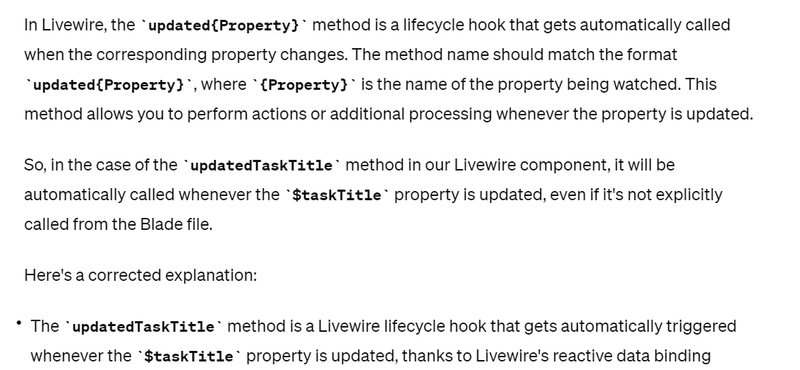
how wire:model perform two way binding and show effect on component side using lifecycle method
How to call dependency injection method in laravel livewire
When user submit form which wire directive is called to perform action
Livewire actions are methods on your component that can be triggered by frontend interactions like clicking a button or submitting a form. They provide the developer experience of being able to call a PHP method directly from the browser, allowing you to focus on the logic of your application without getting bogged down writing boilerplate code connecting your application's frontend and backend.
Let's explore a basic example of calling a save action on a CreatePost component:
<?php

namespace App\Livewire;

use Livewire\Component;
use App\Models\Post;

class CreatePost extends Component
{
    public $title = '';

    public $content = '';

    public function save()
    {
        Post::create([
            'title' => $this->title,
            'content' => $this->content,
        ]);

        return redirect()->to('/posts');
    }

    public function render()
    {
        return view('livewire.create-post');
    }
}
<form wire:submit="save">
    <input type="text" wire:model="title">

    <textarea wire:model="content"></textarea>

    <button type="submit">Save</button>
</form>
In the above example, when a user submits the form by clicking "Save", wire:submit intercepts the submit event and calls the save() action on the server.
In essence, actions are a way to easily map user interactions to server-side functionality without the hassle of submitting and handling AJAX requests manually.
which directive is used to perform confirm message
To demonstrate the usage of wire:confirm in a CRUD (Create, Read, Update, Delete) operation using Laravel Livewire, let's create a simple example of deleting an item from a list.
Here's a basic implementation:
Create a Livewire Component: First, create a Livewire component. Let's call it ItemComponent.
Add HTML Markup: Within the Livewire component's view file (item-component.blade.php), add HTML markup to display a list of items and allow users to delete them.
Implement Delete Method: Add a method in the Livewire component to handle the deletion of items.
Use wire:confirm: Use the wire:confirm directive to display a confirmation modal before deleting an item.
Here's the code:
// ItemComponent.php

namespace App\Http\Livewire;

use Livewire\Component;
use App\Models\Item;

class ItemComponent extends Component
{
    public $items;

    public function mount()
    {
        // Fetch items from the database
        $this->items = Item::all();
    }

    public function deleteItem($id)
    {
        // Find the item
        $item = Item::find($id);

        // Delete the item
        $item->delete();

        // Refresh items after deletion
        $this->items = Item::all();
    }

    public function render()
    {
        return view('livewire.item-component');
    }
}
<!-- item-component.blade.php -->

<div>
    <h2>Items List</h2>

    <ul>
        @foreach ($items as $item)
            <li>
                {{ $item->name }}

                <!-- Delete Button with confirmation -->
                <button wire:click="deleteItem({{ $item->id }})" wire:confirm="Are you sure you want to delete this item?">Delete</button>
            </li>
        @endforeach
    </ul>
</div>
In this example:
We have a Livewire component ItemComponent.
The mount() method fetches items from the database and assigns them to the $items property.
The deleteItem($id) method handles item deletion. It finds the item by its ID, deletes it, and then refreshes the list of items.
In the HTML markup, we display a list of items with a delete button for each item. The wire:confirm directive is used to show a confirmation modal when the delete button is clicked.
Make sure you have the necessary routes and models set up according to your application structure.
which directive is used when user types on search box
You can use one of Livewire's convenient aliases to narrow down key press event listeners to a specific key or combination of keys.
For example, to perform a search when a user hits Enter after typing into a search box, you can use wire:keydown.enter:
<input wire:model="query" wire:keydown.enter="searchPosts">
How to access html element that triggered the event via $event.target
let's create a CRUD example in Laravel Livewire that contains input fields, a dropdown, a checkbox, and a radio button element. We'll then use $event.target.value with each of these elements to demonstrate its usage.
Livewire Component (TaskComponent.php):
// TaskComponent.php

namespace App\Http\Livewire;

use Livewire\Component;

class TaskComponent extends Component
{
    public $taskTitle;
    public $priority;
    public $isCompleted;

     public function saveTask()
    {
        // Validate input fields (if necessary)
        $validatedData = $this->validate([
            'taskTitle' => 'required|string',
            'priority' => 'required|string|in:low,medium,high',
            'isCompleted' => 'boolean',
            'description' => 'nullable|string',
        ]);

        // Create a new Task instance with the validated data
        $task = new Task($validatedData);

        // Save the task to the database
        $task->save();

        // Optionally, you can reset the input fields after saving the task
        $this->reset([
            'taskTitle',
            'priority',
            'isCompleted',
            'description',
        ]);

        // Redirect or show a success message
        session()->flash('message', 'Task saved successfully!');
    }


    public function render()
    {
        return view('livewire.task-component');
    }
}
Livewire View (task-component.blade.php):
<!-- task-component.blade.php -->

<div>
    <label for="taskTitle">Task Title:</label>
    <input type="text" id="taskTitle" wire:model="taskTitle" wire:change="updateTaskTitle($event.target.value)">

    <label for="priority">Priority:</label>
    <select id="priority" wire:model="priority" wire:change="updatePriority($event.target.value)">
        <option value="low">Low</option>
        <option value="medium">Medium</option>
        <option value="high">High</option>
    </select>

    <div>
        <label>
            <input type="checkbox" wire:model="isCompleted" wire:change="updateCompletionStatus($event.target.checked)">
            Completed
        </label>
    </div>

    <div>
        <label>
            <input type="radio" name="status" value="active" wire:model="status" wire:change="updateStatus($event.target.value)">
            Active
        </label>
        <label>
            <input type="radio" name="status" value="inactive" wire:model="status" wire:change="updateStatus($event.target.value)">
            Inactive
        </label>
    </div>

    <button wire:click="saveTask">Save Task</button>
</div>
In this example:
- We have a Livewire component TaskComponent with properties $taskTitle, $priority, $isCompleted, and $status to represent task details.
- In the Livewire view, we have input fields for task title, a dropdown for priority, a checkbox for completion status, and radio buttons for task status.
- We use wire:model to bind the input fields, dropdown, checkbox, and radio buttons to their respective Livewire component properties.
- We use wire:change with each element to trigger Livewire methods when their values change. We pass $event.target.value or $event.target.checked as parameters to these methods.
- In the Livewire component, we have methods such as updateTaskTitle, updatePriority, updateCompletionStatus, and updateStatus to handle changes to each element's value. These methods would typically contain logic to update the corresponding property value in the component.
- Finally, we have a saveTask method to handle saving the task to the database .
how livewire handle third party library
let's create a CRUD example in Laravel Livewire that contains input fields, a dropdown, a checkbox, a radio button, and a rich text editor using Trix. We'll then use wire:trix-change with Trix to demonstrate its usage.
Livewire Component (TaskComponent.php):
// TaskComponent.php

namespace App\Http\Livewire;

use Livewire\Component;
use App\Models\Task; // Import the Task model

class TaskComponent extends Component
{
    public $taskTitle;
    public $priority;
    public $isCompleted;
    public $description;

    public function saveTask()
    {
        // Validate input fields (if necessary)
        $validatedData = $this->validate([
            'taskTitle' => 'required|string',
            'priority' => 'required|string|in:low,medium,high',
            'isCompleted' => 'boolean',
            'description' => 'nullable|string',
        ]);

        // Create a new Task instance with the validated data
        $task = new Task($validatedData);

        // Save the task to the database
        $task->save();

        // Optionally, you can reset the input fields after saving the task
        $this->reset([
            'taskTitle',
            'priority',
            'isCompleted',
            'description',
        ]);

        // Redirect or show a success message
        session()->flash('message', 'Task saved successfully!');
    }

    public function updateDescription($value)
    {
        $this->description = $value;
    }

    public function render()
    {
        return view('livewire.task-component');
    }
}
Livewire View (task-component.blade.php):
<!-- task-component.blade.php -->

<div>
    <label for="taskTitle">Task Title:</label>
    <input type="text" id="taskTitle" wire:model="taskTitle">

    <label for="priority">Priority:</label>
    <select id="priority" wire:model="priority">
        <option value="low">Low</option>
        <option value="medium">Medium</option>
        <option value="high">High</option>
    </select>

    <div>
        <label>
            <input type="checkbox" wire:model="isCompleted">
            Completed
        </label>
    </div>

    <div>
        <label>
            <input type="radio" name="status" value="active" wire:model="status">
            Active
        </label>
        <label>
            <input type="radio" name="status" value="inactive" wire:model="status">
            Inactive
        </label>
    </div>

    <div>
        <label for="description">Description:</label>
        <trix-editor id="description" wire:model="description" wire:trix-change="updateDescription"></trix-editor>
    </div>

    <button wire:click="saveTask">Save Task</button>
</div>
In this example:
- We have a Livewire component TaskComponent with properties $taskTitle, $priority, $isCompleted, and $status to represent task details.
- We also have a $description property to store the task description, which is edited using a rich text editor (Trix).
- In the Livewire view, we have input fields for task title, a dropdown for priority, a checkbox for completion status, radio buttons for task status, and a Trix editor for the description.
- We use wire:model to bind the input fields, dropdown, checkbox, radio buttons, and Trix editor to their respective Livewire component properties.
- We use wire:trix-change with the Trix editor to trigger the updateDescription method in the Livewire component whenever the content of the Trix editor changes.
- In the Livewire component, we have a updateDescription method to handle changes to the task description. This method would typically contain logic to update the $description property in the component.
- Finally, we have a saveTask method to handle saving the task to the database .
Difference between wire:model and wire:change directive in laravel livewire
how wire:model perform two way binding
<!-- task-component.blade.php -->

<div>
    <label for="taskTitle">Task Title:</label>
    <input type="text" id="taskTitle" wire:model="taskTitle">

    <p>Current Task Title: {{ $taskTitle }}</p>

    <button wire:click="saveTask">Save Task</button>
</div>
TaskComponent.php
namespace App\Http\Livewire;

use Livewire\Component;
use App\Models\Task; // Import the Task model

class TaskComponent extends Component
{
    public $taskTitle;

    public function updatedTaskTitle()
    {
        // This method is automatically called when the $taskTitle property is updated
        // You can perform any actions you need here, such as logging or additional processing
        // For example, you could trigger a database update here
        $this->updateTaskInDatabase($this->taskTitle);
    }

    public function saveTask()
    {
        // Save task to the database
        // Here you would typically handle saving task data to the database
        $this->updateTaskInDatabase($this->taskTitle);
    }

    private function updateTaskInDatabase($taskTitle)
    {
        // Update task in the database
        // For demonstration purposes, this method simply logs the task title
        // In a real application, you would replace this with your database logic
        // For example:
        // Task::where('id', $taskId)->update(['title' => $taskTitle]);

        // Log the updated task title
        \Log::info("Task title updated: $taskTitle");
    }

    public function render()
    {
        return view('livewire.task-component');
    }
}
Note
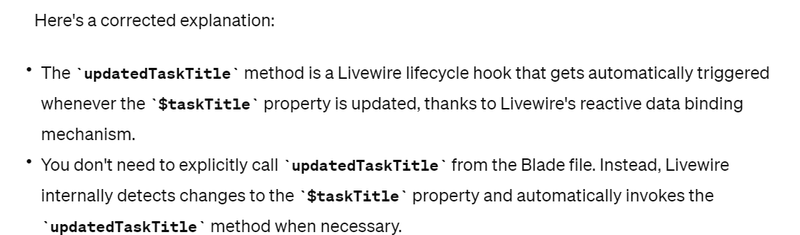
The updatedTaskTitle method is not directly called from the Blade file. It is a lifecycle hook provided by Livewire, and it is automatically triggered when the corresponding property ($taskTitle in this case) is updated.
How to call dependency injection method in laravel livewire
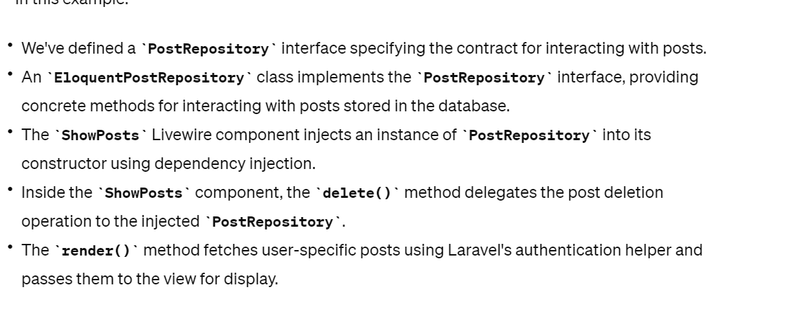
To explain dependency injection with the PostRepository in Laravel Livewire, let's first create the necessary components.
PostRepository Interface (PostRepository.php):
<?php

namespace App\Repositories;

interface PostRepository
{
    public function deletePost($postId);
}
EloquentPostRepository (EloquentPostRepository.php):
php
Copy code
<?php

namespace App\Repositories;

use App\Models\Post;

class EloquentPostRepository implements PostRepository
{
    public function deletePost($postId)
    {
        // Logic to delete post from the database
        Post::findOrFail($postId)->delete();
    }
}
Livewire Component (ShowPosts.php):
<?php

namespace App\Http\Livewire;

use Illuminate\Support\Facades\Auth;
use Livewire\Component;
use App\Repositories\PostRepository;

class ShowPosts extends Component
{
    protected $posts;

    public function __construct(PostRepository $posts)
    {
        $this->posts = $posts;
    }

    public function delete($postId)
    {
        $this->posts->deletePost($postId);
    }

    public function render()
    {
        return view('livewire.show-posts', [
            'posts' => Auth::user()->posts,
        ]);
    }
}
<!-- show-posts.blade.php -->

<div>
    <h2>My Posts</h2>

    <ul>
        @foreach($posts as $post)
            <li>{{ $post->title }} - <button wire:click="delete({{ $post->id }})">Delete</button></li>
        @endforeach
    </ul>
</div>

another way
<?php

namespace App\Livewire;

use Illuminate\Support\Facades\Auth;
use Livewire\Component;
use App\Repositories\PostRepository;

class ShowPosts extends Component
{
    public function delete(PostRepository $posts, $postId)
    {
        $posts->deletePost($postId);
    }

    public function render()
    {
        return view('livewire.show-posts', [
            'posts' => Auth::user()->posts,
        ]);
    }
}
<div>
    @foreach ($posts as $post)
        <div wire:key="{{ $post->id }}">
            <h1>{{ $post->title }}</h1>
            <span>{{ $post->content }}</span>

            <button wire:click="delete({{ $post->id }})">Delete</button>
        </div>
    @endforeach
</div>
how Livewire methods on your component is called directly from blade file without route or ajax route or javascript
In Laravel Livewire, you can't directly call Livewire methods from a Blade file without using JavaScript or AJAX routes. Livewire operates on the principle of reactivity, where changes in the frontend trigger corresponding changes in the backend and vice versa. This is facilitated through Livewire's two-way data binding and event system, which relies on JavaScript to interact with Livewire components.
However, you can achieve a similar result by using Livewire's built-in directive wire:click to trigger Livewire methods from HTML elements. This allows you to call Livewire methods directly from the Blade file without needing to define additional routes or JavaScript listeners.
Here's an example:
Suppose you have a Livewire component named CounterComponent with a method named increment():
CounterComponent.php
namespace App\Http\Livewire;

use Livewire\Component;

class CounterComponent extends Component
{
    public $count = 0;

    public function increment()
    {
        $this->count++;
    }

    public function render()
    {
        return view('livewire.counter-component');
    }
}
In your Blade file, you can call the increment() method directly using the wire:click directive:
<!-- In your Blade file -->
<div>
    <button wire:click="increment" class="btn btn-primary">Increment</button>
    <p>Count: {{ $count }}</p>
</div>
When the button is clicked, the increment() method of the CounterComponent Livewire component will be called directly. Livewire automatically handles the interaction and updates the UI accordingly without the need for explicit AJAX requests or JavaScript listeners.
how Livewire methods on your component is called directly from blade file using javascript without route or ajax route
In Laravel Livewire, you can't directly call Livewire methods from a Blade file without using JavaScript or AJAX routes. Livewire operates on the principle of reactivity, where changes in the frontend trigger corresponding changes in the backend and vice versa. This is facilitated through Livewire's two-way data binding and event system, which relies on JavaScript to interact with Livewire components.
However, you can achieve a similar result by using Livewire's built-in directive wire:click to trigger Livewire methods from HTML elements. This allows you to call Livewire methods directly from the Blade file without needing to define additional routes or JavaScript listeners.
Here's an example:
Suppose you have a Livewire component named CounterComponent with a method named increment():
In Laravel Livewire, you can call Livewire methods directly from a Blade file using Livewire's JavaScript hooks. Livewire provides a way to interact with Livewire components directly from the browser without the need for explicit AJAX requests or routes.
Here's how you can achieve it:
Include Livewire JavaScript: Ensure that Livewire JavaScript is included in your layout or Blade file. You can include it using the @livewireScripts directive.
<script src="{{ asset('vendor/livewire/livewire.js') }}" defer></script>
@livewireScripts
Call Livewire Methods: You can call Livewire methods directly from your Blade file using Livewire's JavaScript hooks. Livewire components are identified by their component tag name.
For example, let's assume you have a Livewire component named CounterComponent with a method named increment():
// CounterComponent.php
<?php

namespace App\Http\Livewire;

use Livewire\Component;

class CounterComponent extends Component
{
    public $count = 0;

    public function increment()
    {
        $this->count++;
    }

    public function render()
    {
        return view('livewire.counter-component');
    }
}
You can call the increment() method directly from your Blade file like this:
<button wire:click="$emit('increment')" class="btn btn-primary">Increment</button>
Listen for Livewire Events: You can listen for Livewire events in your JavaScript code and handle them accordingly. In this case, we're emitting a custom event named increment when the button is clicked.
// In your JavaScript file
document.addEventListener('livewire:load', function () {
    Livewire.on('increment', function () {
        window.livewire.emit('increment');
    });
});
In this way, when the button is clicked, Livewire emits the increment event, which is then captured by the JavaScript listener. The JavaScript listener then emits the increment event back to the Livewire component, triggering the increment() method defined in the Livewire component.
Question
how Livewire methods on your component is called directly from blade file without route or ajax route
how Livewire methods on your component is called directly from blade file using javascript without route or ajax route
how to delete items after find single record
how to Refresh items after deletion
How to save data using create methods
After save data redirect to route
how to reset field after save data immediately
After save data how to give flash message
when we select checkbox and radio button apply boolean value and trigger livewire component function updateCompletionStatus

Top comments (0)