Directives are one of the most important concepts in Angular, In this section, we will see what is a directive and its types and how to create our own directives.
What is meant by directives in Angular?
Directives are classes that add new behavior or modify the existing behavior to the elements in the template.
Basically directives are used to manipulate the DOM, for example adding/removing the element from DOM or changing the appearance of the DOM elements.
Types of directives
- Component directive
- Structural directive
- Attribute directive
- Component directive Components are special directives in Angular. They are the directive with a template
It might confuse you a bit, but if you see the definition of the directive, it says directives are used to manipulate the DOM, so now if you think what component is doing, it is actually showing something in DOM, hence we can say component is also a directive with a template (template or templateUrls).
Structural directive
Structural directives are used to change the DOM layout by adding and removing DOM elements. It basically changes the structure of the DOM
Examples of structural directives are ngIf, ngFor, ngSwitch.
*ngIf — adds or removes element from DOM.
*ngFor — renders list of elements on every iteration.
All structural Directives are preceded by Asterix (*)symbol.
Attribute directive
Attribute directives are used to change the appearance or behavior of an element.
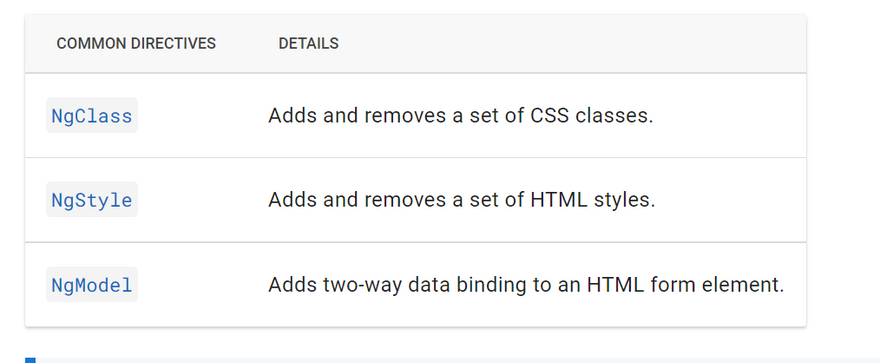
Examples of attributes directives are ngStyle, ngClass, ngModel
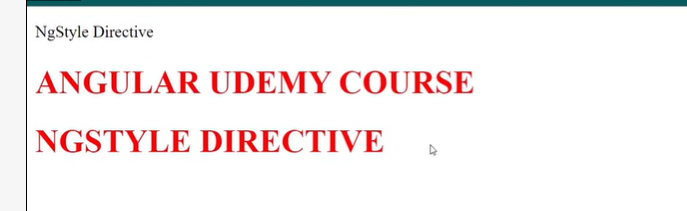
ngStyle — used to apply styles that will change the appearance.
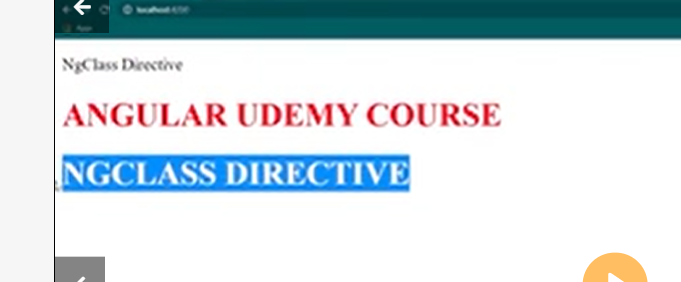
ngClass — used to apply CSS classes to change the appearance.
Built-in attribute directives
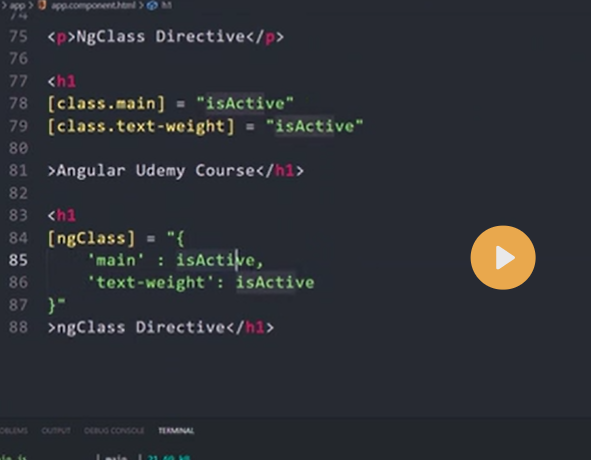
Using NgClass with an expression
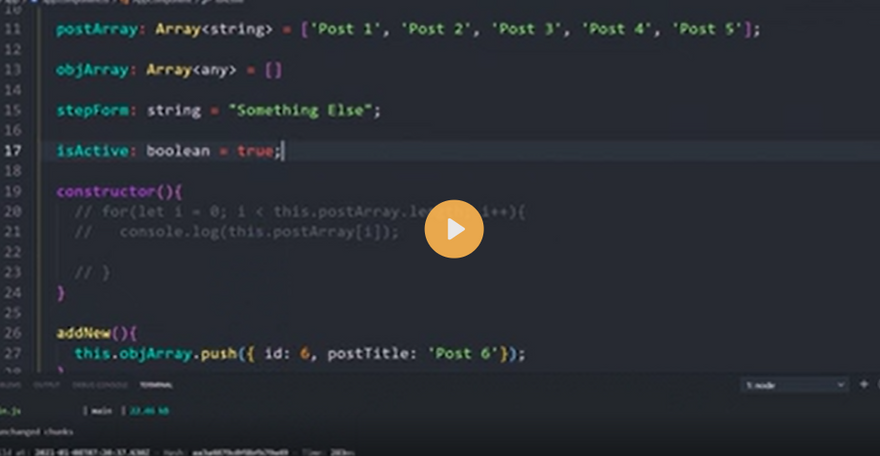
On the element you'd like to style, add [ngClass] and set it equal to an expression. In this case, isSpecial is a boolean set to true in app.component.ts. Because isSpecial is true, ngClass applies the class of special to the
<div [ngClass]="isSpecial ? 'special' : ''">This div is special</div>
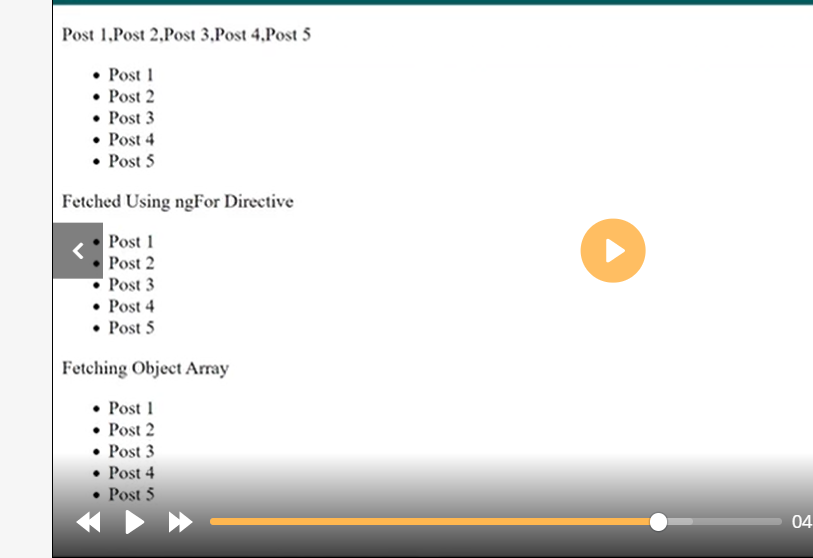
ng-for-directive

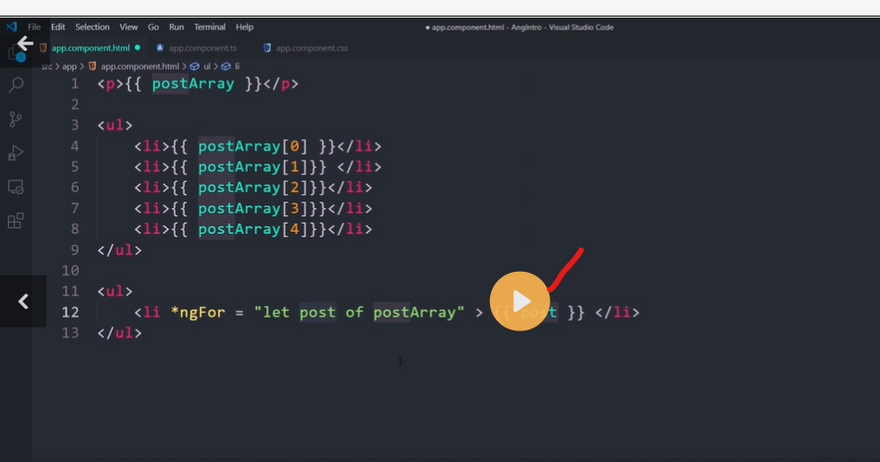
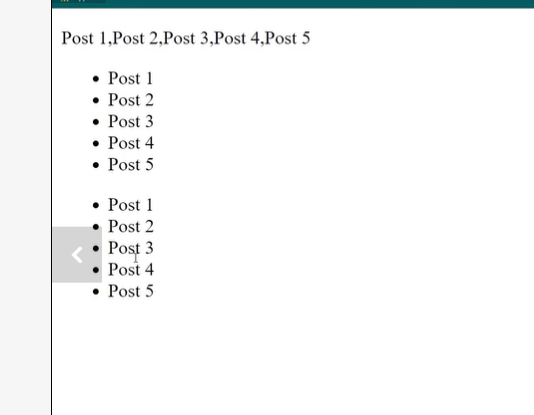
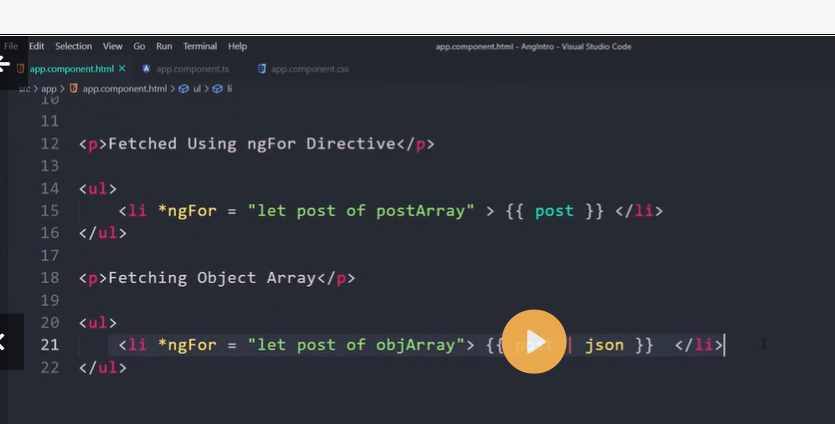
Listing items with NgFor
Define a block of HTML that determines how Angular renders a single item.
To list your items, assign the shorthand let item of items to *ngFor.
<div *ngFor="let item of items">{{item.name}}</div>
The string "let item of items" instructs Angular to do the following:
- Store each item in the items array in the local item looping variable
- Make each item available to the templated HTML for each iteration
- Translate "let item of items" into an around the host element
- Repeat the for each item in the list
Repeating a component view
To repeat a component element, apply *ngFor to the selector. In the following example, the selector is .
<app-item-detail *ngFor="let item of items" [item]="item"></app-item-detail>
Reference a template input variable, such as item, in the following locations:
Within the ngFor host element
Within the host element descendants to access the item's properties
The following example references item first in an interpolation and then passes in a binding to the item property of the component.
<div *ngFor="let item of items">{{item.name}}</div>
<!-- . . . -->
<app-item-detail *ngFor="let item of items" [item]="item"></app-item-detail>
Getting the index of *ngFor
<div *ngFor="let item of items; let i=index">{{i + 1}} - {{item.name}}</div>
Get the index of *ngFor in a template input variable and use it in the template.
In the *ngFor, add a semicolon and let i=index to the shorthand. The following example gets the index in a variable named i and displays it with the item name.
Repeating elements when a condition is true
To repeat a block of HTML when a particular condition is true, put the *ngIf on a container element that wraps an *ngFor element.
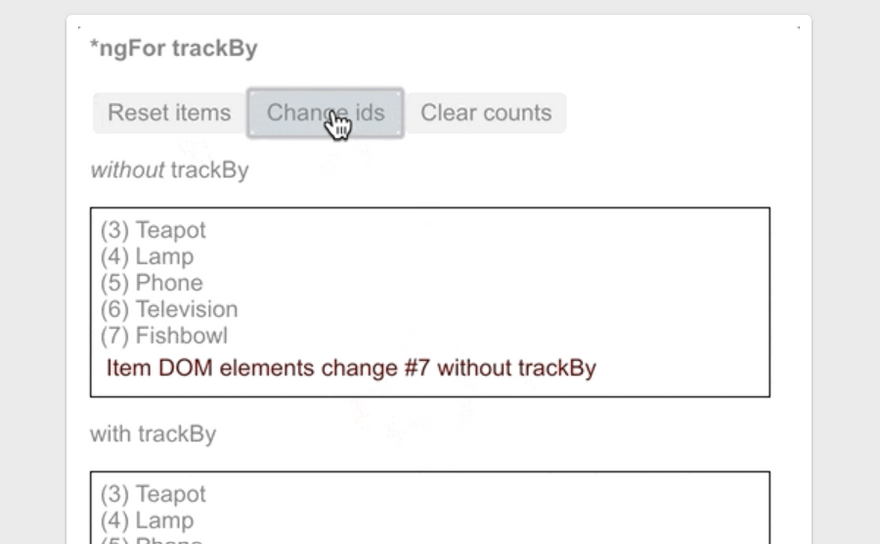
Tracking items with *ngFor trackBy
Reduce the number of calls your application makes to the server by tracking changes to an item list. With the *ngFor trackBy property, Angular can change and re-render only those items that have changed, rather than reloading the entire list of items.
Add a method to the component that returns the value NgFor should track. In this example, the value to track is the item's id. If the browser has already rendered id, Angular keeps track of it and doesn't re-query the server for the same id.
trackByItems(index: number, item: Item): number { return item.id; }
In the shorthand expression, set trackBy to the trackByItems() method.
<div *ngFor="let item of items; trackBy: trackByItems">
  ({{item.id}}) {{item.name}}
</div>
Change ids creates new items with new item.ids. In the following illustration of the trackBy effect, Reset items creates new items with the same item.ids.
With no trackBy, both buttons trigger complete DOM element replacement.
With trackBy, only changing the id triggers element replacement.
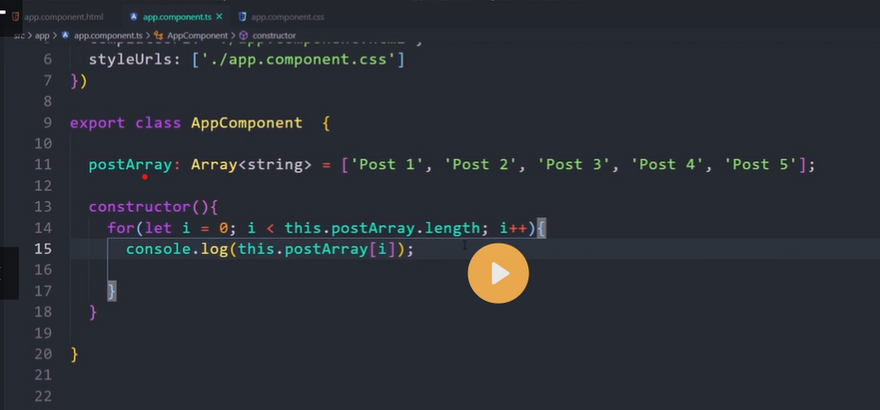
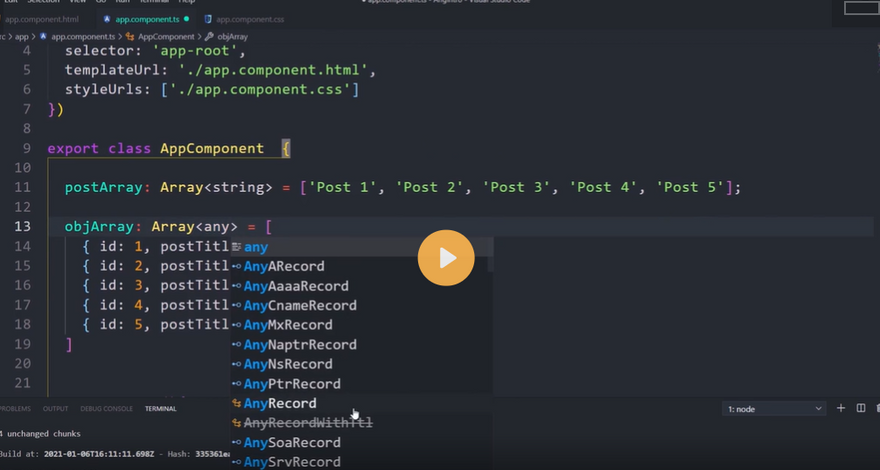
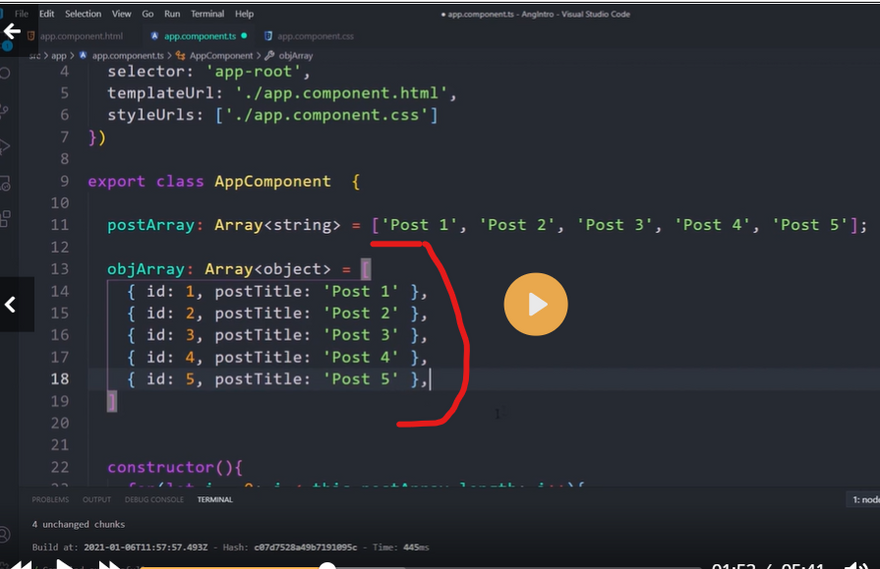
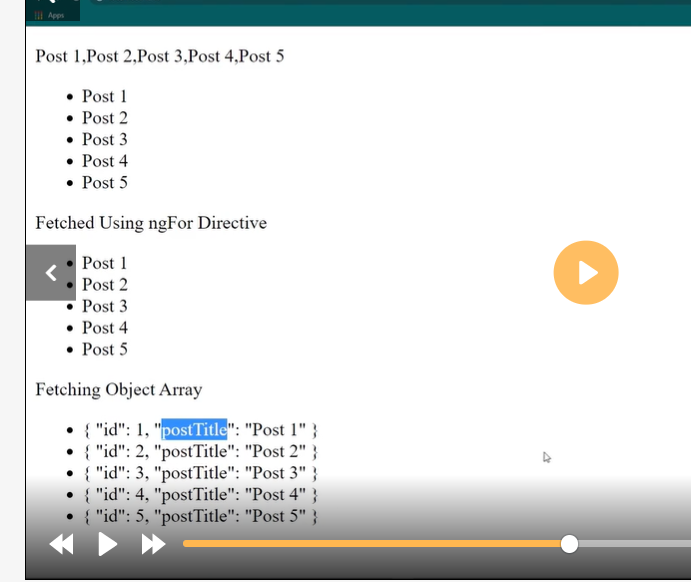
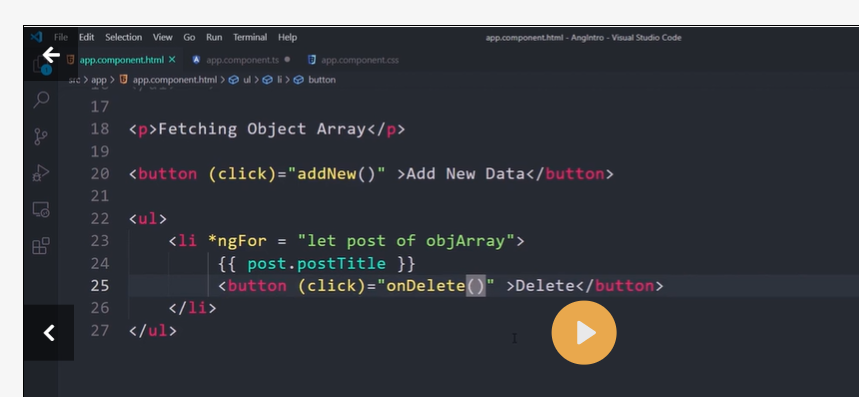
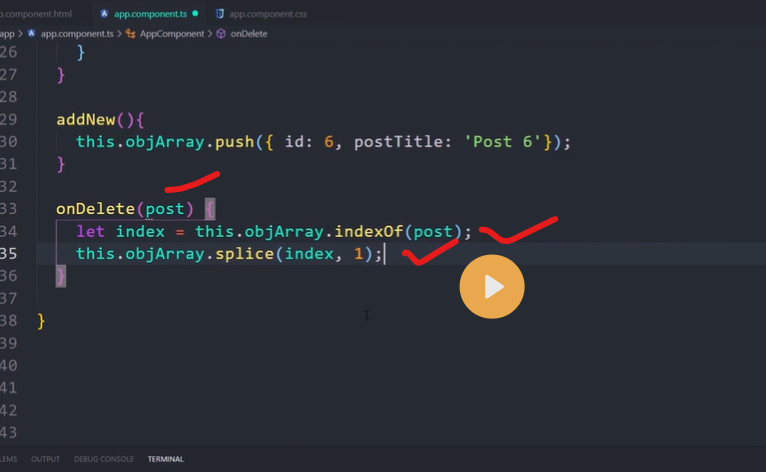
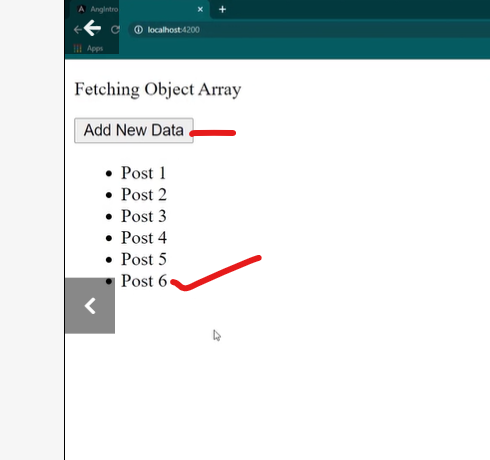
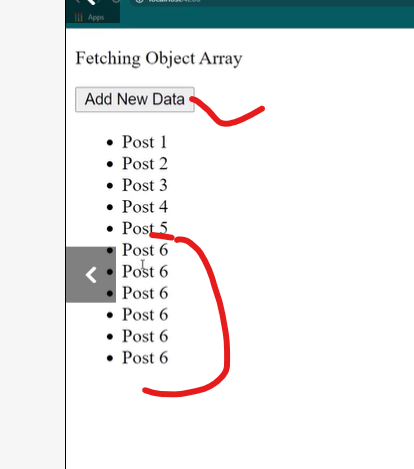
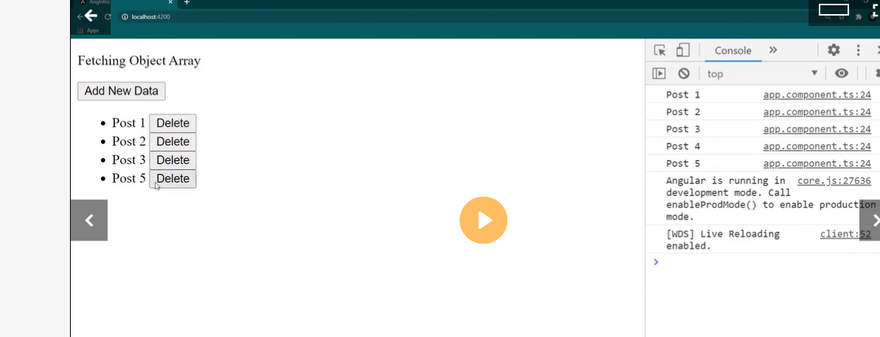
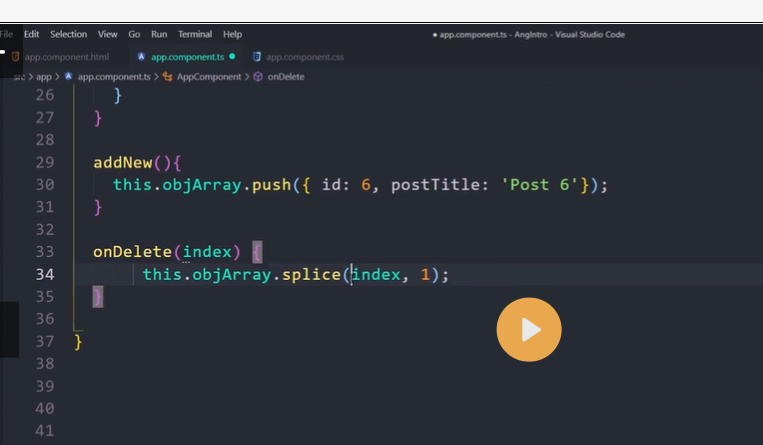
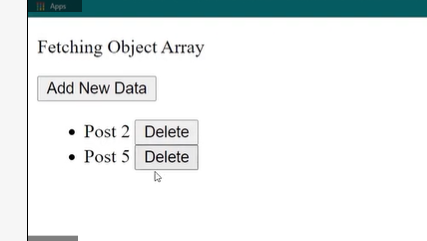
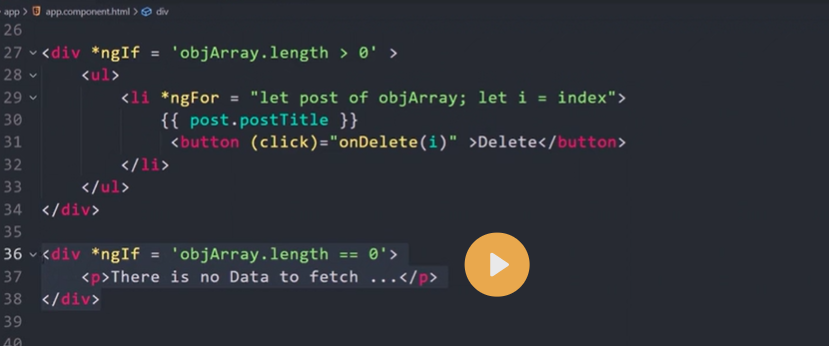
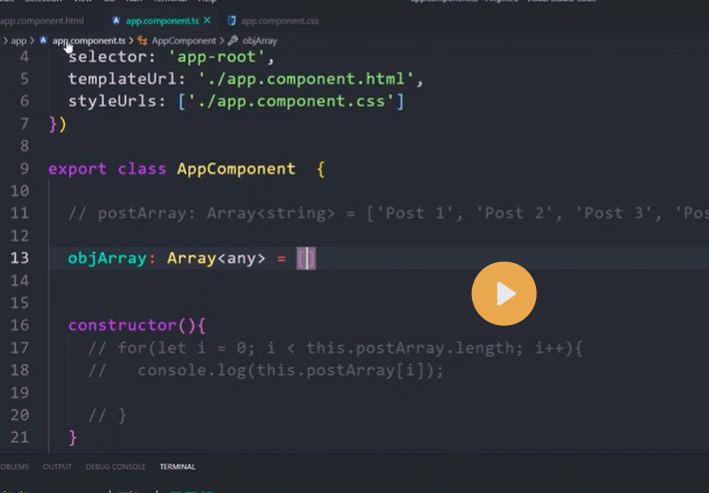
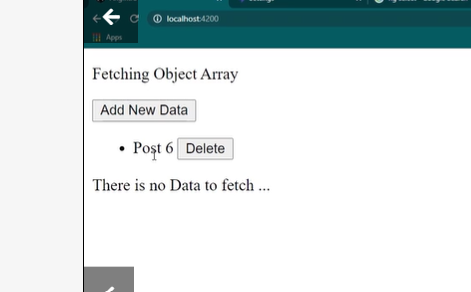
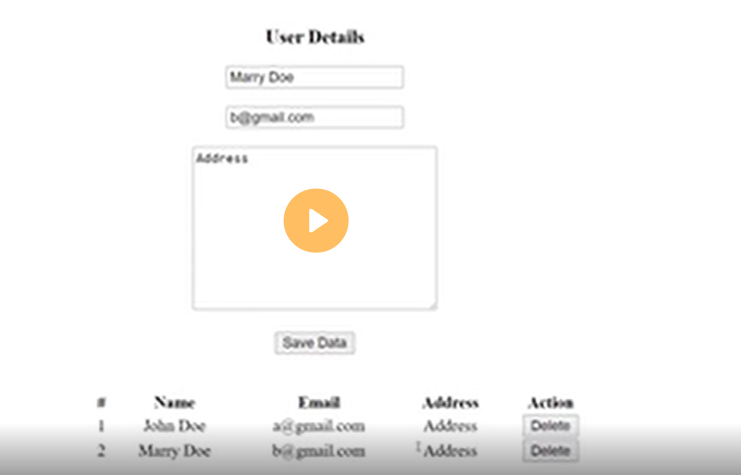
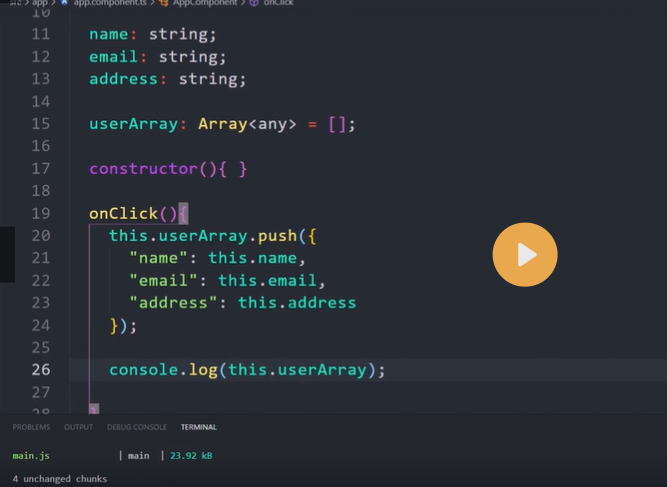
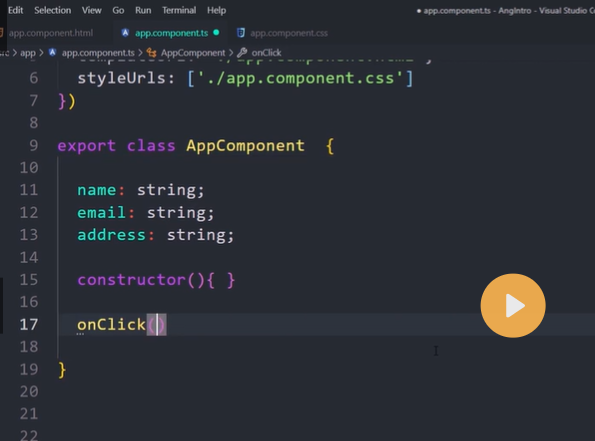
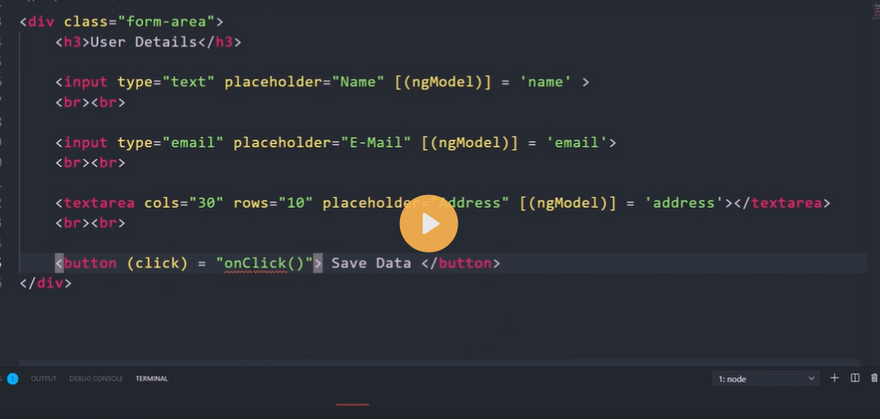
fetching object array

Angular change Detection
ng-for-index

ng-if
Adding or removing an element with NgIf
Add or remove an element by applying an NgIf directive to a host element.
When NgIf is false, Angular removes an element and its descendants from the DOM. Angular then disposes of their components, which frees up memory and resources.
To add or remove an element, bind *ngIf to a condition expression such as isActive in the following example.
<app-item-detail *ngIf="isActive" [item]="item"></app-item-detail>
When the isActive expression returns a truthy value, NgIf adds the ItemDetailComponent to the DOM. When the expression is falsy, NgIf removes the ItemDetailComponent from the DOM and disposes of the component and all of its subcomponents.
For more information on NgIf and NgIfElse, see the NgIf API documentation.
Guarding against null
By default, NgIf prevents display of an element bound to a null value.
To use NgIf to guard a
, add *ngIf="yourProperty" to the . In the following example, the currentCustomer name appears because there is a currentCustomer.<div *ngIf="currentCustomer">Hello, {{currentCustomer.name}}</div>
However, if the property is null, Angular does not display the
. In this example, Angular does not display the nullCustomer because it is null.<div *ngIf="nullCustomer">Hello, <span>{{nullCustomer}}</span></div>
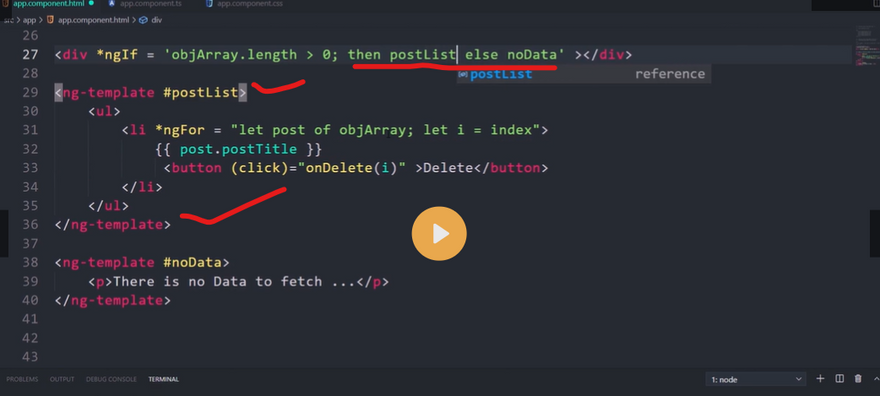
ng-template

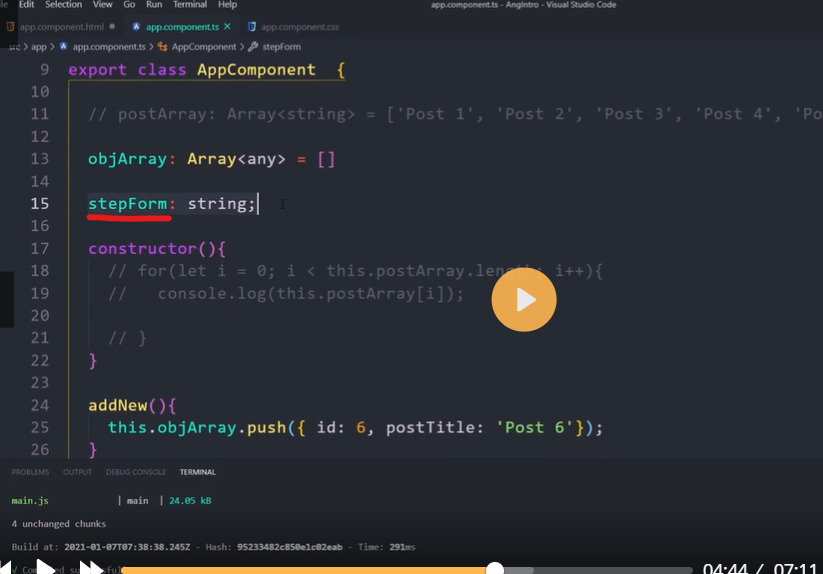
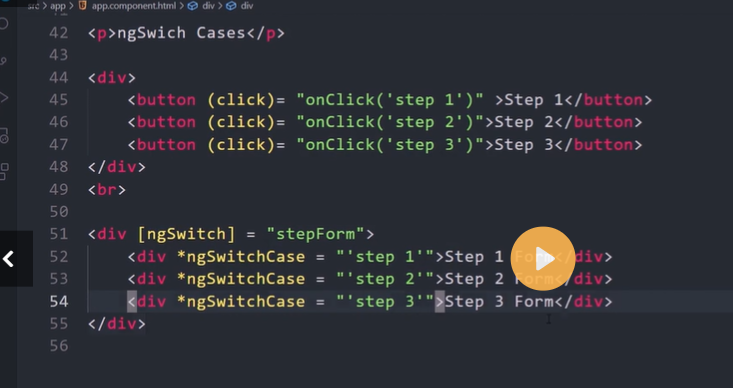
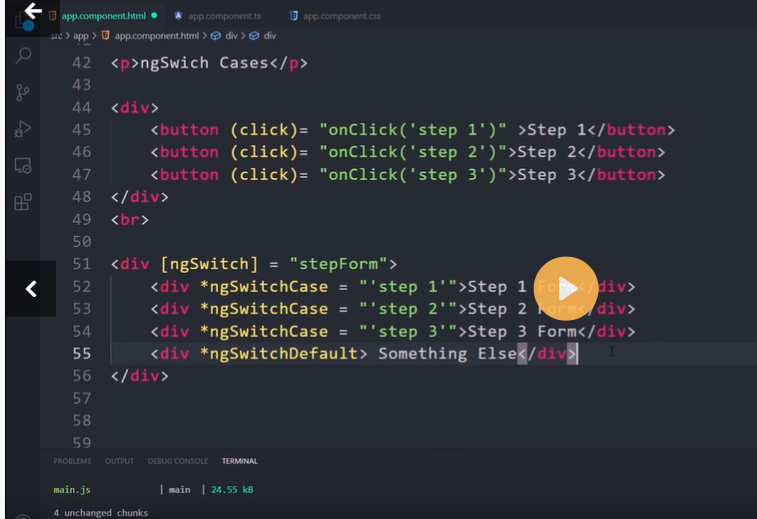
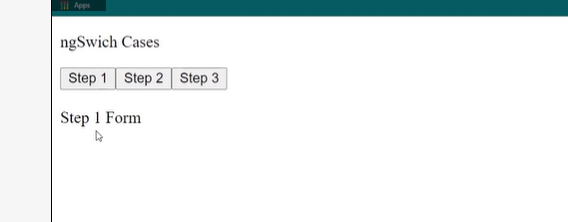
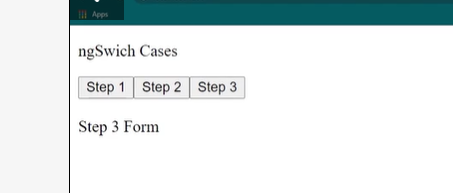
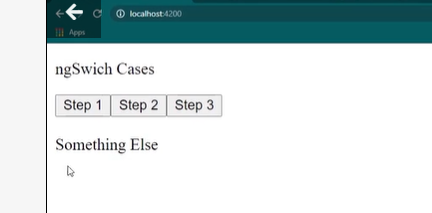
ng-switch
ng-style


ng-class

Solution

Top comments (0)