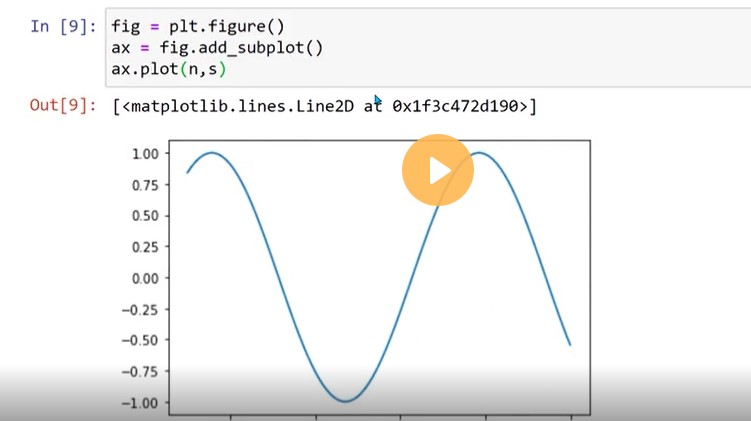
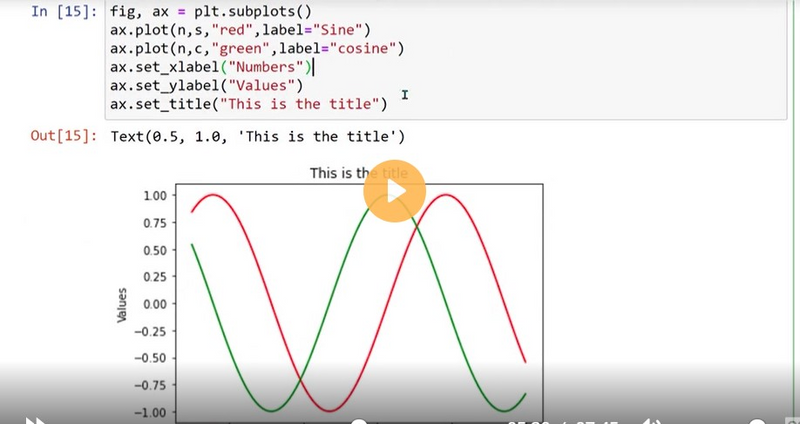
Creating a subplot and display in 2 different plots
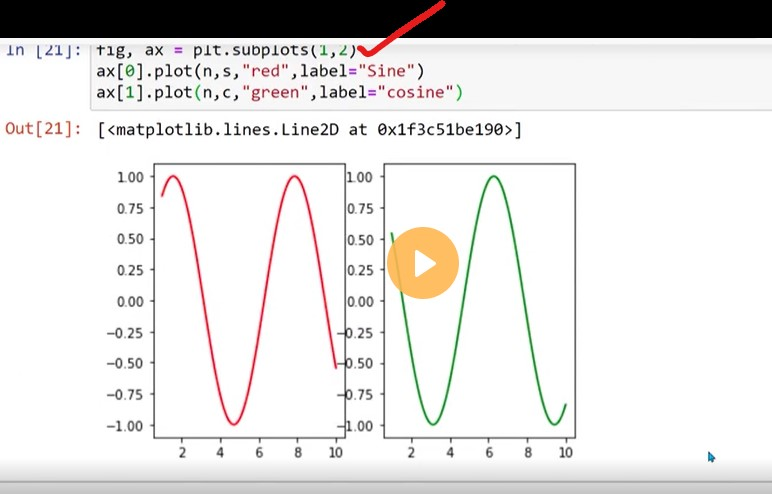
Creating a subplot of 1 rows by 2 columns and display 2 different plots
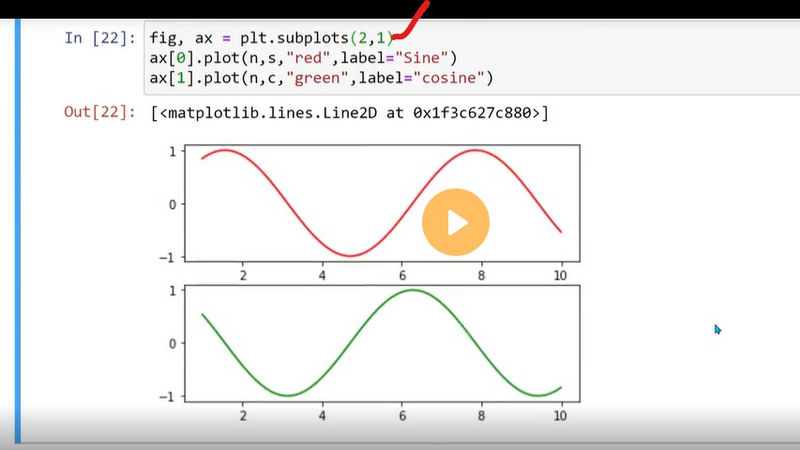
Creating a subplot of 2 rows by 1 columns and display 2 different plots
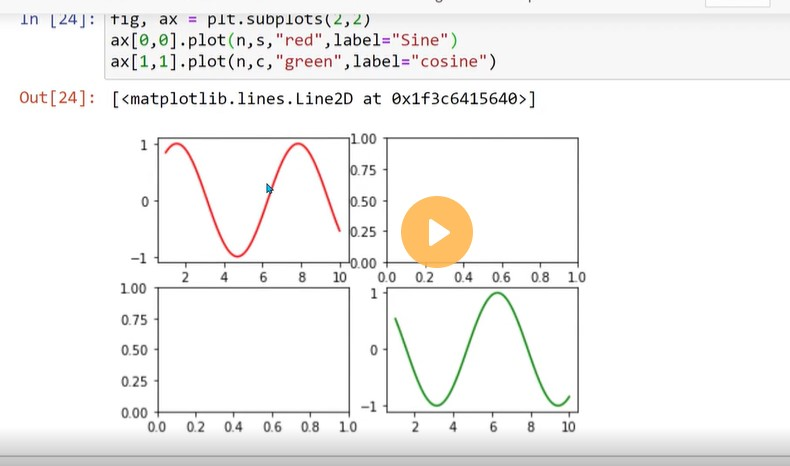
Creating a subplot of 2 rows by 2 columns and display 4 different plots
To plot subplots using plt.subplots(1, 2) or plt.subplots(2, 1) in Matplotlib, save them in a database, and render them in a Django template, you can follow these steps:
Step 1: Install Matplotlib and Django
Ensure that Matplotlib and Django are installed in your Django environment. You can install them using pip:
pip install matplotlib
pip install django
Step 2: Set up your Django project and app
Create a new Django project and an app within the project if you haven't already done so. You can use the following command to create a new app:
django-admin startapp myapp
Step 3: Create a model for the subplots in your app
In your app's models.py file, define a model that includes fields to store the subplot images and associated data. For example:
from django.db import models

class Subplot(models.Model):
    image_1 = models.ImageField(upload_to='subplots/')
    image_2 = models.ImageField(upload_to='subplots/')
    title = models.CharField(max_length=100)
    # Add additional fields as needed
Step 4: Generate the subplots and save them in the database
In your Django view or script, import the necessary libraries and create a function to generate the subplots. Use the savefig() function to save the subplots as image files, and then save the subplots and associated data in the database.
import matplotlib.pyplot as plt
from myapp.models import Subplot

def generate_subplots():
    fig, axes = plt.subplots(1, 2)  # or plt.subplots(2, 1) for vertical subplots

    # Generate data for the subplots
    x = [1, 2, 3, 4, 5]
    y1 = [1, 4, 9, 16, 25]
    y2 = [1, 8, 27, 64, 125]

    # Plot the data on the subplots
    axes[0].plot(x, y1)
    axes[0].set_title('Subplot 1')
    axes[1].plot(x, y2)
    axes[1].set_title('Subplot 2')

    # Save the subplots as image files
    image_path_1 = 'path/to/save/subplot1.png'
    image_path_2 = 'path/to/save/subplot2.png'
    plt.savefig(image_path_1)
    plt.savefig(image_path_2)

    # Save the subplots and associated data in the database
    subplot = Subplot.objects.create(
        image_1=image_path_1,
        image_2=image_path_2,
        title='Subplots'
    )
Step 5: Render the subplots in a Django template
In your Django view, retrieve the subplots and associated data from the database and pass them to the template context. Then, render the template with the subplots and data.
from django.shortcuts import render
from myapp.models import Subplot

def subplots_view(request):
    subplot = Subplot.objects.first()  # Retrieve the subplots from the database

    context = {'subplot': subplot}
    return render(request, 'myapp/subplots_template.html', context)
Step 6: Create a template for displaying the subplots
Create a template file named subplots_template.html in your app's template directory. In the template, use the subplot object to access the image URLs and display the subplots along with the associated data.
<!DOCTYPE html>
<html>
<head>
    <title>Subplots Template</title>
</head>
<body>
    <h1>{{ subplot.title }}</h1>
    <div>
        <img src="{{ subplot.image_1.url }}" alt="Subplot 1">
        <img src="{{ subplot.image_2.url }}" alt="Subplot 2">
    </div>
</body>
</html>
Step 7: Configure media settings in Django
In your project's settings.py file, configure the media settings to specify the location where the subplot images will be saved.
MEDIA_URL = '/media/'
MEDIA_ROOT = os.path.join(BASE_DIR, 'media')
Step 8: Include media URLs in your project's URLs
In your project's urls.py file, include the media URLs to serve the subplot images.
from django.conf import settings
from django.conf.urls.static import static

urlpatterns = [
    # ... your other URL patterns ...
] + static(settings.MEDIA_URL, document_root=settings.MEDIA_ROOT)
Step 9: Run the Django development server
Start the Django development server and visit the URL associated with the subplots_view in your web browser. You should see the rendered subplots along with the associated data.
python manage.py runserver
That's it! You have now generated subplots using Matplotlib, saved them in the database along with associated data, and rendered them in a Django template. The subplot images and data are stored in the media directory and can be accessed via the template. Customize the subplots and template further as per your requirements.
Ensure that you have configured your database settings correctly in your project's settings.py file, and have run the necessary migrations (python manage.py makemigrations and python manage.py migrate) before using the models.
Note: In a production environment, consider configuring a proper media storage backend (such as Amazon S3) to store the subplot images instead of using the local file system.
Another Example
from django.db import models

class Plot(models.Model):
    image = models.ImageField(upload_to='plots/')
    title = models.CharField(max_length=100)
    # Add additional fields as needed
Step 4: Generate the subplots and save them in the database
In your Django view or script, import the necessary libraries and create a function to generate the subplots. Use the savefig() function to save the subplots as an image file, and then save the subplots and associated data in the database.
import matplotlib.pyplot as plt
from myapp.models import Plot

def generate_subplots():
    fig, axes = plt.subplots(2, 2)
    x = [1, 2, 3, 4, 5]
    y1 = [1, 4, 9, 16, 25]
    y2 = [1, 8, 27, 64, 125]

    axes[0, 0].plot(x, y1)
    axes[0, 0].set_title('Plot 1')
    axes[0, 1].plot(x, y2)
    axes[0, 1].set_title('Plot 2')

    # Save the subplots as an image file
    image_path = 'path/to/save/subplots.png'
    plt.savefig(image_path)

    # Save the subplots and associated data in the database
    plot = Plot.objects.create(
        image=image_path,
        title='Subplots'
    )
Step 5: Render the subplots in a Django template
In your Django view, retrieve the subplots and associated data from the database and pass them to the template context. Then, render the template with the subplots and data.
from django.shortcuts import render
from myapp.models import Plot

def subplots_view(request):
    plot = Plot.objects.first()  # Retrieve the subplots from the database

    context = {'plot': plot}
    return render(request, 'myapp/subplots_template.html', context)
Step 6: Create a template for displaying the subplots
Create a template file named subplots_template.html in your app's template directory. In the template, use the plot object to access the image URL and display the subplots.
<!DOCTYPE html>
<html>
<head>
    <title>Subplots Template</title>
</head>
<body>
    <h1>{{ plot.title }}</h1>
    <img src="{{ plot.image.url }}" alt="{{ plot.title }} Subplots">
</body>
</html>
Step 7: Configure media settings in Django
In your project's settings.py file, configure the media settings to specify the location where plot images will be saved.
MEDIA_URL = '/media/'
MEDIA_ROOT = os.path.join(BASE_DIR, 'media')
Step 8: Include media URLs in your project's URLs
In your project's urls.py file, include the media URLs to serve the plot images.
from django.conf import settings
from django.conf.urls.static import static

urlpatterns = [
    # ... your other URL patterns ...
] + static(settings.MEDIA_URL, document_root=settings.MEDIA_ROOT)
Step 9: Run the Django development server
Start the Django development server and visit the URL associated with the subplots_view in your web browser. You should see the rendered subplots along with the associated data.
python manage.py runserver
That's it! You have now generated subplots using Matplotlib, saved them in the database along with associated data, and rendered them in a Django template. The subplot images and data are stored in the media directory and can be accessed via the template. Customize the subplots and template further as per your requirements.
=======================================================
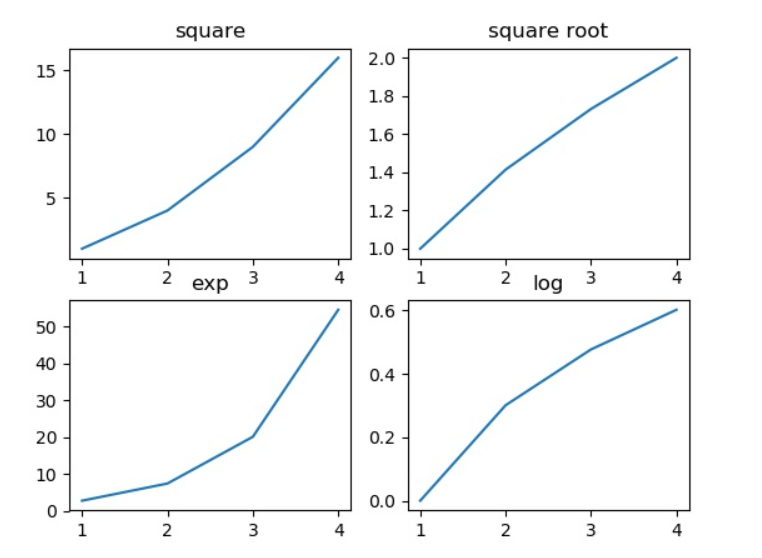
Creating a subplot of 2 rows by 2 columns and display 4 different plots
import matplotlib.pyplot as plt
fig,a =  plt.subplots(2,2)
import numpy as np
x = np.arange(1,5)
a[0][0].plot(x,x*x)
a[0][0].set_title('square')
a[0][1].plot(x,np.sqrt(x))
a[0][1].set_title('square root')
a[1][0].plot(x,np.exp(x))
a[1][0].set_title('exp')
a[1][1].plot(x,np.log10(x))
a[1][1].set_title('log')
plt.show()

Top comments (0)