Reference1
Reference2
Reference3
Reference4
Reference5
Reference6
Reference7
how-to-improve-the-performance-of-your-flutter-app
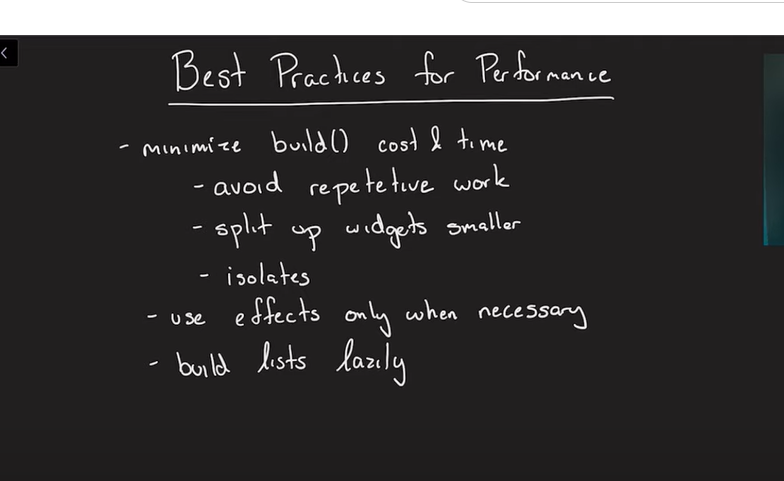
Don’t split your widgets into methods
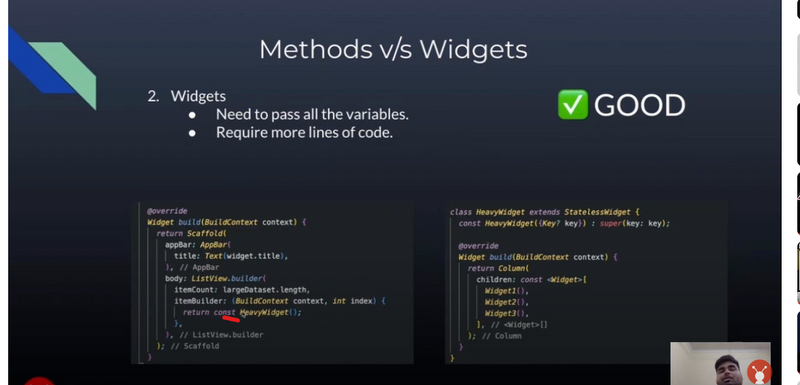
split your widgets into stateless Widget
Avoid rebuilding all the widgets repetitively
rebuild our StatefulWidget using setState
Use Concept of ValueNotifier,ChangeNotifier instead of setState
Use const widgets where possible
Positioned.fill(
            child:  BackgroundWidget(),
          ),
Positioned.fill(
            child: const BackgroundWidget(),
          ),
Use itemExtent in ListView for long Lists
 body: ListView(
        controller: _scrollController,
        children: widgets,
        itemExtent: 200,
      ),
Avoid rebuilding unnecessary widgets inside AnimatedBuilder
Avoid using the Opacity particularly in an animation
Improve the Performance of your Flutter App
Improve the Performance of your Flutter App
Use stateless widgets
Break down heavy build functions(The sub-widgets created should be stateless widgets whenever possible)
Don’t use helper functions for rendering UI
Split large widgets into smaller widgets.
minimize the size of your build function
Use the const keyword.
Column(
  children: [
    const JDSearchIcon(),
    InkWell(....),
    const JDSearchIcon(),
  ],
),
Render only widgets that are visible on the screen
ListView.builder(
  itemCount: dataSource.length,
  itemBuilder: (context, index) {
    return Tweet(dataSource[index]);
  },
)
 IconButton(
            icon: Icon(Icons.search),
            onPressed: () {
              Navigator.of(context).pushNamed('productSearch');
            }),
Breaking down the size
flutter build apk --analyze-size
flutter build appbundle --analyze-size
flutter build ios --analyze-size
flutter build linux --analyze-size
flutter build macos --analyze-size
flutter build windows --analyze-size
There are many doubts and questions related to how we can improve the performance of our Flutter application.
We have to clarify that Flutter is performant by default, but we must avoid making some mistakes when writing the code to make the application run in an excellent and fast way.
With these tips that I am going to give you we could avoid the use of profiling tools.
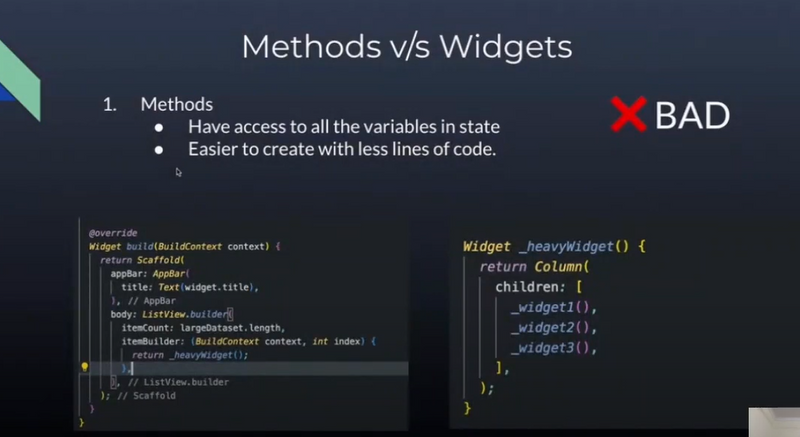
Don’t split your widgets into methods
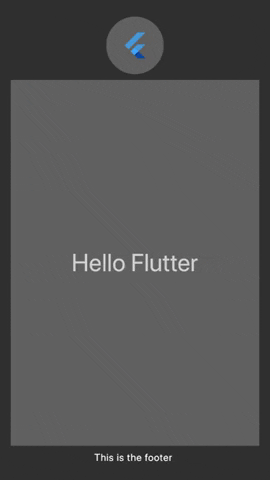
When we have a large layout, then what we usually do is splitting using methods for each widget.
The following example is a widget that contains a header, center and footer widget.
class MyHomePage extends StatelessWidget {
  Widget _buildHeaderWidget() {
    final size = 40.0;
    return Padding(
      padding: const EdgeInsets.all(8.0),
      child: CircleAvatar(
        backgroundColor: Colors.grey[700],
        child: FlutterLogo(
          size: size,
        ),
        radius: size,
      ),
    );
  }

  Widget _buildMainWidget(BuildContext context) {
    return Expanded(
      child: Container(
        color: Colors.grey[700],
        child: Center(
          child: Text(
            'Hello Flutter',
            style: Theme.of(context).textTheme.display1,
          ),
        ),
      ),
    );
  }

  Widget _buildFooterWidget() {
    return Padding(
      padding: const EdgeInsets.all(8.0),
      child: Text('This is the footer '),
    );
  }

  @override
  Widget build(BuildContext context) {
    return Scaffold(
      body: Padding(
        padding: const EdgeInsets.all(15.0),
        child: Column(
          mainAxisSize: MainAxisSize.min,
          children: [
            _buildHeaderWidget(),
            _buildMainWidget(context),
            _buildFooterWidget(),
          ],
        ),
      ),
    );
  }
}
What we saw earlier is an anti-pattern. What happens internally is that when we make a change in and refresh the entire widget, it will also refresh the widgets that we have within the method, which leads us to waste CPU cycles.
What we should do is convert those methods to stateless Widget in the following way.
class MyHomePage extends StatelessWidget {
  @override
  Widget build(BuildContext context) {
    return Scaffold(
      body: Padding(
        padding: const EdgeInsets.all(15.0),
        child: Column(
          mainAxisSize: MainAxisSize.min,
          children: [
            HeaderWidget(),
            MainWidget(),
            FooterWidget(),
          ],
        ),
      ),
    );
  }
}

class HeaderWidget extends StatelessWidget {
  @override
  Widget build(BuildContext context) {
    final size = 40.0;
    return Padding(
      padding: const EdgeInsets.all(8.0),
      child: CircleAvatar(
        backgroundColor: Colors.grey[700],
        child: FlutterLogo(
          size: size,
        ),
        radius: size,
      ),
    );
  }
}

class MainWidget extends StatelessWidget {
  @override
  Widget build(BuildContext context) {
    return Expanded(
      child: Container(
        color: Colors.grey[700],
        child: Center(
          child: Text(
            'Hello Flutter',
            style: Theme.of(context).textTheme.display1,
          ),
        ),
      ),
    );
  }
}

class FooterWidget extends StatelessWidget {
  @override
  Widget build(BuildContext context) {
    return Padding(
      padding: const EdgeInsets.all(8.0),
      child: Text('This is the footer '),
    );
  }
}
Stateful/Stateless widgets have a special ‘cache’ mechanism (based on key, widget type and attributes), which only rebuild when necessary. Besides that, this helps us to encapsulate and refactor our widgets. (Divide and Conquer)
And it would be a good idea to add const to our widgets, we’ll see why this is important later
Avoid rebuilding all the widgets repetitively
This is a typical mistake we make when we start using Flutter, we learn to rebuild our StatefulWidget using setState.
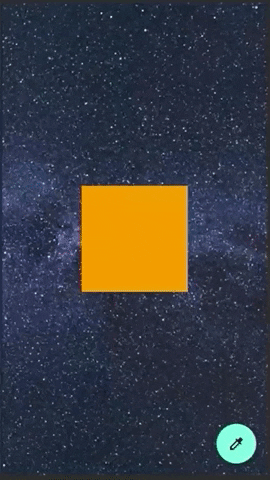
The following example is a widget that contains a Square to the center with a fav button that each time it is pressed causes the color to change. Oh, and the page also has a widget with background image.
Also, we’ll add some print statements after the build methods of each widget to see how it works.
class _MyHomePageState extends State<MyHomePage> {
  Color _currentColor = Colors.grey;

  Random _random = new Random();

  void _onPressed() {
    int randomNumber = _random.nextInt(30);
    setState(() {
      _currentColor = Colors.primaries[randomNumber % Colors.primaries.length];
    });
  }

  @override
  Widget build(BuildContext context) {
    print('building `MyHomePage`');
    return Scaffold(
      floatingActionButton: FloatingActionButton(
        onPressed: _onPressed,
        child: Icon(Icons.colorize),
      ),
      body: Stack(
        children: [
          Positioned.fill(
            child: BackgroundWidget(),
          ),
          Center(
            child: Container(
              height: 150,
              width: 150,
              color: _currentColor,
            ),
          ),
        ],
      ),
    );
  }
}

class BackgroundWidget extends StatelessWidget {
  @override
  Widget build(BuildContext context) {
    print('building `BackgroundWidget`');
    return Image.network(
      'https://cdn.pixabay.com/photo/2017/08/30/01/05/milky-way-2695569_960_720.jpg',
      fit: BoxFit.cover,
    );
  }
}
You will see 2 logs printed :
flutter: building `MyHomePage`
flutter: building `BackgroundWidget`
Every time we press the button, we are refreshing the entire screen, Scaffold, Background widget, and finally what matters to us, the container.
As we learn more, we know that rebuilding the entire widget is not a good practice, we only have to rebuild what we want to update.
Many know that this can be done with a state management package like flutter_bloc, mobx, provider, etc. But few know that it can also be done without any external package, that is, with classes that the flutter framework already offers out of the box.
We are going to refactor the same example now using ValueNotifier.
class _MyHomePageState extends State<MyHomePage> {
  final _colorNotifier = ValueNotifier<Color>(Colors.grey);
  Random _random = new Random();

  void _onPressed() {
    int randomNumber = _random.nextInt(30);
    _colorNotifier.value =
        Colors.primaries[randomNumber % Colors.primaries.length];
  }

  @override
  void dispose() {
    _colorNotifier.dispose();
    super.dispose();
  }

  @override
  Widget build(BuildContext context) {
    print('building `MyHomePage`');
    return Scaffold(
      floatingActionButton: FloatingActionButton(
        onPressed: _onPressed,
        child: Icon(Icons.colorize),
      ),
      body: Stack(
        children: [
          Positioned.fill(
            child: BackgroundWidget(),
          ),
          Center(
            child: ValueListenableBuilder(
              valueListenable: _colorNotifier,
              builder: (_, value, __) => Container(
                height: 150,
                width: 150,
                color: value,
              ),
            ),
          ),
        ],
      ),
    );
  }
}
Now you won’t see any print statement.
This works perfect, we are just rebuilding the widget we need. There is another interesting widget that we can also use in case we want to make a better separation between business logic and view (and maybe add some more logic inside that), and we can also handle more data within the notifier.
The same example now using ChangeNotifier.
//------ ChangeNotifier class ----//
class MyColorNotifier extends ChangeNotifier {
  Color myColor = Colors.grey;
  Random _random = new Random();

  void changeColor() {
    int randomNumber = _random.nextInt(30);
    myColor = Colors.primaries[randomNumber % Colors.primaries.length];
    notifyListeners();
  }
}
//------ State class ----//

class _MyHomePageState extends State<MyHomePage> {
  final _colorNotifier = MyColorNotifier();

  void _onPressed() {
    _colorNotifier.changeColor();
  }

  @override
  void dispose() {
    _colorNotifier.dispose();
    super.dispose();
  }

  @override
  Widget build(BuildContext context) {
    print('building `MyHomePage`');
    return Scaffold(
      floatingActionButton: FloatingActionButton(
        onPressed: _onPressed,
        child: Icon(Icons.colorize),
      ),
      body: Stack(
        children: [
          Positioned.fill(
            child: BackgroundWidget(),
          ),
          Center(
            child: AnimatedBuilder(
              animation: _colorNotifier,
              builder: (_, __) => Container(
                height: 150,
                width: 150,
                color: _colorNotifier.myColor,
              ),
            ),
          ),
        ],
      ),
    );
  }
}
The most important thing is that with these last 2 widgets we avoid unnecessary rebuilds.
Use const widgets where possible
It is good practice to use the keyword const for constants that we can initialize at compile time. Let’s also not forget to use const as much as possible for our widgets, this allows us to catch and reuse widgets to avoid unnecessary rebuilds that are caused by their ancestors.
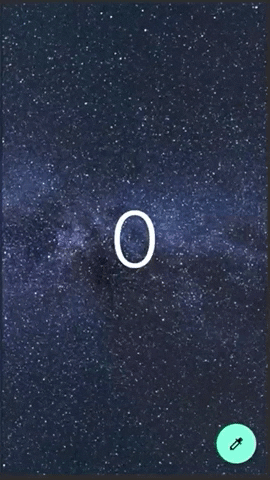
Let’s reuse the last example using setState, but now we’ll add a counter which will increment the value every time we press the fav button.
class _MyHomePageState extends State<MyHomePage> {
  int _counter = 0;

  void _onPressed() {
    setState(() {
      _counter++;
    });
  }

  @override
  Widget build(BuildContext context) {
    print('building `MyHomePage`');
    return Scaffold(
      floatingActionButton: FloatingActionButton(
        onPressed: _onPressed,
        child: Icon(Icons.colorize),
      ),
      body: Stack(
        children: [
          Positioned.fill(
            child: BackgroundWidget(),
          ),
          Center(
              child: Text(
            _counter.toString(),
            style: Theme.of(context).textTheme.display4.apply(
                  color: Colors.white,
                  fontWeightDelta: 2,
                ),
          )),
        ],
      ),
    );
  }
}

class BackgroundWidget extends StatelessWidget {
  @override
  Widget build(BuildContext context) {
    print('building `BackgroundWidget`');
    return Image.network(
      'https://cdn.pixabay.com/photo/2017/08/30/01/05/milky-way-2695569_960_720.jpg',
      fit: BoxFit.cover,
    );
  }
}
We have 2 prints statements, one in the build of the main widget and the other one in the background widget. Every time we press the fab button, we see that the child widget is also rebuilt even though it has a fixed content.
flutter: building MyHomePage
flutter: building BackgroundWidget
Now using const for our widget, the code would look like this:
class _MyHomePageState extends State<MyHomePage> {
  int _counter = 0;

  void _onPressed() {
    setState(() {
      _counter++;
    });
  }

  @override
  Widget build(BuildContext context) {
    print('building `MyHomePage`');
    return Scaffold(
      floatingActionButton: FloatingActionButton(
        onPressed: _onPressed,
        child: Icon(Icons.colorize),
      ),
      body: Stack(
        children: [
          Positioned.fill(
            child: const BackgroundWidget(),
          ),
          Center(
              child: Text(
            _counter.toString(),
            style: Theme.of(context).textTheme.display4.apply(
                  color: Colors.white,
                  fontWeightDelta: 2,
                ),
          )),
        ],
      ),
    );
  }
}

class BackgroundWidget extends StatelessWidget {
  const BackgroundWidget();

  @override
  Widget build(BuildContext context) {
    print('building `BackgroundWidget`');
    return Image.network(
      'https://cdn.pixabay.com/photo/2017/08/30/01/05/milky-way-2695569_960_720.jpg',
      fit: BoxFit.cover,
    );
  }
}
And when we see the log when pressing the fav button, we only see the initial print of the parent widget (of course we can improve this using the technique I showed you before this tip), therefore we avoid the rebuild of the widget marked as const.
Use itemExtent in ListView for long Lists
Sometimes when we have a very long list, and we want to make a drastic jump with the scroll, the use of itemExtent is very important, let’s see a simple example.
We have a list of 10 thousand elements. On pressing the button, we will jump to the last element. In this example we won’t use itemExtent and we will let the children determine its size.
class MyHomePage extends StatelessWidget {
  final widgets = List.generate(
    10000,
    (index) => Container(
      height: 200.0,
      color: Colors.primaries[index % Colors.primaries.length],
      child: ListTile(
        title: Text('Index: $index'),
      ),
    ),
  );

  final _scrollController = ScrollController();

  void _onPressed() async {
    _scrollController.jumpTo(
      _scrollController.position.maxScrollExtent,
    );
  }

  @override
  Widget build(BuildContext context) {
    return Scaffold(
      floatingActionButton: FloatingActionButton(
        onPressed: _onPressed,
        splashColor: Colors.red,
        child: Icon(Icons.slow_motion_video),
      ),
      body: ListView(
        controller: _scrollController,
        children: widgets,
      ),
    );
  }
}
Existing below code is taking long time
 Future<void> _fetchData() async {
    setState(() {
      isLoading = true;
    });

    try {
      final organizationViewModel = Provider.of<OrganizationViewModel>(context, listen: false);
      final credentials = await _getCredentials();
      final email = credentials['email'];

      await organizationViewModel.getProject(
        email.toString(),
        widget.orgSlug,
        widget.orgRoleId,
        widget.orgUserId,
        widget.orgUserorgId,
      );

      await organizationViewModel.getUrl(
        email.toString(),
        widget.orgSlug,
        widget.orgRoleId,
        widget.orgUserId,
        widget.orgUserorgId,
      );

      await organizationViewModel.getKeyword(
        email.toString(),
        widget.orgSlug,
        widget.orgRoleId,
        widget.orgUserId,
        widget.orgUserorgId,
      );

      _populateProjectDropdown();
    } catch (e) {
      print('Error fetching data: $e');
    } finally {
      setState(() {
        isLoading = false;
      });
    }
  }
Parallel API Calls
Instead of making API calls sequentially, you can execute them in parallel using Future.wait. This can significantly reduce the overall waiting time.
Future<void> _fetchData() async {
  setState(() {
    isLoading = true;
  });

  try {
    final organizationViewModel = Provider.of<OrganizationViewModel>(context, listen: false);
    final credentials = await _getCredentials();
    final email = credentials['email'];

    // Execute API calls in parallel
    await Future.wait([
      organizationViewModel.getProject(email.toString(), widget.orgSlug, widget.orgRoleId, widget.orgUserId, widget.orgUserorgId),
      organizationViewModel.getUrl(email.toString(), widget.orgSlug, widget.orgRoleId, widget.orgUserId, widget.orgUserorgId),
      organizationViewModel.getKeyword(email.toString(), widget.orgSlug, widget.orgRoleId, widget.orgUserId, widget.orgUserorgId),
    ]);

    _populateProjectDropdown();
  } catch (e) {
    print('Error fetching data: $e');
  } finally {
    setState(() {
      isLoading = false;
    });
  }
}
Cache Data Where Possible
If the project, URL, and keyword data don't change frequently, consider caching them locally using a state management solution (e.g., Provider, Riverpod) or storing them in secure storage/shared preferences. This way, you can avoid unnecessary API calls.Implement Lazy Loading
Fetch data when it's needed, rather than all at once. For example, instead of loading all projects, URLs, and keywords initially, fetch URLs only when a project is selected and fetch keywords when a URL is selected.Use Pagination
If your API returns a large amount of data, implement pagination to load smaller chunks of data at a time. This reduces the load on both your app and the server.Error Handling and User Experience
Display a loading indicator for individual dropdowns instead of blocking the entire screen. This gives users a more responsive experience.
For example:
bool isProjectLoading = true;
bool isUrlLoading = false;
bool isKeywordLoading = false;

// Inside _fetchData
setState(() {
  isProjectLoading = true;
});
await organizationViewModel.getProject(...);
setState(() {
  isProjectLoading = false;
});
Then use isProjectLoading, isUrlLoading, and isKeywordLoading in build to display a loading spinner for each dropdown field.
- Optimize Network Calls in OrganizationViewModel Ensure your getProject, getUrl, and getKeyword methods in OrganizationViewModel are optimized and avoid unnecessary data processing or network requests.
By implementing these improvements, your CreateTaskboardDialog should become more responsive, and the overall user experience will be enhanced.
================Images=============


Top comments (0)