How Firewall logs show patterns of traffic that indicate attempts to gain unauthorized access to the server with examples
How Firewall logs identify Failed login attempts using command to secure linux server with examples
linux command for Failed login attempts
How Firewall logs show patterns of traffic that indicate attempts to gain unauthorized access to the server with examples
Firewall logs can show patterns of traffic that indicate attempts to gain unauthorized access to a server by capturing information about incoming and outgoing network traffic. Here are some examples of how firewall logs can reveal unauthorized access attempts:
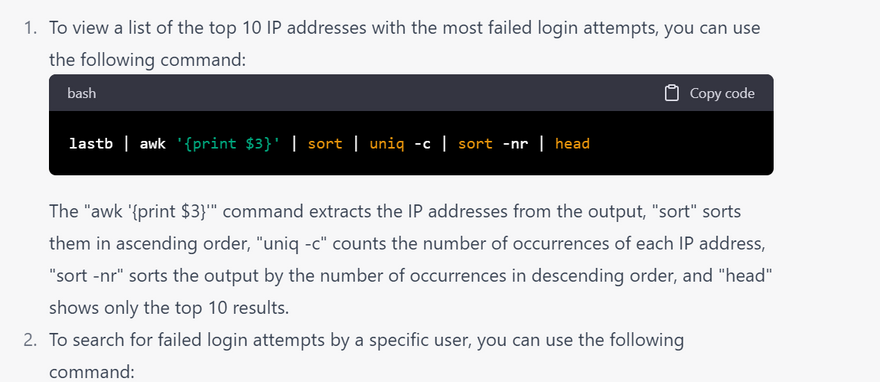
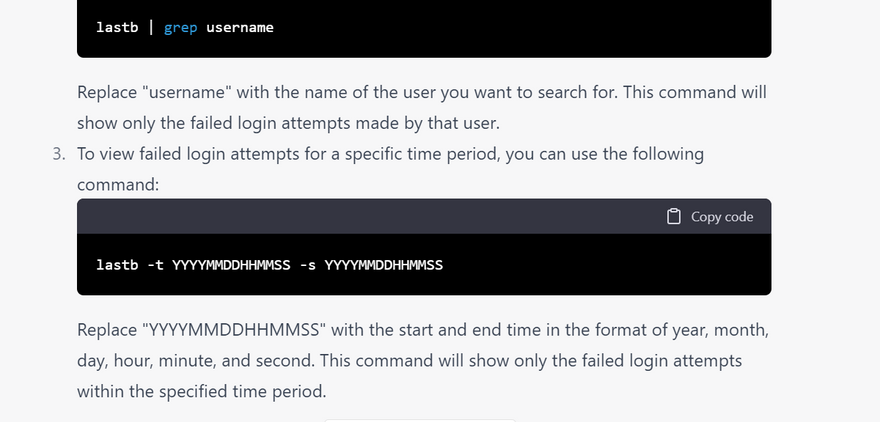
Failed login attempts: Firewall logs can capture information about failed login attempts, including the username and IP address of the client attempting to log in. If multiple failed login attempts are detected from the same IP address, it could be an indication of a brute force attack.
Suspicious network traffic: Firewall logs can capture information about network traffic, including the source and destination IP addresses, protocols used, and the amount of data transmitted. If traffic from an unknown source is detected, or if a large amount of traffic is being transmitted from a single IP address, it could be an indication of an attempted network attack.
Port scanning: Firewall logs can capture information about attempted port scans, which involve scanning a range of IP addresses and ports to identify vulnerabilities. If a large number of port scan attempts are detected from the same IP address, it could be an indication of an attempted network attack.
Unauthorized access attempts: Firewall logs can capture information about attempts to access restricted resources or services, such as attempting to access a system through an unauthorized port or protocol. If unauthorized access attempts are detected, it could be an indication of an attempted network attack.
Overall, by analyzing firewall logs for patterns of suspicious network traffic, administrators can identify potential security threats and take appropriate action to mitigate them before they cause harm to the server.
How Firewall logs identify Failed login attempts using command to secure linux server with examples
Firewall logs can identify failed login attempts by capturing information about login attempts and recording the IP addresses of clients attempting to log in. Here are the steps to use the command line to secure a Linux server and capture firewall logs that show failed login attempts:
1.Install a firewall: A firewall is a critical tool for securing a Linux server. The most commonly used firewall on Linux is iptables, which is built into the Linux kernel. To install iptables, use the following command:
sudo apt-get install iptables
2.Configure iptables rules: Once iptables is installed, you need to configure rules to control which traffic is allowed and which traffic is blocked. Here is an example of an iptables rule that allows incoming SSH traffic but logs failed login attempts:
sudo iptables -A INPUT -p tcp --dport ssh -m state --state NEW -m recent --set --name SSH --rsource
sudo iptables -A INPUT -p tcp --dport ssh -m state --state NEW -m recent --update --seconds 60 --hitcount 4 --rttl --name SSH --rsource -j LOG --log-prefix "SSH_brute_force "
sudo iptables -A INPUT -p tcp --dport ssh -m state --state NEW -m recent --update --seconds 60 --hitcount 4 --rttl --name SSH --rsource -j DROP
This rule allows incoming SSH traffic and logs failed login attempts using the "LOG" action. If there are more than 4 failed login attempts from the same IP address within 60 seconds, the rule drops all incoming traffic from that IP address.
3.Check the firewall logs: To check the firewall logs for failed login attempts, use the following command:
sudo tail -f /var/log/syslog | grep SSH_brute_force
This command shows the most recent entries in the syslog file that match the "SSH_brute_force" log prefix. You can use this command to monitor failed login attempts in real-time and take appropriate action to block attackers before they gain access to your server.
Overall, by configuring iptables rules to capture failed login attempts and monitoring the firewall logs, administrators can identify and block attackers attempting to gain unauthorized access to a Linux server.
linux command for Failed login attempts
To check for failed login attempts on a Linux system, you can use the last command. The last command reads from the /var/log/wtmp file and displays a list of all logins and logouts on the system. To display only failed login attempts, you can use the -f option to filter the output to show only failed logins. Here is the command:
last -f /var/log/wtmp | grep "failed"
This command shows a list of all failed login attempts on the system. The output includes the username, IP address, and date and time of the failed login attempt. By monitoring the output of this command regularly, administrators can quickly identify failed login attempts and take appropriate action to block attackers attempting to gain unauthorized access to the system.
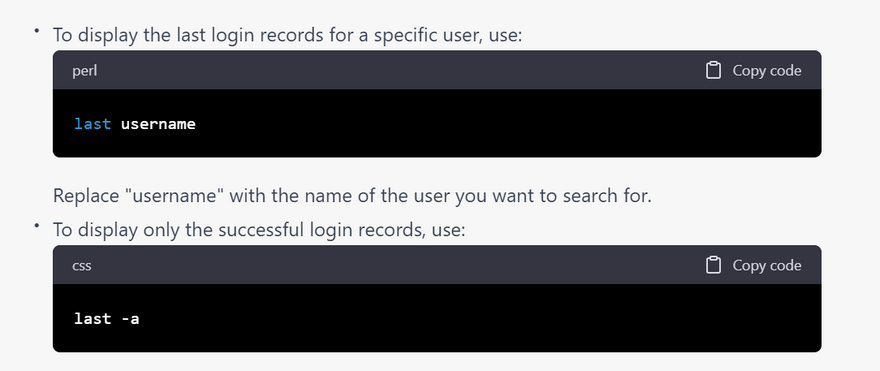
"last" command: This command shows a list of the last successful and failed login attempts from the /var/log/wtmp log file.
"journalctl" command: This command shows system logs, including failed login attempts.
Feb 18 10:08:42 server sshd[1234]: Failed password for user from 192.168.1.100 port 22 ssh2
Feb 18 10:09:03 server sshd[1234]: Failed password for user from 192.168.1.100 port 22 ssh2
Note: Replace "sshd.service" with the name of the service responsible for handling SSH connections on your system.
how to know Suspicious network traffic using Linux command with examples
There are various Linux commands you can use to detect suspicious network traffic. Here are a few examples:
1."tcpdump" command: This command captures and analyzes network traffic in real-time. It can be used to capture suspicious traffic to specific ports, IP addresses or protocols.
$ sudo tcpdump port 22
tcpdump: verbose output suppressed, use -v or -vv for full protocol decode
listening on eth0, link-type EN10MB (Ethernet), capture size 262144 bytes
14:12:13.789243 IP 192.168.1.100.57428 > 192.168.1.101.ssh: Flags [S], seq 2959138919, win 64240, options [mss 1460,sackOK,TS val 18277959 ecr 0,nop,wscale 7], length 0
14:12:13.870300 IP 192.168.1.101.ssh > 192.168.1.100.57428: Flags [S.], seq 1310106163, ack 2959138920, win 65535, options [mss 1460], length 0
14:12:13.870327 IP 192.168.1.100.57428 > 192.168.1.101.ssh: Flags [.], ack 1, win 502, length 0
2."iftop" command: This command shows real-time network bandwidth usage by process and connection.
Example:
$ sudo iftop -P -i eth0
192.168.1.100:ssh          => 192.168.1.101:50000     0.98Kb  0.98Kb  1.96Kb
192.168.1.100:3389         => 192.168.1.102:33728     0.30Kb  0.31Kb  0.61Kb
192.168.1.102:https        <= 0.0.0.0/0:0            0.00b   0.00b   0.00b
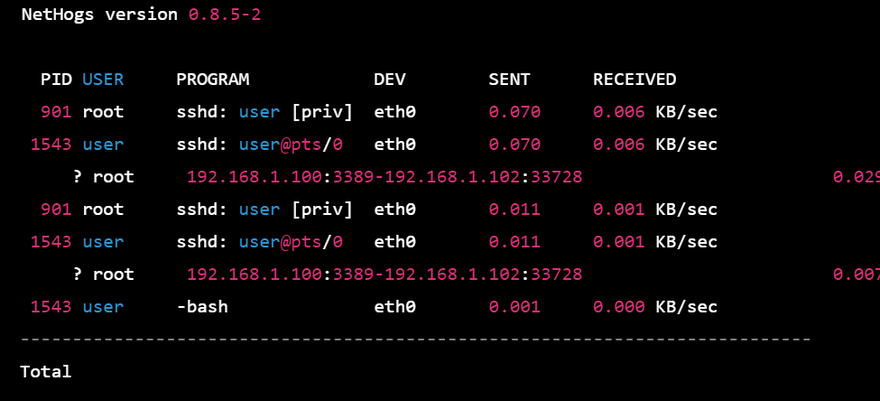
3."nethogs" command: This command shows real-time network traffic usage by process.
Output
NetHogs version 0.8.5-2

  PID USER     PROGRAM            DEV        SENT      RECEIVED
  901 root     sshd: user [priv]  eth0       0.070     0.006 KB/sec
 1543 user     sshd: user@pts/0   eth0       0.070     0.006 KB/sec
     ? root     192.168.1.100:3389-192.168.1.102:33728                        0.029      0.000 KB/sec
  901 root     sshd: user [priv]  eth0       0.011     0.001 KB/sec
 1543 user     sshd: user@pts/0   eth0       0.011     0.001 KB/sec
     ? root     192.168.1.100:3389-192.168.1.102:33728                        0.007      0.000 KB/sec
 1543 user     -bash              eth0       0.001     0.000 KB/sec
----------------------------------------------------------------------------
Total
Port scanning using Linux command with examples to secure linux server
Port scanning is a technique used by attackers to discover open ports on a target system, which can be used to exploit vulnerabilities and launch attacks. To protect your Linux server from port scanning, you can use various Linux command-line tools to detect and block unauthorized access attempts. Here are some examples:
1.Nmap: Nmap (Network Mapper) is a powerful and popular tool for network exploration and security auditing. You can use Nmap to scan for open ports on your Linux server and identify potential security vulnerabilities. Here's an example command:
nmap -sS <server-IP-address>
This command scans the specified IP address using the SYN Stealth Scan method to identify open TCP ports. You can also use other scanning methods such as UDP, TCP Connect, or SCTP.
2.Netstat: Netstat is a built-in Linux command that displays network connection statistics. You can use netstat to check which ports are open and listening on your Linux server. Here's an example command:
netstat -tulpn
This command displays a list of all TCP and UDP ports that are currently in use on the server, along with the corresponding process ID (PID).
3.FirewallD: FirewallD is a firewall management tool that comes with most Linux distributions. You can use FirewallD to block incoming traffic to specific ports on your Linux server. Here's an example command to block incoming traffic on port 22 (SSH):
firewall-cmd --zone=public --add-rich-rule='rule family="ipv4" source address="<source-IP-address>" port protocol="tcp" port="22" reject'
This command adds a rule to the FirewallD configuration to reject incoming traffic on port 22 from the specified source IP address.
4.IPTables: IPTables is a command-line tool for configuring the netfilter firewall in Linux. You can use IPTables to block incoming traffic to specific ports on your Linux server. Here's an example command to block incoming traffic on port 80 (HTTP):
iptables -A INPUT -p tcp --dport 80 -j DROP
This command adds a rule to the IPTables configuration to drop incoming traffic on port 80.
Overall, port scanning is a serious security threat that can leave your Linux server vulnerable to attack. By using the Linux command-line tools mentioned above, you can detect and block port scanning attempts and secure your server from unauthorized access.
Port scanning using using firewall with examples to secure linux server
Port scanning is a technique used by attackers to discover open ports on a target system, which can be used to exploit vulnerabilities and launch attacks. To protect your Linux server from port scanning, you can use the firewall to detect and block unauthorized access attempts. Here are some examples:
1.Using FirewallD: FirewallD is a firewall management tool that comes with most Linux distributions. You can use FirewallD to block incoming traffic to specific ports on your Linux server. Here's an example command to block incoming traffic on port 22 (SSH):
firewall-cmd --zone=public --add-rich-rule='rule family="ipv4" source address="<source-IP-address>" port protocol="tcp" port="22" reject'
This command adds a rule to the FirewallD configuration to reject incoming traffic on port 22 from the specified source IP address. You can replace port 22 with any other port that you want to block.
2.Using IPTables: IPTables is a command-line tool for configuring the netfilter firewall in Linux. You can use IPTables to block incoming traffic to specific ports on your Linux server. Here's an example command to block incoming traffic on port 80 (HTTP):
This command adds a rule to the IPTables configuration to drop incoming traffic on port 80. You can replace port 80 with any other port that you want to block.
3.Using UFW: UFW (Uncomplicated Firewall) is a user-friendly command-line tool for managing the firewall in Ubuntu and other Debian-based Linux distributions. You can use UFW to block incoming traffic to specific ports on your Linux server. Here's an example command to block incoming traffic on port 443 (HTTPS):
ufw deny 443/tcp
This command adds a rule to the UFW configuration to deny incoming traffic on port 443.
Overall, using the firewall to block incoming traffic to specific ports is an effective way to protect your Linux server from port scanning and other unauthorized access attempts. You can use FirewallD, IPTables, or UFW to configure the firewall rules based on your specific needs and preferences.
Unauthorized access attempts
$ last
$ less /var/log/auth.log
$ sudo iptables -A INPUT -p tcp --dport 22 -j LOG --log-prefix "SSH Connection: " --log-level 4
$ sudo iptables -A INPUT -s 10.10.10.10 -j DROP
This will block all incoming traffic from the specified IP address.
Note that the "iptables" command requires root privileges, so you will need to run it with "sudo" or as the root user.








Top comments (0)