Step 1: Install Laravel
We will install laravel application using composer command in cmd, so open your terminal and hit the below command.
composer create-project — prefer-dist laravel/laravel paytm
Step 2 : Install Package
To integrate Paytm in laravel we require anandsiddharth/laravel-paytm-wallet package, so lets install it using terminal in our project directory.
composer require anandsiddharth/laravel-paytm-wallet
After successfully install package, open config/app.php file and add service provider in it.
config/app.php
'providers' => [
Anand\LaravelPaytmWallet\PaytmWalletServiceProvider::class,
],
'aliases' => [
'PaytmWallet' => Anand\LaravelPaytmWallet\Facades\PaytmWallet::class,
],
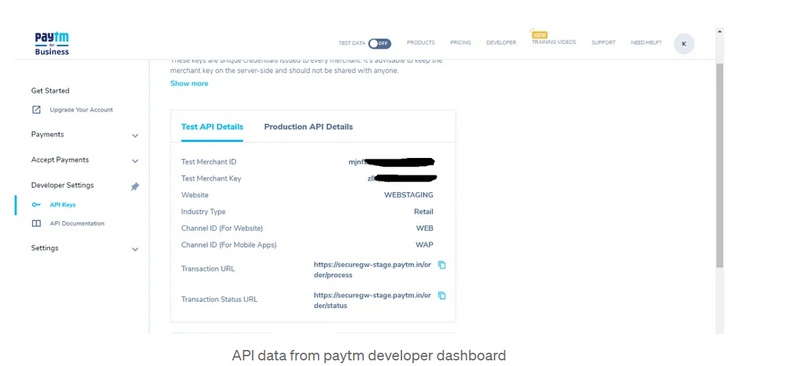
Step 3 : Login into Paytm developer website and generate api key and secret. Click Here
After getting your api data from paytm developer website put it in .env file.
PAYTM_ENVIRONMENT=local
PAYTM_MERCHANT_ID=YOUR_MERCHANT_ID
PAYTM_MERCHANT_KEY=YOUR_MERCHANT_KEY
PAYTM_MERCHANT_WEBSITE=YOUR_MERCHANT_WEBSITE
PAYTM_CHANNEL=YOUR_MERCHANT_CHANNEL
PAYTM_INDUSTRY_TYPE=Retail
Also add this configuration to config/services.php file like below.
‘paytm-wallet’ => [
‘env’ => env(‘PAYTM_ENVIRONMENT’),
‘merchant_id’ => env(‘PAYTM_MERCHANT_ID’),
‘merchant_key’ => env(‘PAYTM_MERCHANT_KEY’),
‘merchant_website’ => env(‘PAYTM_MERCHANT_WEBSITE’),
‘channel’ => env(‘PAYTM_CHANNEL’),
‘industry_type’ => env(‘PAYTM_INDUSTRY_TYPE’),
],
Explain
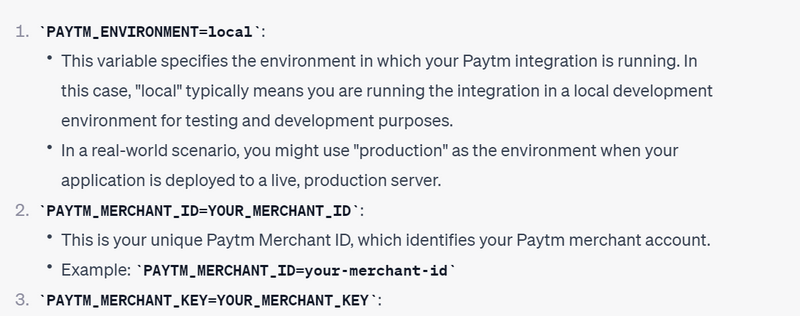
PAYTM_ENVIRONMENT=local:
This variable specifies the environment in which your Paytm integration is running. In this case, "local" typically means you are running the integration in a local development environment for testing and development purposes.
In a real-world scenario, you might use "production" as the environment when your application is deployed to a live, production server.
PAYTM_MERCHANT_ID=YOUR_MERCHANT_ID:
This is your unique Paytm Merchant ID, which identifies your Paytm merchant account.
Example:
PAYTM_MERCHANT_ID=your-merchant-id
PAYTM_MERCHANT_KEY=YOUR_MERCHANT_KEY:
This is the secret key or merchant key associated with your Paytm Merchant ID. It is used for authentication and securing transactions.
Example:
PAYTM_MERCHANT_KEY=your-merchant-key
PAYTM_MERCHANT_WEBSITE=YOUR_MERCHANT_WEBSITE:
This is your Paytm Merchant Website name or ID. It associates your merchant account with a specific website or application.
Example:
PAYTM_MERCHANT_WEBSITE=your-website
PAYTM_CHANNEL=YOUR_MERCHANT_CHANNEL:
The Paytm channel specifies the sales channel through which you are accepting payments. It helps Paytm categorize transactions based on where they originate.
Example:
PAYTM_CHANNEL=your-website
PAYTM_INDUSTRY_TYPE=Retail:
This variable defines the industry type or category of your business. It helps Paytm route transactions correctly and apply specific rules based on the industry.
Example:
PAYTM_INDUSTRY_TYPE=Retail
Step 4 : Create Model and Migration
To generate Model and Migration execute the following command.
php artisan make:model Paytm -m
Put below code in your in Model class of Paytm.
Path for model is App/Paytm.php
<?php

namespace App;
use Illuminate\Database\Eloquent\Model;

class Paytm extends Model
{
    protected $table = 'paytm';

    protected $fillable = ['name','mobile','email','status','fee','order_id','transaction_id'];
         //status = 0, failed,
         //status = 1, success,
         //status = 2, processing

}
database/migrations
<?php

use Illuminate\Database\Migrations\Migration;
use Illuminate\Database\Schema\Blueprint;
use Illuminate\Support\Facades\Schema;

class CreatePaytmTable extends Migration
{
    public function up()
    {
        Schema::create('paytm', function (Blueprint $table) {
            $table->id();
            $table->string('name');
            $table->bigInteger('mobile');
            $table->string('email');
            $table->tinyInteger('status')->default(0);
            $table->integer('fee');
            $table->string('order_id');
            $table->string('transaction_id')->default(0);
            $table->timestamps();
        });
    }

    public function down()
    {
        Schema::dropIfExists('paytm');
    }
}
Now run bellow command for migration:
php artisan migrate
Step 5 : Create a Web Routes
In this step we will create 3 routes for our application as per below.
Step 6 : Create Controller
In this step we have to create new controller and their methods, So let’s create PaytmController and put bellow code:
php artisan make:controller PaytmController

app/Http/Controllers/PaytmController.php
Step 6 : Create View File
In this step, we will create paytm blade file and we create form with name, mobile number and email. So, let’s create paytm.blade.php file and put bellow code:
recources/views/paytm.blade.php
Now we are ready to run our project so run below command to start server.
php artisan serve
Go to the following url and you will see below form as shown in photo.
http://127.0.0.1:8000/initiate
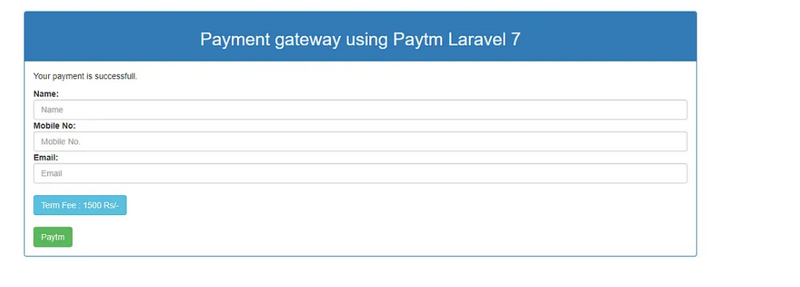
Fill the form and click on submit button it will redirect to the Paytm payment page.
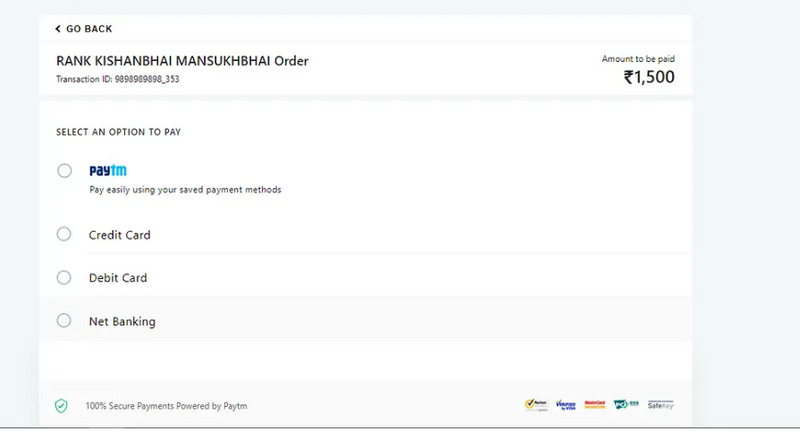
Now select any option and complete process.
Paytm provides dummy credit card data to perform test transaction. Select credit card and put below detail.
Use below CC detail to perform transaction and click on Pay.
Credit Card No. : 4242–4242–4242–4242
Expiry date : 01/24 //should be greater then current date
cvv : 123
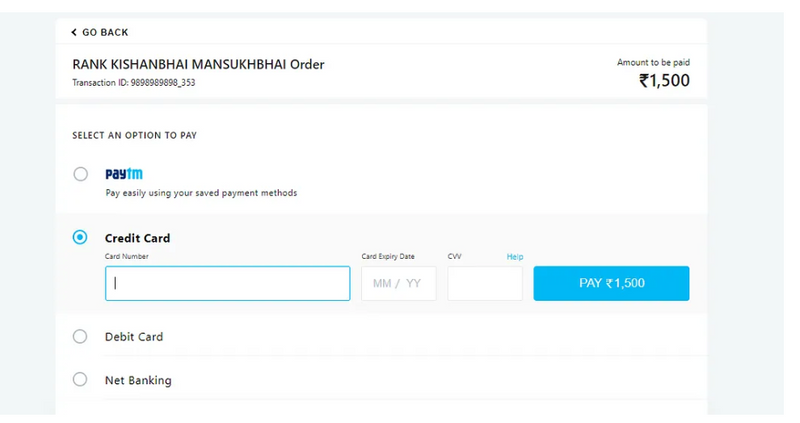
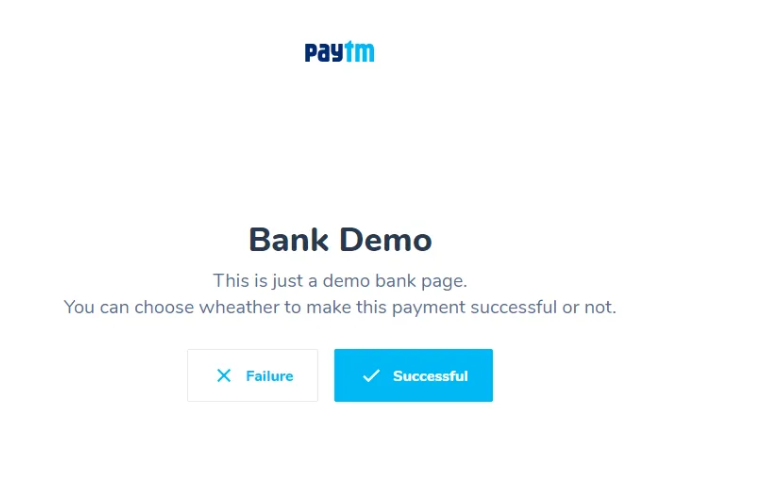
As you click on Pay it will show page like below,
Now click on successful and you will be redirected to form page that display a success message.
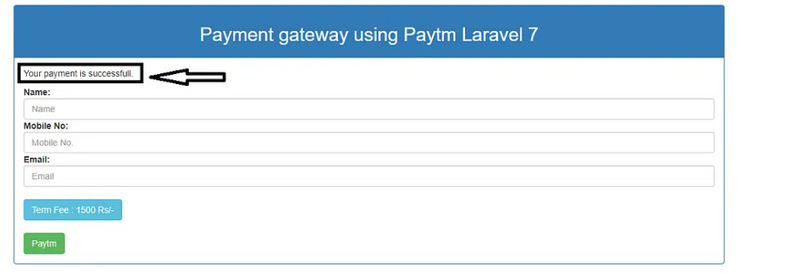
You can check your transaction in paytm developer dashboard and you will also receive a sms and e-mail notification.
That’s it. Payment done!!!
Thanks for reading.
Another Way
Implementing Paytm payments in a Laravel application involves several steps, including setting up your Paytm account, configuring your Laravel application, and creating routes and controllers. Below is a step-by-step example of how to integrate Paytm payments into your Laravel application.
Step 1: Set Up a Paytm Account
Before you begin, make sure you have a Paytm merchant account. You will need to obtain your Paytm Merchant ID, Merchant Key, and Merchant Website URL. You can get these credentials by signing up on the Paytm website and completing the merchant registration process.
Step 2: Create a New Laravel Project
If you don't have an existing Laravel project, create one using the following command:
composer create-project --prefer-dist laravel/laravel paytm-
example
Navigate to your project folder:
cd paytm-example
Step 3: Install Paytm Package
You can use a Laravel Paytm package for easy integration. In this example, we'll use the "paytm-wallet" package by ankitpokhrel.
Install the package using Composer:
composer require ankitpokhrel/paytm-wallet
Step 4: Configure Paytm Credentials
In your Laravel project, open the .env file and add your Paytm credentials:
PAYTM_MERCHANT_ID=your_merchant_id
PAYTM_MERCHANT_KEY=your_merchant_key
PAYTM_MERCHANT_WEBSITE=your_merchant_website_url
PAYTM_CHANNEL=WEB
PAYTM_INDUSTRY_TYPE_ID=your_industry_type_id
PAYTM_CALLBACK_URL=your_callback_url
Make sure to replace the placeholders with your actual Paytm credentials.
Step 5: Create Routes
Open the routes/web.php file and define routes for initiating payments and handling callbacks:
use Illuminate\Support\Facades\Route;
use App\Http\Controllers\PaytmController;

Route::get('/pay', [PaytmController::class, 'pay'])->name('paytm.pay');
Route::post('/paytm-callback', [PaytmController::class, 'callback'])->name('paytm.callback');
Step 6: Create a Controller
Create a new controller to handle Paytm payments:
php artisan make:controller PaytmController
Step 7: Implement the PaytmController
Edit the app/Http/Controllers/PaytmController.php file to implement the Paytm payment logic:
<?php

namespace App\Http\Controllers;

use Illuminate\Http\Request;
use PaytmWallet;

class PaytmController extends Controller
{
    public function pay(Request $request)
    {
        $payment = PaytmWallet::with('receive');

        $payment->prepare([
            'order' => uniqid(),
            'user' => auth()->user()->id,
            'mobile_number' => 'user_mobile_number',
            'email' => 'user_email',
            'amount' => 100, // Replace with the amount you want to charge
            'callback_url' => route('paytm.callback'),
        ]);

        return $payment->receive();
    }

    public function callback(Request $request)
    {
        $transaction = PaytmWallet::with('receive');

        $response = $transaction->response();

        if ($transaction->isSuccessful()) {
            // Payment successful, you can process the order here
            return 'Payment successful';
        } else if ($transaction->isFailed()) {
            // Payment failed
            return 'Payment failed';
        }
    }
}
Make sure to replace 'user_mobile_number' and 'user_email' with the user's actual mobile number and email. You should also handle the successful and failed payment cases accordingly.
Step 8: Use Views
Create views for initiating payments and displaying success or error messages.
Step 9: Run the Application
Run your Laravel application:
php artisan serve
Visit the /pay route in your browser to initiate a Paytm payment. After a successful or failed payment, the user will be redirected to the /paytm-callback route, and you can handle the callback accordingly.

Top comments (0)