Why and When Do We Use DBeaver?
How to install DBeaver
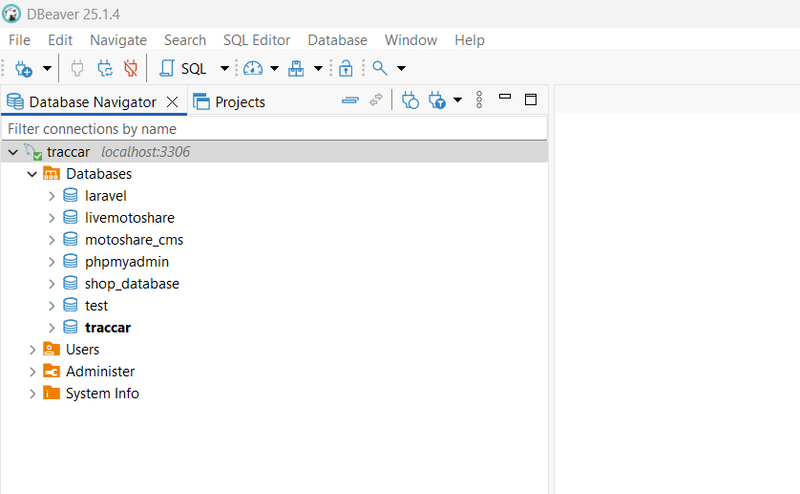
Connect to MySQL in DBeaver
Connect to the H2 Database in DBeaver
Data Migration & Transfer of table between h2 database and mysql
How to transfer multiple table between database
DBeaver is a powerful, free, and open-source universal database management tool used by database administrators, developers, and analysts. Its main purpose is to provide a graphical interface for managing, visualizing, and interacting with databases of all kinds, including relational (like MySQL, PostgreSQL, H2, Oracle, SQL Server) and non-relational systems.
Why and When Do We Use DBeaver?
Database Connectivity:
It can connect to a wide range of databases using JDBC, making it a one-stop solution for viewing and querying heterogeneous data sources from a single tool.
Visual Database Management:
Instead of using command-line tools or writing raw SQL, DBeaver lets you browse tables, view schema structures, edit data, and run SQL queries in a friendly GUI.
Data Migration & Transfer:
DBeaver can migrate, export, and import data between different databases (e.g., from H2 to MySQL), mapping data types and handling most conversion work, which is difficult and error-prone with manual scripts.
Data Visualization & Analysis:
You can explore data, create ER diagrams, visualize table relationships, generate data reports, and perform ad hoc analyses.
Table Design & Schema Discovery:
DBeaver’s GUI allows you to create, modify, or delete tables, indexes, procedures, and other schema objects without deep knowledge of each database’s SQL syntax.
Cross-Platform & Open Source:
Runs on Windows, Mac, and Linux; the community edition is open source
How to install DBeaver
Download
https://dbeaver.io/download/

Connect to MySQL in DBeaver
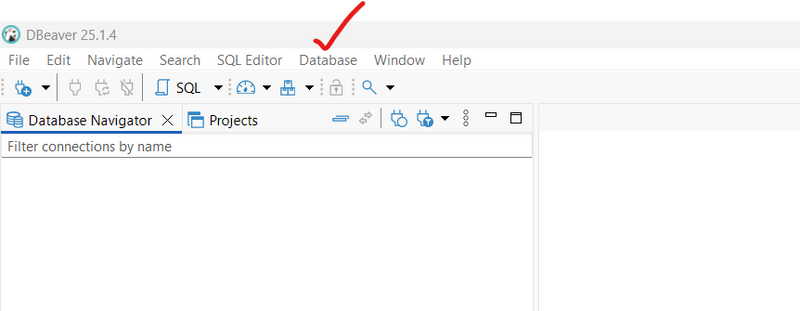
A. New Connection Wizard:
Click Database > New Database Connection again.
step1:right click downloaded file and run as administrator
click database on top menu
then click new database connection
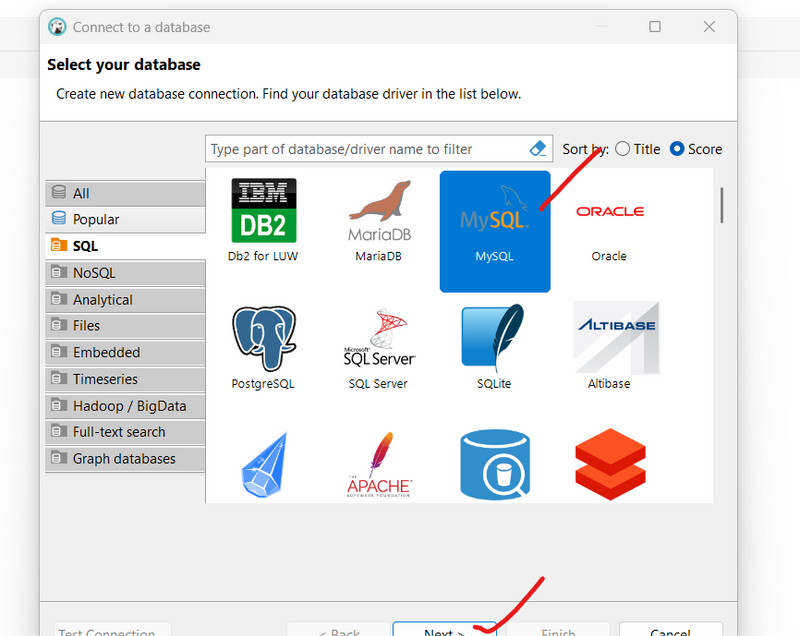
B. Select MySQL:
Type MySQL in the search bar and select MySQL.
C. Set MySQL Connection Parameters:
Host: e.g., localhost or your IP/domain

Port: usually 3306

Database: motoshare_db

Username: root (or your actual user)

Password: your password
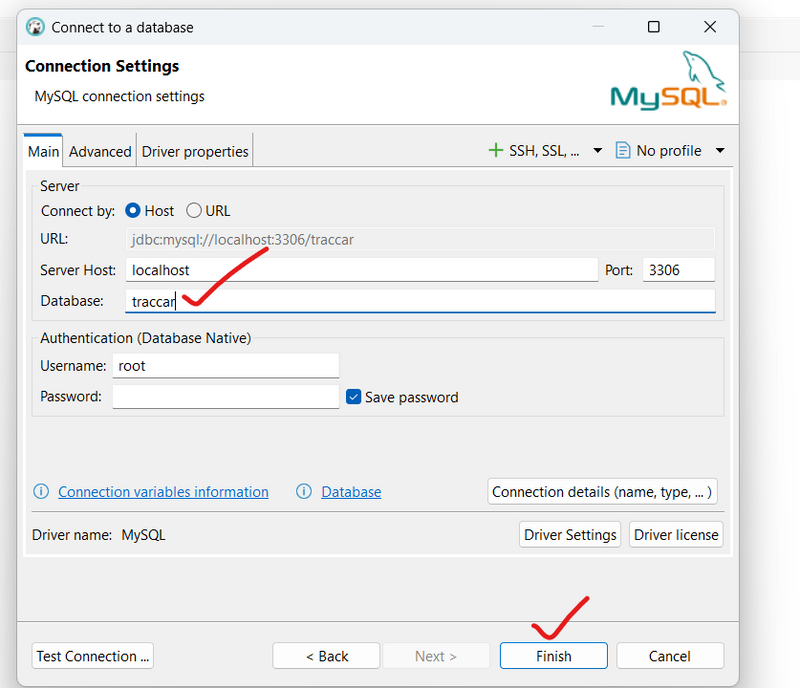
D. Test Connection & Finish:
Click Test Connection to verify.

Click Finish.
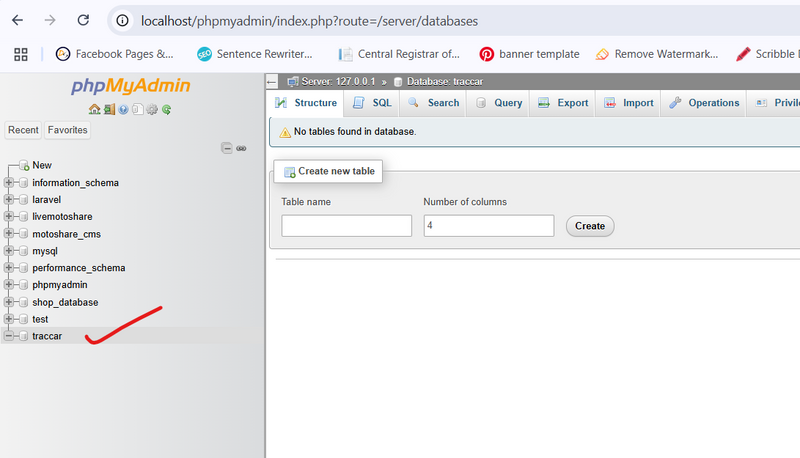
see all database appear in DBeaver console output
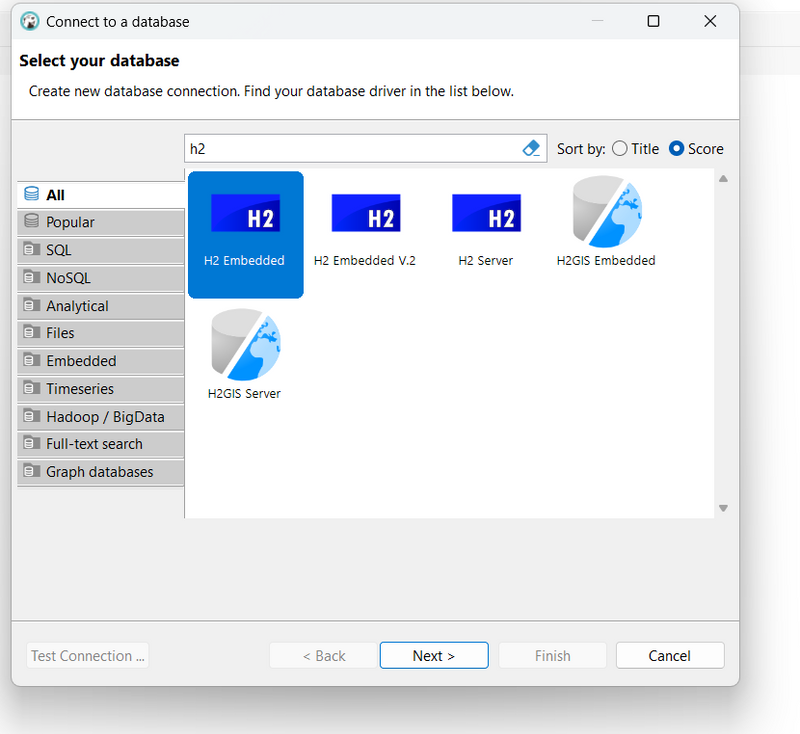
Connect to the H2 Database in DBeaver
A. Start DBeaver.
B. New Connection Wizard:
Click Database > New Database Connection (or use the plug icon on the toolbar).
C. Select H2:
Type H2 in the search bar.
Choose H2 (you want "H2 Embedded" if your database is a file, which is typical for Traccar).
D. Set H2 Connection Parameters:
For embedded/file mode (typical for Traccar):
Database file path: Enter the full path to your H2 database file. For Traccar, this will usually be something like:
/opt/traccar/data/database
(do NOT include the .mv.db extension; DBeaver will handle it)

Username: sa

Password: (leave blank if not set)
for local

C:/Program Files/Traccar/data/database
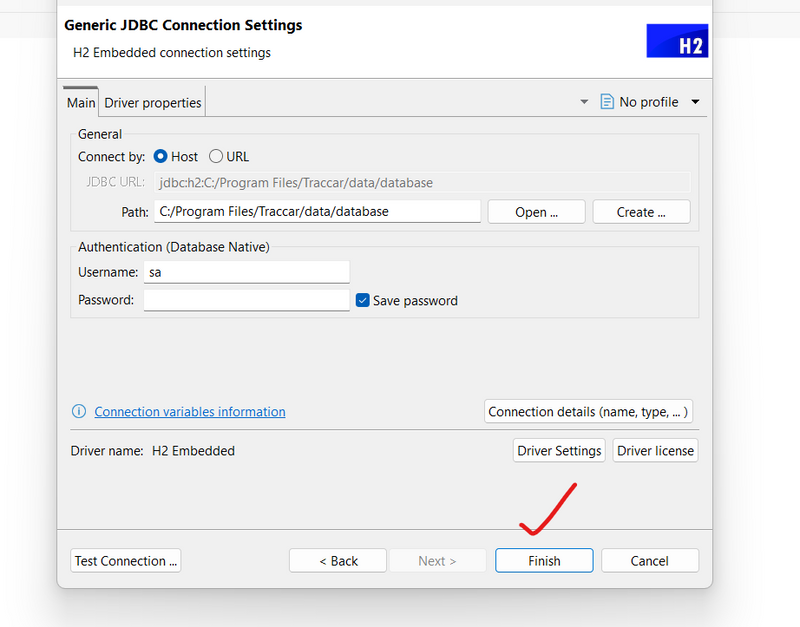
E. Test Connection & Finish:
Click Test Connection to verify.
If successful, click Finish.
Data Migration & Transfer of table between h2 database and mysql
Prepare Both Connections in DBeaver
Connect to H2 database (source):
Use the H2 Embedded connection, select your Traccar .mv.db file path (without .mv.db), and ensure you use the correct (usually latest) H2 driver JAR.
Connect to MySQL database (target):
Use your existing MySQL connection for the target database (e.g., traccar).
Check/Stop Traccar Service
Stop the Traccar server to avoid the database file being locked and to ensure data consistency.
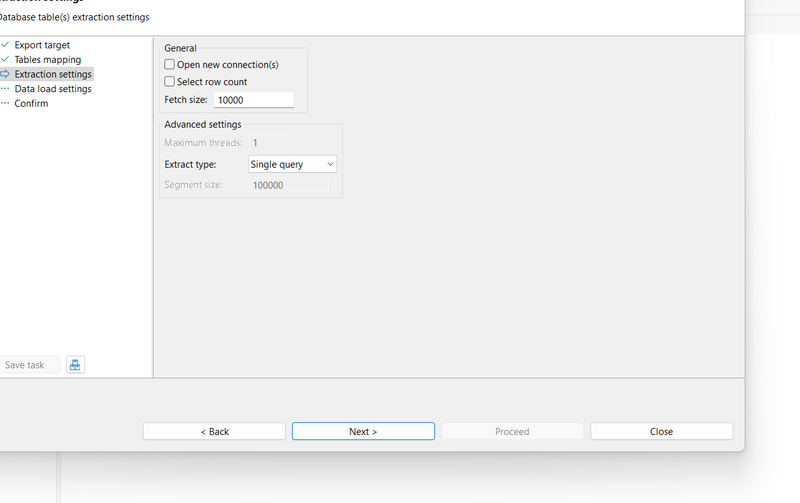
Transfer Data (using DBeaver Data Transfer Wizard)
Table-by-table or Bulk Transfer:
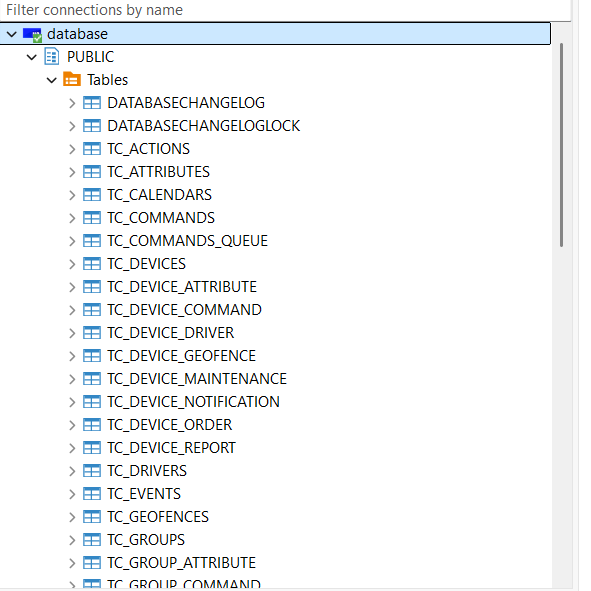
In your H2 connection, right-click the table(s) you want to migrate (e.g., TC_DEVICES, TC_POSITIONS, etc.).
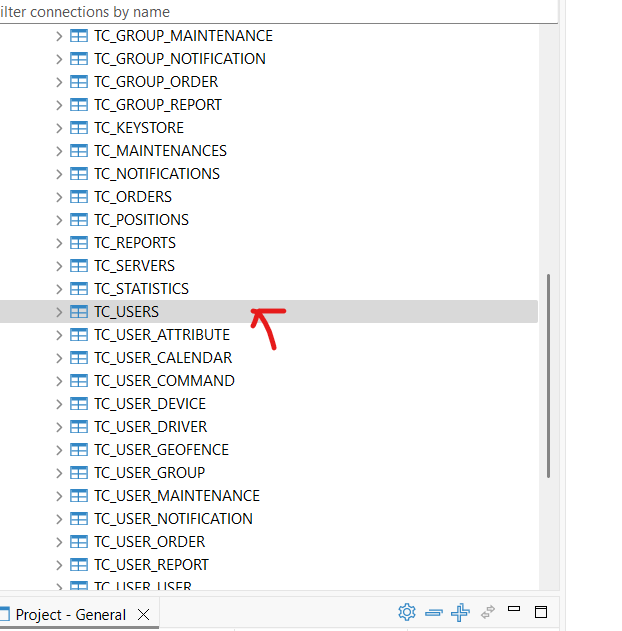
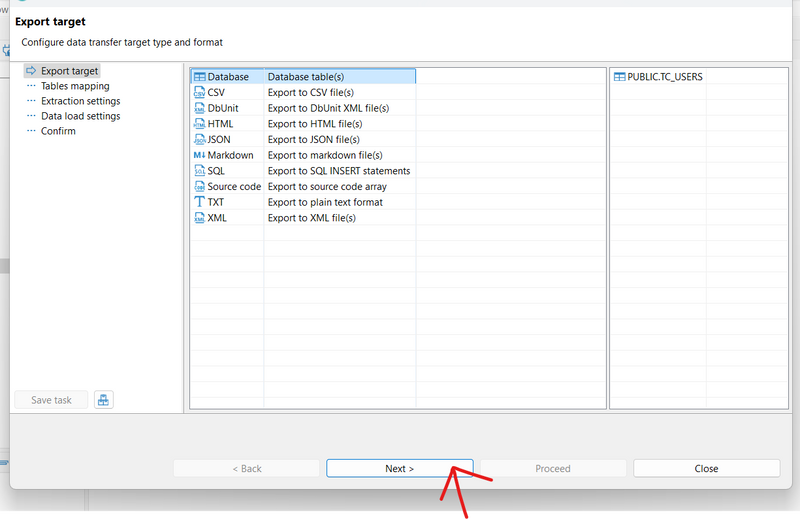
Select Export Data → Database.
In the wizard:
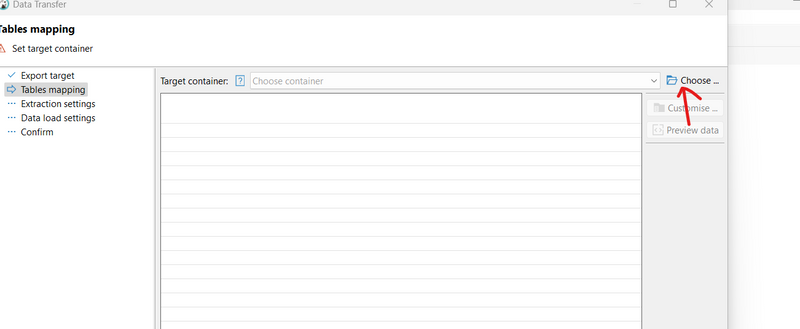
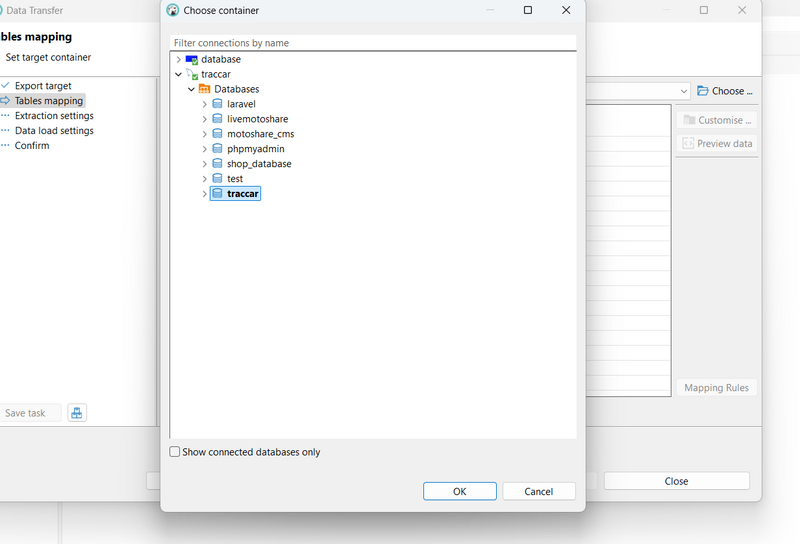
Target: Choose your MySQL connection and target database.
Mapping: Map columns if needed, or let DBeaver create tables automatically.
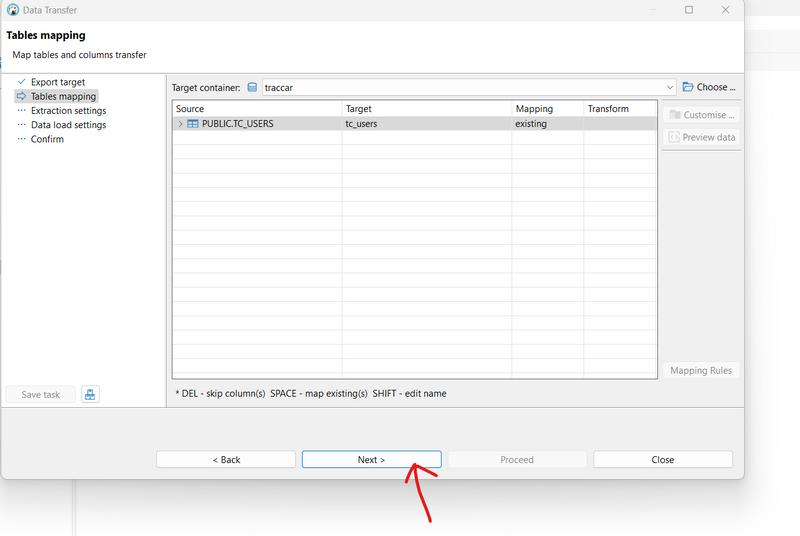
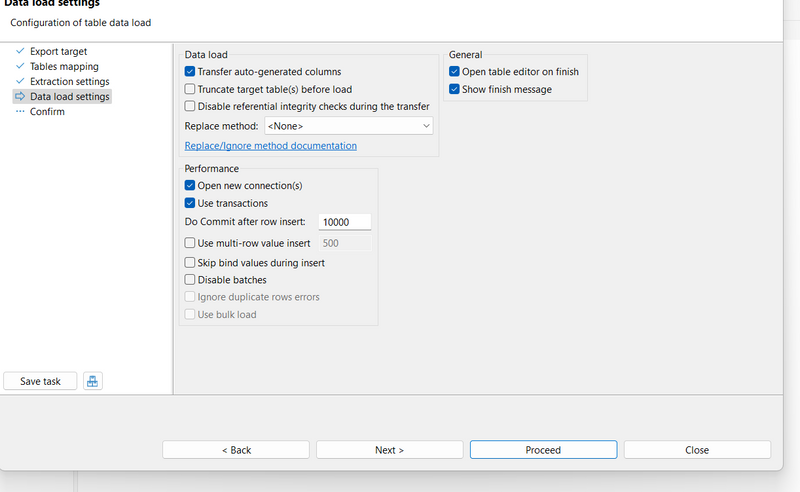
If the table already exists, set the mode to "Insert", "Truncate before load", or "Replace" as your situation requires.
Follow the wizard prompts and execute the transfer.
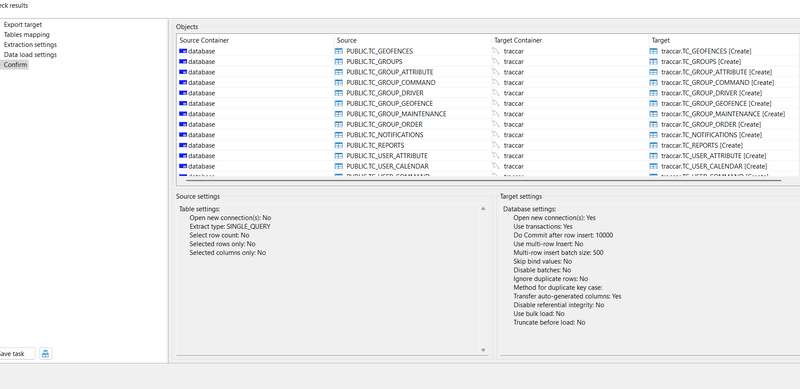
Verify and Fix Issues
If DBeaver reports any errors (e.g., about CREATE TABLE or column types), read the details:
Manually fix any schema differences, reserved words, or datatype incompatibilities in MySQL before retrying.
Typical problems include: auto-increment columns (IDENTITY in H2 → AUTO_INCREMENT in MySQL), and boolean type mapping (BOOLEAN in H2 → TINYINT(1) in MySQL).
Repeat as Needed
Repeat for each table you want to transfer, or use DBeaver’s multi-selection or schema-wide transfer features for bulk migration.
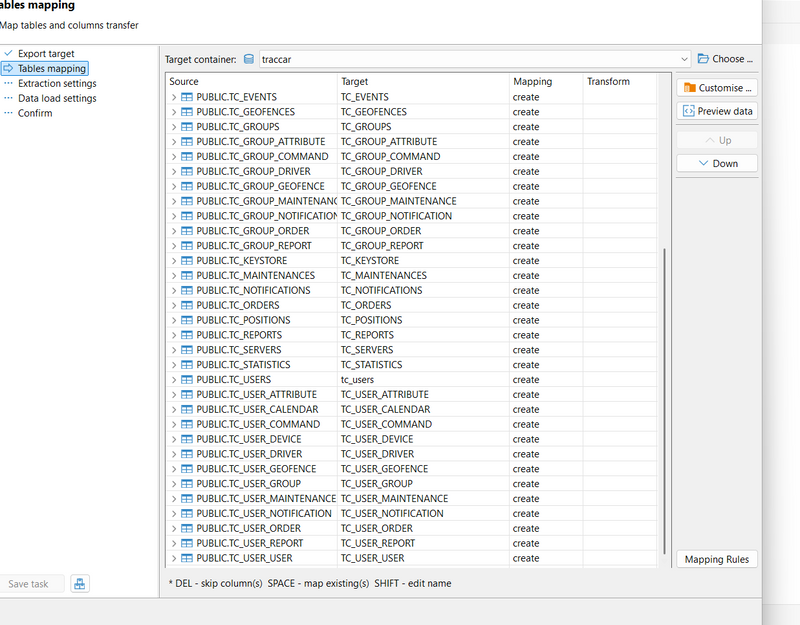
How to transfer multiple table between database
Connect to both your source H2 and target MySQL databases in DBeaver.
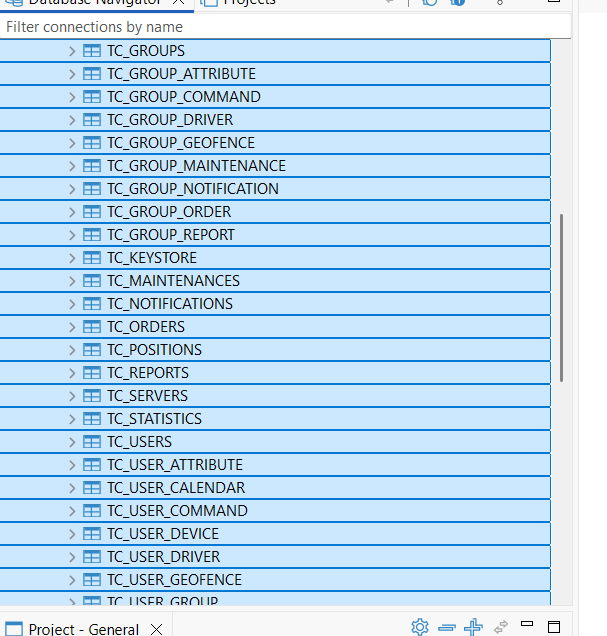
In the Database Navigator panel:
Expand your H2 connection.
Find the "Tables" section (under the schema, usually PUBLIC).
Select all the tables you want to transfer (you can Ctrl+Click for multi-select or Shift+Click for a range).
Right-click your selection and choose:
Export Data → Database
In the Data Transfer Wizard:
Select your MySQL database as the target.
Review and adjust the table mappings if necessary.
Choose whether to create tables, truncate existing, etc.
Adjust data type mappings if prompted.
Follow the wizard to completion and let DBeaver perform the migration.
DBeaver will handle each table, exporting all data directly from H2 to MySQL, including most data type conversions.
If there are schema or type incompatibilities, review the wizard's error/confirmation output and resolve them as needed.

Top comments (0)