- Laravel Migration Structure
- Generating Migrations
- Migration commands As we know that Migration is an important feature in a Laravel, which helps us to create the tables in a database in an ordered mode. Ordered mode means that if we have a class running the php artisan commands will create the tables with all the fields and columns.
Let's understand the migration structure.
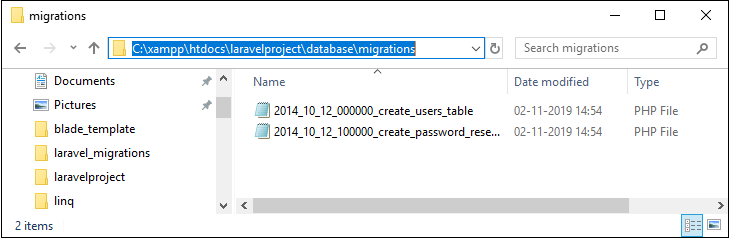
**Step 1: Move to the C:\xampp\htdocs\laravelproject\database\migrations directory.
Laravel Migration Structure
The above screenshot shows that we have opened the migrations folder containing two php files. These files are the classes. The name of the file is 2014_10_12_000000_create_users_table, where 2014_10_12_000000 represents the time and create_users_table does not represent the name of the table but the name of the migration.
Step 2: Double click on the class, which will take me to that specific class that extends the Migration.
<?php
use Illuminate\Support\Facades\Schema;
use Illuminate\Database\Schema\Blueprint;
use Illuminate\Database\Migrations\Migration;

class CreateUsersTable extends Migration
{
    /**
     * Run the migrations.
     *
     * @return void
     */
    public function up()
    {
            Schema::create('users', function (Blueprint $table) {
            $table->bigIncrements('id');
            $table->string('name');
            $table->string('email')->unique();
            $table->timestamp('email_verified_at')->nullable();
            $table->string('password');
            $table->rememberToken();
            $table->timestamps();
        });
    }

    /**
     * Reverse the migrations.
     *
     * @return void
     */
    public function down()
    {
        Schema::dropIfExists('users');
    }
}
In the above code, we observe that the migration class contains two methods, i.e., up() method and down() method. The up() method is used to create the new table, add the new columns or indexes to the database while the down() method is the opposite of the up() method, i.e., it drops the fields. The above class is basically creating the table in a database. The up() method runs the static method, i.e., create() by using the Schema class.
public function up()
{
    Schema::create('users',function(Blueprint $table)
    {
        //
    });
}
In the above syntax of up() method, Schema is the class and 'create' is the static function of the Schema class. The create() method contains the two parameters, i.e., the name of the table and the closure function. The 'users' is the name of the table and closure function in which the Blueprint class with its object is passed as a parameter. The $table is used to create the columns in the users table.
$table->bigIncrements('id'): It means that the $table is implementing the increments() method which is creating the id column in users table, and this 'id' is auto-incremented.
**$table->string('name'): **It means that $table implements the string() method which is creating the name column in users table.
$table->string('email')->unique(): It means that $table implements the string() method which is creating the email column in users table. It also implements the unique() function which means that email should be unique.
$table->timestamp('email_verified_at')->nullable(): It means that $table implements the timestamp() method which is creating the email_verified_at column in users table. This function also creates the two columns, i.e., created_at and updated_at, and these two fields are automatically updated when new records are added or updated.
The code of down() method is given below:
Schema::dropIfExists('users');
In the above code, we observe that the down() method calls the dropIfExists('users') function by using the Schema class. This function checks whether the 'users' table exists or not, if the 'users' exists, then it drops the users table.
Note: Till now, we have learnt about the table which is already created by default or just a Blueprint. However, we can also create our own table according to the functionalities of our application.
To run the above code, follow the steps which are given below:
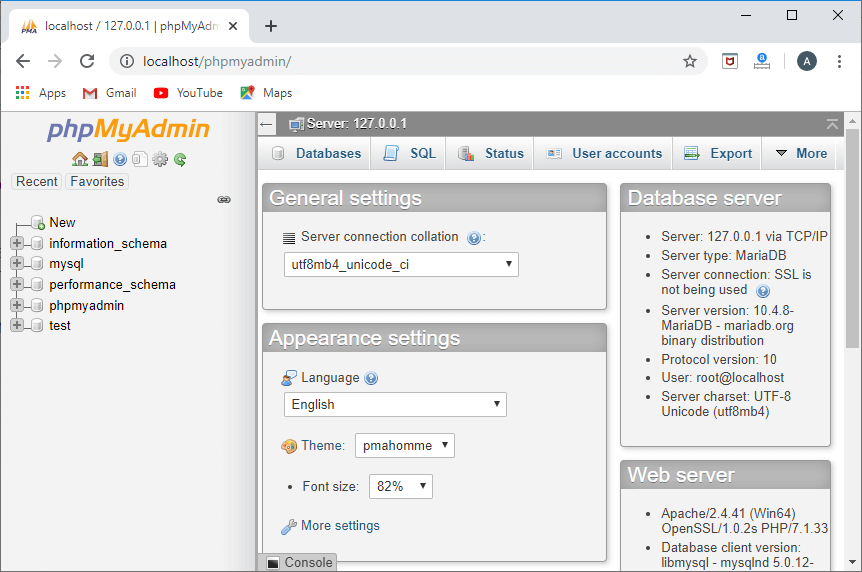
Open the phpmyadmin, which is available in the xampp.
Laravel Migration Structure
Click on the Databases appearing in the tab.
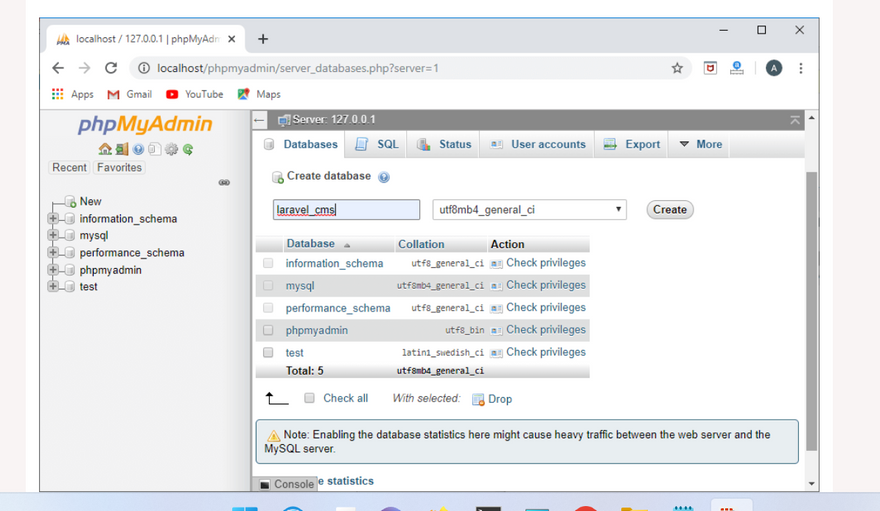
Enter the database name, and then click on the create button.

Laravel Migration Structure
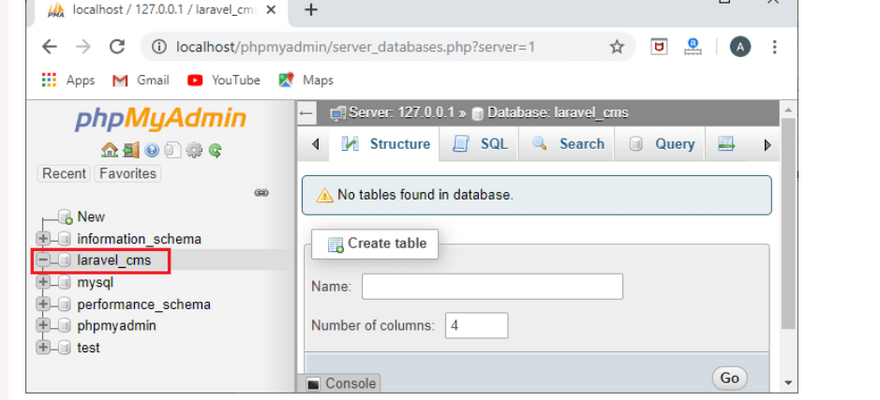
After clicking on the create button, we can see that laravel_cms is created at the left-side of the panel.
Laravel Migration Structure
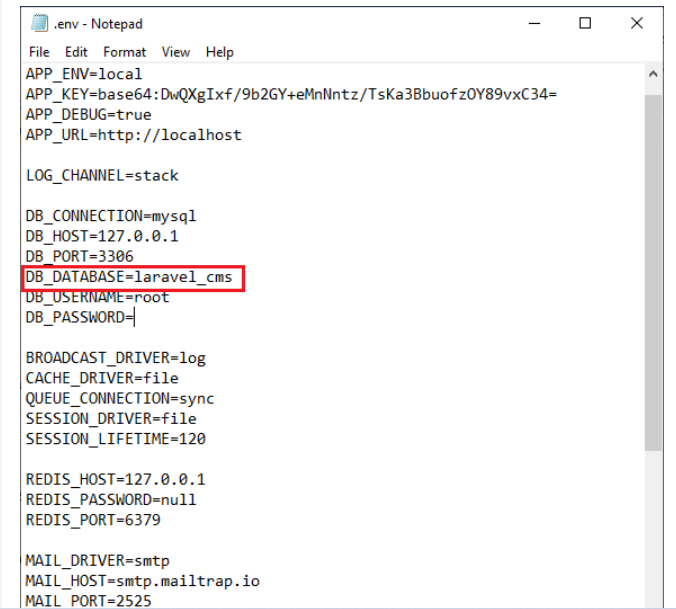
*Open the .env file and add the database name that you have added *
in a previous step.
Laravel Migration Structure
Update the database name with the name that you created, as shown in the above screenshot.
Open the Git Bash window and enter the command "php artisan migrate". The output of this command is shown in the below screenshot:
Laravel Migration Structure
The above screenshot shows that the migration table has been created.
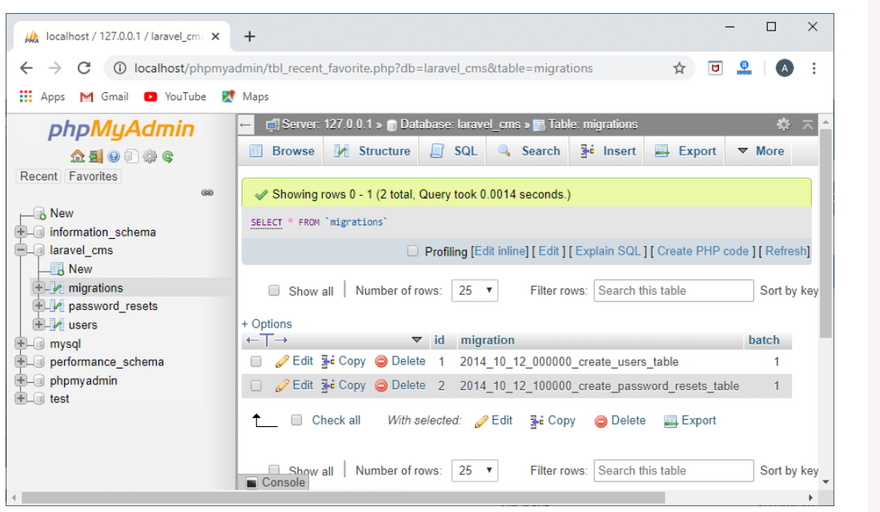
The below screenshot shows the migration table in phpmyadmin.
Laravel Migration Structure
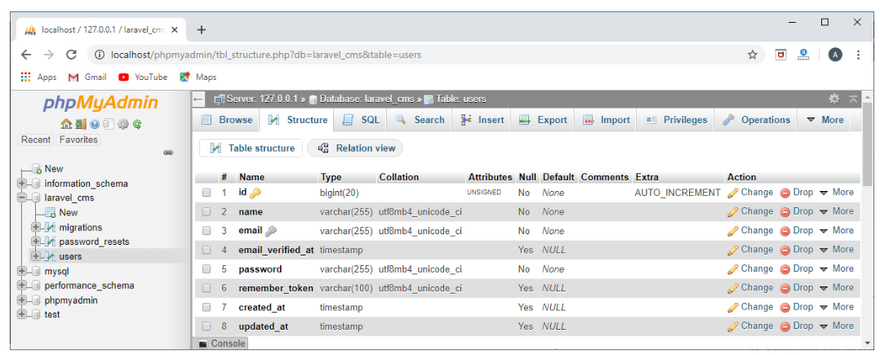
The below screenshot shows the structure of the 'users' table.
Laravel Migration Structure
The above output shows that the 'users' table has been created after running the migration in the Git bash window.
Laravel Migration Commands
In this topic, we will learn about the migration commands. To view the migration commands, open the Git bash window, and enter the command "php artisan list". This command lists all the commands available in Laravel.
n the above output, the highlighted area is the list of all the migrate commands. There are six commands of migrate in Laravel:
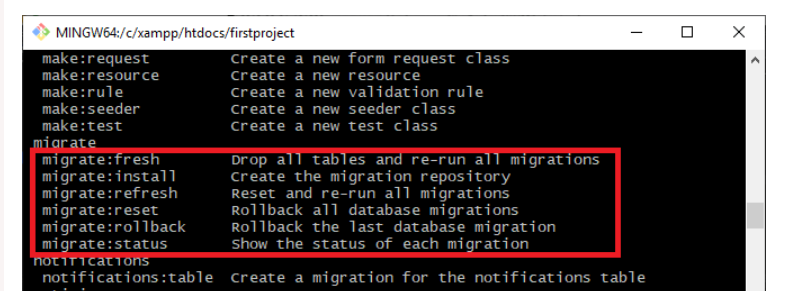
migrate:fresh
migrate:install
migrate:refresh
migrate:reset
migrate:rollback
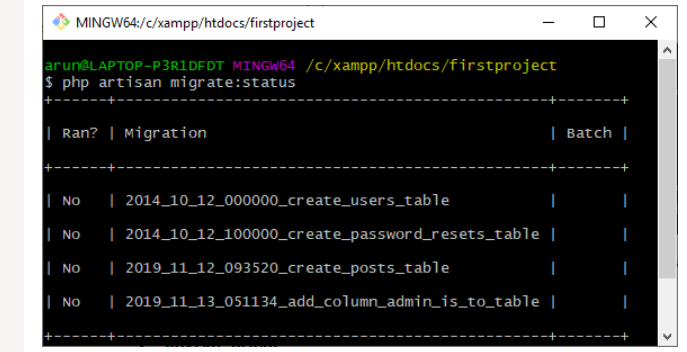
migrate:status
Migration commands
migrate:fresh
The migrate:fresh command is used to drop all the tables from the database, and then it re-runs all the migrations.
Syntax of migrate:fresh command:
php artisan migrate:fresh
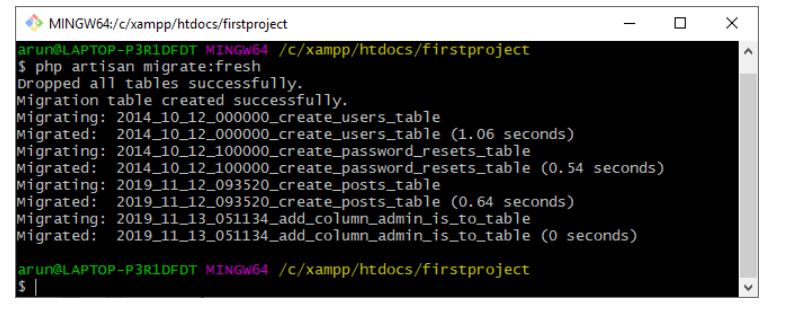
The above output shows that the fresh command drops all the tables and then re-migrate it.
migrate:install
The migrate:install command creates the migration table in a database.
Syntax of migrate:install command:
php artisan migrate:install
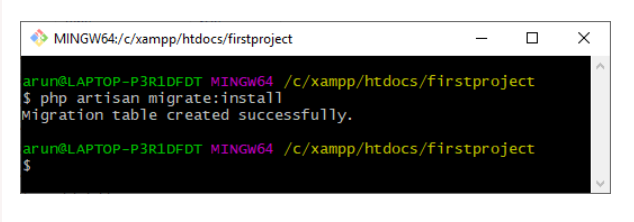
The above output shows that the install command creates the new migration table.
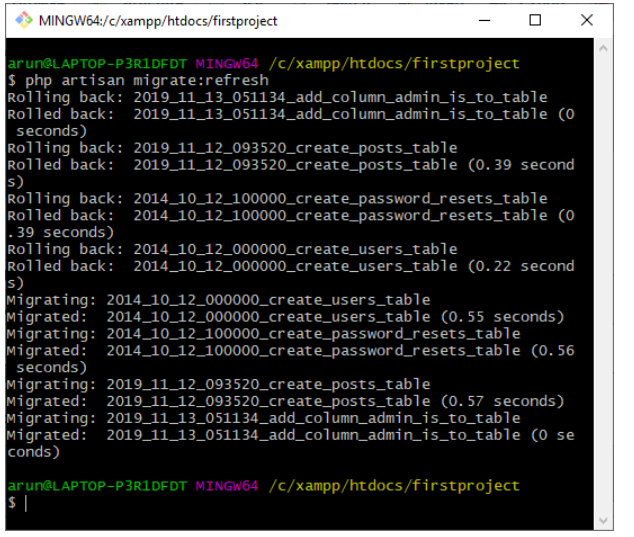
migrate:refresh
The migrate:refresh command is used to rollback all the migrations and then re-run the migrations. Basically, it is used to re-create the entire database.
Syntax of migrate:refresh command:
php artisan migrate:refresh
The above output shows that the refresh command rollbacks all the migrations and then re-migrate all the migrations.
migrate:reset
The migrate:reset command is used to rollback all the migrations, i.e., it drops all the tables that you have created in your database.
Syntax of migrate:reset command:
php artisan migrate:reset

The above output shows that reset command rollbacks all the migrations.
migrate:rollback

**The migrate:rollback **is used to rollback the last database migration.

Top comments (0)