How to refreshes the component using listener methods
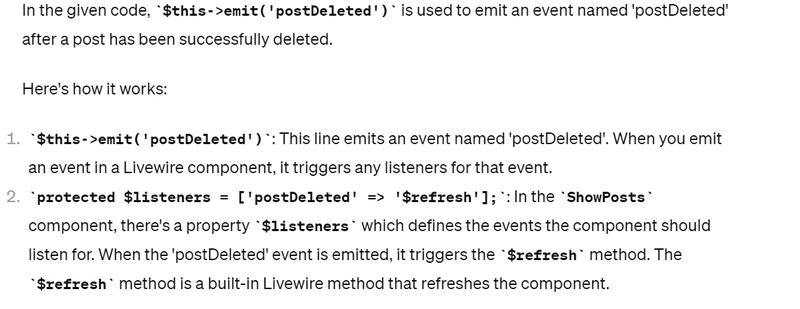
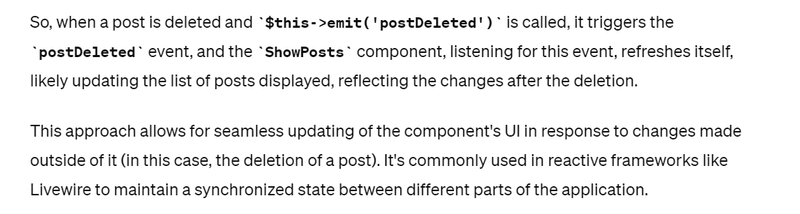
why we use emit methods
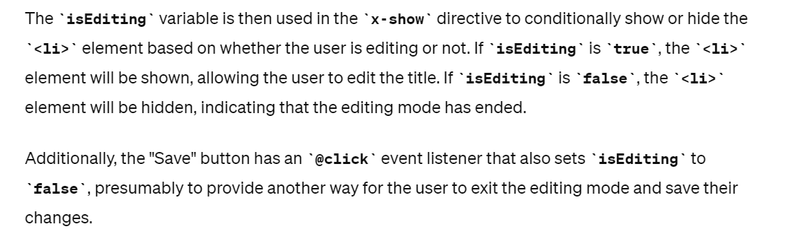
when we use x-show and x-data directive
why we use @keydown.enter="isEditing = false"
In which method we perform initialization action
Give example of change action,scroll action and resize action
How Alpine js directives is used to manage tasks and handle user interactions
Use of x-if x-elseif directive in laravel livewire through alpine js
Use x-for,and all other x- in laravel livewire through alpine js
Use x-bind, x-bind:value in laravel livewire through alpine js
Explain the difference x-bind and x-model directive
why we use x-ref directive
Alpine.js provides several directives (actions) that can be used to add interactivity to HTML elements. Here's a list of commonly used Alpine.js directives prefixed with x-:
x-data: Initializes a new Alpine.js component instance.
x-init: Executes JavaScript code when the component is initialized.
x-show: Conditionally shows or hides an element based on a Boolean expression.
x-if: Conditionally renders an element based on a Boolean expression. It removes the element from the DOM when the expression evaluates to false.
x-bind: Binds an attribute or property to a data property.
x-model: Binds an input field value to a data property.
x-text: Dynamically updates the text content of an element based on a data property.
x-html: Dynamically updates the HTML content of an element based on a data property.
x-on: Listens to DOM events and executes JavaScript code when the event occurs.
x-ref: Assigns a reference to an element, allowing you to access it in JavaScript.
x-cloak: Prevents the element from being displayed until Alpine.js has finished initializing.
x-transition: Adds transitions to elements when they are inserted or removed from the DOM.
x-bind:value: Binds the value of an input field to a data property.
x-bind:class: Binds CSS classes to an element based on a data property.
x-bind:style: Binds CSS styles to an element based on a data property.
x-for:
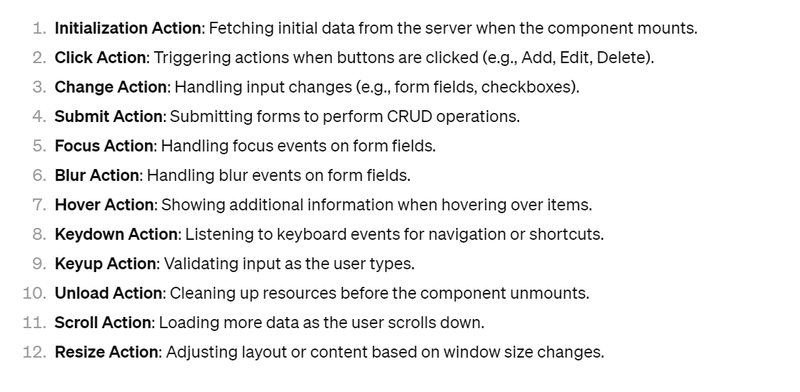
Here's a checklist of different kinds of actions called in Alpine.js with CRUD examples:
Initialization Action:
This action initializes data or performs setup tasks when the component is mounted.
Example: Fetching initial data from the server.
Click Action:
This action is triggered when a button or element is clicked.
Example: Clicking on a "Delete" button to remove an item from the list.
Change Action:
This action is triggered when the value of an input, dropdown, or checkbox changes.
Example: Selecting an option from a dropdown to filter data.
Submit Action:
This action is triggered when a form is submitted.
Example: Submitting a form to add or update data in the database.
Focus Action:
This action is triggered when an element gains focus.
Example: Focusing on an input field to enter data.
Blur Action:
This action is triggered when an element loses focus.
Example: Removing focus from an input field after entering data.
Hover Action:
This action is triggered when the mouse pointer hovers over an element.
Example: Displaying additional information when hovering over an item.
Keydown Action:
This action is triggered when a key is pressed down.
Example: Implementing keyboard shortcuts or navigation in a component.
Keyup Action:
This action is triggered when a key is released.
Example: Validating input as the user types in an input field.
Unload Action:
This action is triggered when a component is unloaded or removed from the DOM.
Example: Cleanup tasks before unloading a component.
Scroll Action:
This action is triggered when the user scrolls a specific element.
Example: Loading more data as the user scrolls down a long list.
Resize Action:
This action is triggered when the window or a specific element is resized.
Example: Adjusting layout or content based on the window size.
These are some common actions used in Alpine.js components, each serving a different purpose in handling user interactions and component lifecycle events. You can implement these actions in CRUD examples to perform various tasks like data manipulation, validation, and interaction handling.
ShowPosts.php
namespace App\Http\Livewire;

use App\Models\Post;
use Livewire\Component;

class ShowPosts extends Component
{
    public $posts;

    protected $listeners = ['postDeleted' => '$refresh'];

    public function mount()
    {
        $this->posts = Post::all();
    }

    public function deletePost($postId)
    {
        $post = Post::findOrFail($postId);
        $post->delete();
        $this->emit('postDeleted');
    }

    public function render()
    {
        return view('livewire.show-posts');
    }
}
<!-- show-posts.blade.php -->
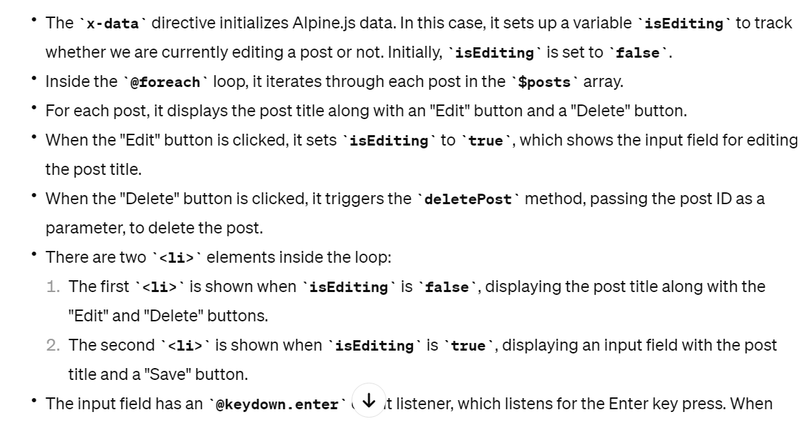
<div x-data="{ isEditing: false }">
<h2>My Posts</h2>
<ul>
@foreach($posts as $post)
<li x-show="!isEditing">
{{ $post->title }} -
<button @click="isEditing = true">Edit</button> -
<button wire:click="deletePost({{ $post->id }})">Delete</button>
</li>
<li x-show="isEditing">
<input type="text" value="{{ $post->title }}" @keydown.enter="isEditing = false">
<button @click="isEditing = false">Save</button>
</li>
@endforeach
</ul>
<form wire:submit.prevent="addPost">
<input type="text" wire:model="newPostTitle" placeholder="Enter post title">
<button type="submit">Add Post</button>
</form>
</div>
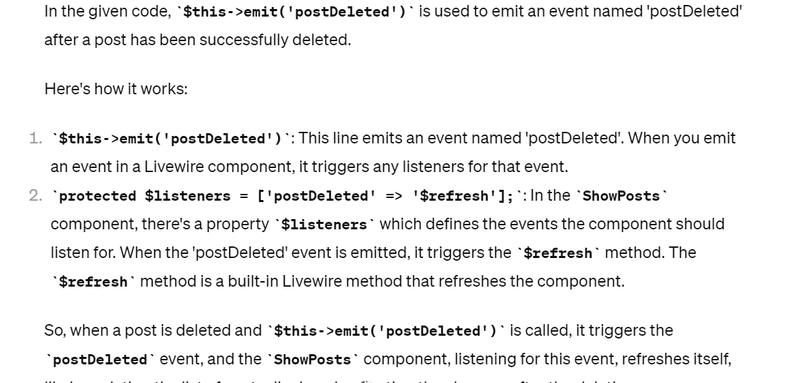
How to refreshes the component using listener methods
in above example see
protected $listeners = ['postDeleted' => '$refresh'];
 public function deletePost($postId)
    {
        $post = Post::findOrFail($postId);
        $post->delete();
        $this->emit('postDeleted');
    }

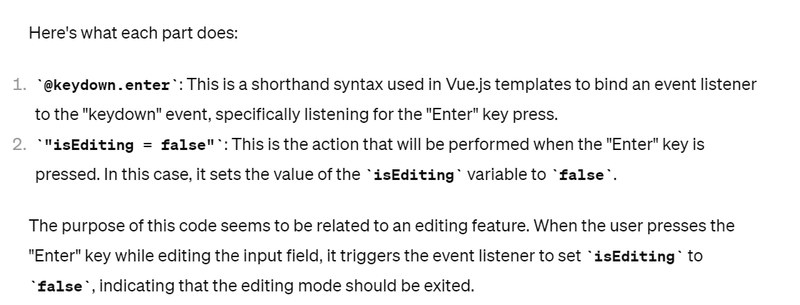
why we use @keydown.enter="isEditing = false"
<input type="text" value="{{ $post->title }}" @keydown.enter="isEditing = false">
why we use emit methods
  public function deletePost($postId)
    {
        $post = Post::findOrFail($postId);
        $post->delete();
        $this->emit('postDeleted');
    }

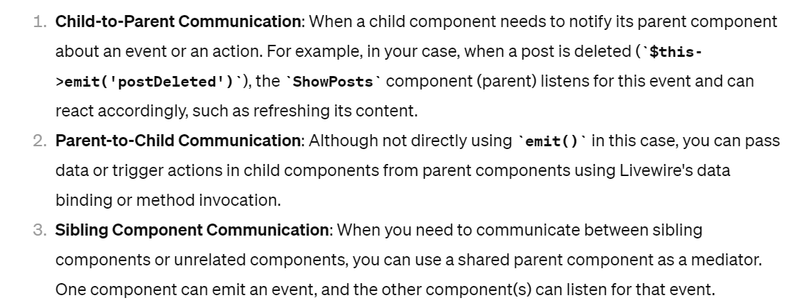

Another example of emit methods
here's a basic example of a CRUD (Create, Read, Update, Delete) application using Laravel Livewire to demonstrate the use of emit methods for inter-component communication:
Let's create a simple CRUD application for managing tasks:
Task Model: Create a Task model with fields id and name.
Task Controller: Create a controller to handle CRUD operations for tasks.
Livewire Components:
TaskIndex: Displays a list of tasks with options to edit or delete each task.
TaskEdit: Allows editing a task name.
TaskCreate: Allows creating a new task.
Routing: Define routes to access these components.
Here's a simplified implementation:
Task Model:
// Task.php
namespace App\Models;

use Illuminate\Database\Eloquent\Model;

class Task extends Model
{
    protected $fillable = ['name'];
}
Task Controller:
// TaskController.php
namespace App\Http\Controllers;

use App\Models\Task;

class TaskController extends Controller
{
    public function index()
    {
        return view('tasks.index', ['tasks' => Task::all()]);
    }

    public function edit(Task $task)
    {
        return view('tasks.edit', compact('task'));
    }

    public function update(Task $task)
    {
        $task->update(request()->validate(['name' => 'required']));
        return redirect()->route('tasks.index');
    }

    public function destroy(Task $task)
    {
        $task->delete();
        return redirect()->route('tasks.index');
    }
}
Livewire Components:
TaskIndex:
<!-- tasks/index.blade.php -->
<div>
    <h2>Task List</h2>
    <ul>
        @foreach($tasks as $task)
            <li>
                {{ $task->name }} -
                <button wire:click="$emit('editTask', {{ $task->id }})">Edit</button> -
                <button wire:click="deleteTask({{ $task->id }})">Delete</button>
            </li>
        @endforeach
    </ul>
</div>
TaskIndex.php
namespace App\Http\Livewire;

use Livewire\Component;
use App\Models\Task;

class TaskIndex extends Component
{
    public $tasks;

    protected $listeners = ['taskUpdated' => '$refresh'];

    public function mount()
    {
        $this->tasks = Task::all();
    }

    public function deleteTask($taskId)
    {
        Task::destroy($taskId);
        $this->emit('taskUpdated');
    }

    public function render()
    {
        return view('livewire.task-index');
    }
}
TaskEdit:
<!-- tasks/edit.blade.php -->
<div>
    <h2>Edit Task</h2>
    <input type="text" wire:model="taskName">
    <button wire:click="updateTask">Save</button>
</div>
// TaskEdit.php
namespace App\Http\Livewire;

use Livewire\Component;
use App\Models\Task;

class TaskEdit extends Component
{
    public $taskId;
    public $taskName;

    protected $listeners = ['editTask'];

    public function editTask($taskId)
    {
        $this->taskId = $taskId;
        $this->taskName = Task::find($taskId)->name;
    }

    public function updateTask()
    {
        $task = Task::find($this->taskId);
        $task->update(['name' => $this->taskName]);
        $this->emit('taskUpdated');
    }

    public function render()
    {
        return view('livewire.task-edit');
    }
}
TaskCreate:
<!-- tasks/create.blade.php -->
<div>
    <h2>Create Task</h2>
    <input type="text" wire:model="taskName">
    <button wire:click="createTask">Create</button>
</div>
// TaskCreate.php
namespace App\Http\Livewire;

use Livewire\Component;
use App\Models\Task;

class TaskCreate extends Component
{
    public $taskName;

    protected $listeners = ['taskUpdated' => '$refresh'];

    public function createTask()
    {
        Task::create(['name' => $this->taskName]);
        $this->taskName = '';
        $this->emit('taskUpdated');
    }

    public function render()
    {
        return view('livewire.task-create');
    }
}
Routing:
use App\Http\Controllers\TaskController;

Route::get('tasks', [TaskController::class, 'index'])->name('tasks.index');
Route::get('tasks/{task}/edit', [TaskController::class, 'edit'])->name('tasks.edit');
Route::put('tasks/{task}', [TaskController::class, 'update'])->name('tasks.update');
Route::delete('tasks/{task}', [TaskController::class, 'destroy'])->name('tasks.destroy');
In this example:
- The TaskIndex Livewire component displays a list of tasks and listens for the taskUpdated event to refresh the task list after any CRUD operation.
- The TaskEdit Livewire component allows editing a task and emits the taskUpdated event after the task is updated.
- The TaskCreate Livewire component allows creating a new task and emits the taskUpdated event after a new task is created.
- The Task model and controller handle database operations for tasks . Routing is set up to access the components and perform CRUD operations.
In which method we perform initialization action
mount() methods
Give example of change action,scroll action and resize action
To demonstrate the use of the Change Action in Laravel Livewire with Alpine.js, let's create a simple CRUD example for managing tasks. In this example, we'll handle the change action to update task details dynamically.
Task Model (Task.php): Define the Task model for interacting with tasks in the database.
// Task.php
namespace App\Models;

use Illuminate\Database\Eloquent\Model;

class Task extends Model
{
    protected $fillable = ['title', 'description', 'completed'];
}
Task Controller (ShowTasks.php): Create a Livewire component to manage tasks.
// ShowTasks.php
namespace App\Http\Livewire;

use App\Models\Task;
use Livewire\Component;

class ShowTasks extends Component
{
    public $tasks;

    public function mount()
    {
        $this->tasks = Task::all();
    }

    public function updateTaskTitle($taskId, $newTitle)
    {
        $task = Task::findOrFail($taskId);
        $task->title = $newTitle;
        $task->save();
    }

    public function render()
    {
        return view('livewire.show-tasks');
    }
}
Blade View (show-tasks.blade.php): Create the Blade view for
<!-- show-tasks.blade.php -->

<div x-data>
    <h2>My Tasks</h2>

    <ul>
        @foreach($tasks as $task)
            <li>
                <input type="text" value="{{ $task->title }}" @change="$wire.updateTaskTitle({{ $task->id }}, $event.target.value)">
            </li>
        @endforeach
    </ul>
</div>
In this example:
We define a Task model to interact with tasks in the database.
The ShowTasks Livewire component fetches initial task data from the server when mounted using the mount method.
We use Alpine.js to handle the change action for updating task titles dynamically.
When the value of the input field changes, the updateTaskTitle Livewire method is called to update the task title.
Here's a CRUD example using Laravel Livewire, where the scroll action is implemented using Alpine.js. This example will focus on a simple blog post management system.
First, ensure you have Livewire and Alpine.js installed in your Laravel application. If not, you can install them via Composer and npm, respectively.
composer require livewire/livewire
npm install alpinejs
Now, let's create the components and set up the necessary routes.
Create Post Model and Migration:
php artisan make:model Post -m
In the migration file (create_posts_table.php), define the necessary columns for your posts table (e.g., title, content).
Define Routes:
// routes/web.php

use App\Http\Controllers\PostController;

Route::get('/posts', [PostController::class, 'index'])->name('posts.index');
Route::get('/posts/create', [PostController::class, 'create'])->name('posts.create');
Route::post('/posts', [PostController::class, 'store'])->name('posts.store');
Route::get('/posts/{post}/edit', [PostController::class, 'edit'])->name('posts.edit');
Route::put('/posts/{post}', [PostController::class, 'update'])->name('posts.update');
Route::delete('/posts/{post}', [PostController::class, 'destroy'])->name('posts.destroy');
Create Livewire Components:
PostIndex (to display a list of posts)
PostCreate (to create a new post)
PostEdit (to edit an existing post)
Set up Livewire Components:
PostIndex:
// app/Http/Livewire/PostIndex.php

namespace App\Http\Livewire;

use Livewire\Component;
use App\Models\Post;

class PostIndex extends Component
{
    public $posts;

    public function mount()
    {
        $this->posts = Post::all();
    }

    public function render()
    {
        return view('livewire.post-index');
    }
}
PostIndex Blade View (post-index.blade.php):
<div x-data="{ scroll: false }" @scroll.window="scroll = window.scrollY > 100">
    <h2>Posts</h2>

    <ul>
        @foreach ($posts as $post)
            <li>{{ $post->title }}</li>
        @endforeach
    </ul>

    <button x-show="scroll" @click="window.scrollTo({ top: 0, behavior: 'smooth' })">Back to Top</button>
</div>
PostCreate and PostEdit components will contain forms to create and edit posts, respectively.
Implement PostController:
// app/Http/Controllers/PostController.php

namespace App\Http\Controllers;

use Illuminate\Http\Request;
use App\Models\Post;

class PostController extends Controller
{
    // Implement necessary methods such as index, create, store, edit, update, destroy
}
Set Up Views:
Create views for creating, editing, and listing posts (create.blade.php, edit.blade.php, index.blade.php).
Finalize:
Ensure your layout file (app.blade.php or similar) includes the necessary scripts for Livewire and Alpine.js.
<html lang="en">
<head>
    <!-- Include other meta tags, stylesheets, etc. -->

    @livewireStyles
</head>
<body>
    <!-- Include other HTML content -->

    @livewireScripts
    <script src="{{ asset('js/alpine.js') }}"></script>
</body>
</html>
This example demonstrates how to use the scroll action in Laravel Livewire components with Alpine.js. In the PostIndex component, the back-to-top button appears when the user scrolls down the page. Clicking the button smoothly scrolls the page back to the top.
How Alpine js directives is used to manage tasks and handle user interactions
To demonstrate the use of various Alpine.js directives in Laravel Livewire, let's create a simple CRUD example for managing tasks. We'll use Alpine.js to handle interactivity such as showing/hiding elements, updating data dynamically, and performing actions based on user input.
Task Model (Task.php): Define the Task model for interacting with tasks in the database.
// Task.php

namespace App\Models;

use Illuminate\Database\Eloquent\Model;

class Task extends Model
{
    protected $fillable = ['title', 'description', 'completed'];
}
Task Controller (ShowTasks.php): Create a Livewire component to manage tasks.
// ShowTasks.php

namespace App\Http\Livewire;

use App\Models\Task;
use Livewire\Component;

class ShowTasks extends Component
{
    public $tasks;

    public function mount()
    {
        $this->tasks = Task::all();
    }

    public function render()
    {
        return view('livewire.show-tasks');
    }
}
Blade View (show-tasks.blade.php): Create the Blade view for displaying tasks and handling interactions using Alpine.js.
<!-- show-tasks.blade.php -->

<div x-data="{ isEditing: false, newTaskTitle: '' }">
    <h2>My Tasks</h2>

    <ul>
        @foreach($tasks as $task)
            <li x-show="!isEditing">
                <span x-text="task.title"></span> - <span x-text="task.description"></span> -
                <button @click="isEditing = true">Edit</button>
            </li>
            <li x-show="isEditing">
                <input type="text" x-model="task.title">
                <input type="text" x-model="task.description">
                <button @click="isEditing = false">Save</button>
            </li>
        @endforeach
    </ul>

    <div>
        <input type="text" x-model="newTaskTitle" placeholder="Enter task title">
        <button @click="addTask">Add Task</button>
    </div>
</div>

<script>
    window.addEventListener('load', function () {
        const tasks = @json($tasks->toArray());

        Alpine.data('showTasks', () => ({
            tasks: tasks,
            addTask() {
                if (this.newTaskTitle.trim() === '') return;
                this.tasks.push({
                    title: this.newTaskTitle,
                    description: '',
                    completed: false
                });
                this.newTaskTitle = '';
            }
        }));
    });
</script>
Note
Alpine.data('showTasks', () => ({
class ShowTasks extends Component
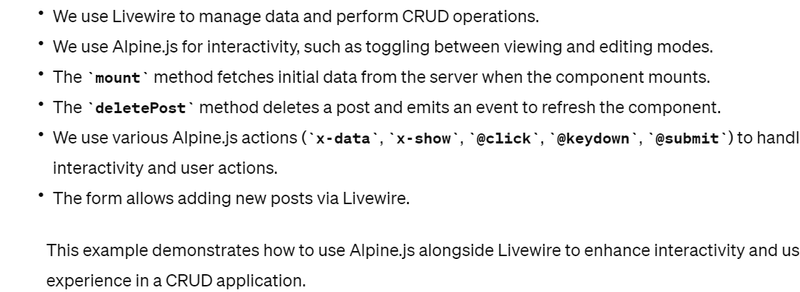
In this example:
- We define a Task model to interact with tasks in the database.
- The ShowTasks Livewire component fetches initial task data from the server when mounted using the mount method.
- We use Alpine.js to handle interactivity, such as showing/hiding elements (x-show), updating data dynamically (x-text, x-model), and performing actions based on user input (@click).
- The Alpine.js script initializes data (tasks) and defines methods (addTask) to handle task management .
Use of x-if and x-elseif directive in laravel livewire through alpine js
To demonstrate the use of x-if, x-elseif, and other Alpine.js directives in Laravel Livewire, let's create a simple CRUD example for managing tasks. We'll use Alpine.js to handle interactivity such as showing/hiding elements based on conditions and dynamically updating data.
Task Model (Task.php): Define the Task model for interacting with tasks in the database.
// Task.php

namespace App\Models;

use Illuminate\Database\Eloquent\Model;

class Task extends Model
{
    protected $fillable = ['title', 'description', 'completed'];
}
Task Controller (ShowTasks.php): Create a Livewire component to manage tasks.
// ShowTasks.php

namespace App\Http\Livewire;

use App\Models\Task;
use Livewire\Component;

class ShowTasks extends Component
{
    public $tasks;

    public function mount()
    {
        $this->tasks = Task::all();
    }

    public function render()
    {
        return view('livewire.show-tasks');
    }
}
Blade View (show-tasks.blade.php): Create the Blade view for displaying tasks and handling interactions using Alpine.js.
<!-- show-tasks.blade.php -->

<div x-data="{ showCompleted: false }">
    <h2>My Tasks</h2>

    <ul>
        @foreach($tasks as $task)
            <li x-if="!$wire.taskCompleted({{ $task->id }})" x-text="task.title"></li>
            <li x-elseif="showCompleted" x-text="task.title"></li>
        @endforeach
    </ul>

    <button @click="showCompleted = !showCompleted">Toggle Completed Tasks</button>
</div>

<script>
    window.addEventListener('load', function () {
        Alpine.data('showTasks', () => ({
            taskCompleted(taskId) {
                // Logic to check if task is completed
                // For demonstration purpose, return true for tasks with odd IDs
                return taskId % 2 === 1;
            }
        }));
    });
</script>
In this example:
- We define a Task model to interact with tasks in the database.
- The ShowTasks Livewire component fetches initial task data from the server when mounted using the mount method.
- We use Alpine.js directives x-if and x-elseif to conditionally render task items based on whether they are completed or not.
- The taskCompleted method in Alpine.js is used to check if a task is completed. For demonstration purpose, odd task IDs are considered completed.
- Clicking the "Toggle Completed Tasks" button toggles the visibility of completed tasks
This example demonstrates how to use Alpine.js directives alongside Laravel Livewire to manage tasks and handle user interactions in a CRUD application.
Use of x-for, in laravel livewire through alpine js
Task Model (Task.php): Define the Task model for interacting with tasks in the database.
// Task.php

namespace App\Models;

use Illuminate\Database\Eloquent\Model;

class Task extends Model
{
    protected $fillable = ['title', 'description', 'completed'];
}
Task Controller (ShowTasks.php): Create a Livewire component to manage tasks.
// ShowTasks.php

namespace App\Http\Livewire;

use App\Models\Task;
use Livewire\Component;

class ShowTasks extends Component
{
    public $tasks;

    public function mount()
    {
        $this->tasks = Task::all();
    }

    public function render()
    {
        return view('livewire.show-tasks');
    }
}
Blade View (show-tasks.blade.php): Create the Blade view for displaying tasks and handling interactions using Alpine.js.
<!-- show-tasks.blade.php -->

<div x-data="{ tasks: @json($tasks), newTaskTitle: '' }">
    <h2>My Tasks</h2>

    <ul>
        <template x-for="task in tasks" :key="task.id">
            <li>
                <div x-text="task.title"></div>
                <div x-text="task.description"></div>
                <div>
                    <input type="checkbox" x-model="task.completed" @click="updateTask(task)">
                    <button @click="deleteTask(task)">Delete</button>
                </div>
            </li>
        </template>
    </ul>

    <div>
        <input type="text" x-model="newTaskTitle" placeholder="Enter task title">
        <input type="text" x-model="newTaskDescription" placeholder="Enter task description">
        <button @click="addTask">Add Task</button>
    </div>
</div>
<script>
    window.addEventListener('load', function () {
        Alpine.data('showTasks', () => ({
            tasks: [],
            newTaskTitle: '',
            newTaskDescription: '',

            addTask() {
                if (this.newTaskTitle.trim() === '') return;
                this.tasks.push({
                    id: this.tasks.length + 1,
                    title: this.newTaskTitle,
                    description: this.newTaskDescription,
                    completed: false
                });
                this.newTaskTitle = '';
                this.newTaskDescription = '';
            },

            updateTask(task) {
                // Perform Livewire action to update task completion status
                Livewire.emit('updateTask', task);
            },

            deleteTask(task) {
                // Perform Livewire action to delete task
                Livewire.emit('deleteTask', task);
            }
        }));
    });
</script>
In this example:
Use of x-bind, x-bind:value in laravel livewire through alpine js
To demonstrate the use of x-bind, x-bind:value, and other Alpine.js directives in Laravel Livewire, let's create a simple CRUD example for managing tasks. We'll use Alpine.js to bind data dynamically to HTML elements and handle user interactions.
Task Model (Task.php): Define the Task model for interacting with tasks in the database.
// Task.php

namespace App\Models;

use Illuminate\Database\Eloquent\Model;

class Task extends Model
{
    protected $fillable = ['title', 'description', 'completed'];
}
Task Controller (ShowTasks.php): Create a Livewire component to manage tasks.
ShowTasks.php
namespace App\Http\Livewire;

use App\Models\Task;
use Livewire\Component;

class ShowTasks extends Component
{
    public $tasks;

    public function mount()
    {
        $this->tasks = Task::all();
    }

    public function render()
    {
        return view('livewire.show-tasks');
    }
}
Blade View (show-tasks.blade.php): Create the Blade view for displaying tasks and handling interactions using Alpine.js.
show-tasks.blade.php
<div x-data="{ tasks: @json($tasks), newTaskTitle: '', newTaskDescription: '' }">
    <h2>My Tasks</h2>

    <ul>
        <template x-for="task in tasks" :key="task.id">
            <li>
                <div x-text="task.title"></div>
                <div x-text="task.description"></div>
                <div>
                    <input type="checkbox" x-bind:checked="task.completed" @click="updateTaskCompletion(task)">
                    <button @click="deleteTask(task)">Delete</button>
                </div>
            </li>
        </template>
    </ul>

    <div>
        <input type="text" x-model="newTaskTitle" placeholder="Enter task title">
        <input type="text" x-model="newTaskDescription" placeholder="Enter task description">
        <button @click="addTask">Add Task</button>
    </div>
</div>

<script>
    window.addEventListener('load', function () {
        Alpine.data('showTasks', () => ({
            tasks: [],
            newTaskTitle: '',
            newTaskDescription: '',

            addTask() {
                if (this.newTaskTitle.trim() === '') return;
                this.tasks.push({
                    id: this.tasks.length + 1,
                    title: this.newTaskTitle,
                    description: this.newTaskDescription,
                    completed: false
                });
                this.newTaskTitle = '';
                this.newTaskDescription = '';
            },

            updateTaskCompletion(task) {
                task.completed = !task.completed;
                // Perform Livewire action to update task completion status
                Livewire.emit('updateTaskCompletion', task);
            },

            deleteTask(task) {
                // Perform Livewire action to delete task
                Livewire.emit('deleteTask', task);
            }
        }));
    });
</script>
In this example:
- We define a Task model to interact with tasks in the database.
- The ShowTasks Livewire component fetches initial task data from the server when mounted using the mount method.
- We use Alpine.js directive x-data to initialize the tasks array and manage new task data.
- Alpine.js directives such as x-for, x-model, x-bind:checked, and x-bind:value are used to bind data dynamically to HTML elements and handle user interactions.
- Interactivity such as adding, updating, and deleting tasks is handled using Alpine.js directives along with Livewire component action s.
Explain the difference x-bind and x-model directive
x-bind is used for one-way binding in Alpine.js. It sets the value of an attribute or property on an HTML element based on a given expression.
One-way binding means that changes to the attribute or property in the JavaScript model will update the DOM element, but changes to the DOM element itself will not update the JavaScript model automatically. In other words, changes in the JavaScript model are reflected in the DOM, but changes in the DOM do not affect the JavaScript model.
If you need two-way data binding, where changes in the DOM automatically update the JavaScript model and vice versa, you would use x-model instead of x-bind. x-model is specifically designed for two-way binding with form elements like input fields, checkboxes, and radio buttons.
To demonstrate the difference between x-bind and x-model in Alpine.js within a CRUD example, let's consider a simple scenario of managing a list of tasks.
Scenario: We want to display a list of tasks with checkboxes indicating completion status. When the user checks or unchecks a checkbox, we want to update the completion status of the corresponding task.
Here's how we can implement this scenario using both x-bind and x-model:
Using x-bind:
<!-- Using x-bind -->
<div x-data="{ tasks: @json($tasks) }">
    <h2>My Tasks</h2>

    <ul>
        <template x-for="task in tasks" :key="task.id">
            <li>
                <input type="checkbox" x-bind:checked="task.completed" @click="toggleCompletion(task)">
                <span x-text="task.title"></span>
            </li>
        </template>
    </ul>
</div>

<script>
    window.addEventListener('load', function () {
        Alpine.data('taskManager', () => ({
            tasks: @json($tasks),

            toggleCompletion(task) {
                task.completed = !task.completed;
                // Perform Livewire action to update task completion status
                Livewire.emit('updateTaskCompletion', task);
            }
        }));
    });
</script>
Using x-model:
<!-- Using x-model -->
<div x-data="{ tasks: @json($tasks) }">
    <h2>My Tasks</h2>

    <ul>
        <template x-for="task in tasks" :key="task.id">
            <li>
                <input type="checkbox" x-model="task.completed" @click="toggleCompletion(task)">
                <span x-text="task.title"></span>
            </li>
        </template>
    </ul>
</div>

<script>
    window.addEventListener('load', function () {
        Alpine.data('taskManager', () => ({
            tasks: @json($tasks),

            toggleCompletion(task) {
                // Perform Livewire action to update task completion status
                Livewire.emit('updateTaskCompletion', task);
            }
        }));
    });
</script>
In both cases, we're binding the completed property of each task to the checked attribute of the checkbox. The difference lies in how changes to the checkbox are handled:
With x-bind:checked, the checkbox's state is bound directly to the completed property of the task. When the checkbox is clicked, Alpine.js updates the property, and we manually emit a Livewire event to reflect the change on the server.
With x-model, Alpine.js sets up two-way data binding between the checkbox and the completed property. When the checkbox is clicked, Alpine.js automatically updates the property, and we again emit a Livewire event to reflect the change on the server.
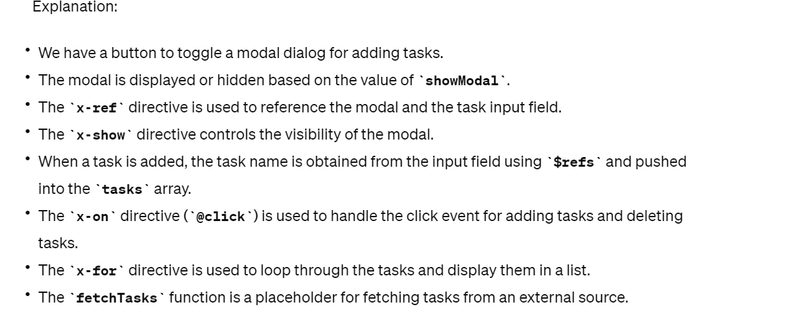
why we use x-ref directive
here's a CRUD example that demonstrates the use of x-ref and x-on in Alpine.js:
<div x-data="{ showModal: false }">
<!-- Button to toggle modal -->
<button @click="showModal = true">Add Task</button>
<!-- Modal -->
<div x-show="showModal" @click.away="showModal = false">
<div x-ref="modal" class="modal">
<!-- Modal content -->
<div class="modal-content">
<span @click="showModal = false" class="close">×</span>
<h2>Add Task</h2>
<input type="text" x-ref="taskInput" placeholder="Task name">
<button @click="addTask">Save</button>
</div>
</div>
</div>
<!-- Task list -->
<ul>
<template x-for="task in tasks" :key="task.id">
<li>
<span x-text="task.name"></span>
<button @click="deleteTask(task.id)">Delete</button>
</li>
</template>
</ul>
</div>
<script>
function fetchTasks() {
return [
{ id: 1, name: 'Task 1' },
{ id: 2, name: 'Task 2' },
{ id: 3, name: 'Task 3' }
];
}
window.addEventListener('load', function () {
const app = Alpine.data('crudExample', () => ({
tasks: fetchTasks(),
addTask() {
const taskName = this.$refs.taskInput.value;
if (taskName.trim() !== '') {
const newTask = { id: Date.now(), name: taskName };
this.tasks.push(newTask);
this.$refs.taskInput.value = ''; // Clear input field
this.$refs.modal.style.display = 'none'; // Hide modal
}
},
deleteTask(id) {
this.tasks = this.tasks.filter(task => task.id !== id);
}
}));
});
</script>

Top comments (0)