Adding css color,fontsize,height,width using .css jquery:
Adding styles color,fontsize,height,width using addClass() jquery:
Adding styles color,fontsize,height,width using addClass() on click div,button ,select dropdown,checkbox or different event listener jquery:
Toggle a Class
remove a single style using .css
remove a all inline styles using removeAttr on click div,button ,select dropdown,checkbox or different event listener jquery
Removing a single Class using removeClass:
Removing a all Class using removeClass:
Modifying Styles
Get the current width and increase
Chain multiple style methods for concise code use two method at a time .css and .addclass().
Multiselect
How to change form height using form-horizontal based on on change event listener
Write a code to adjust height dynamically when i type long text on input field
Adding Styles:
Using CSS Method:
Use the css() method to add or modify styles.
// Add a single style
$('#elementId').css('color', 'red');

// Add multiple styles
$('#elementId').css({
    'color': 'red',
    'font-size': '16px'
});
// Add a single style
$('#inputElement').css('border', '2px solid red');

// Add multiple styles
$('#inputElement').css({
    'color': 'blue',
    'font-size': '16px'
});
// Add a single style
$('select').css('border', '2px solid red');

// Add multiple styles
$('select').css({
    'color': 'blue',
    'font-size': '16px'
});
table Property:
if (rowStatus === status) {
        $(this).css('display', 'table-row'); // Show the row
    } else {
        $(this).css('display', 'none'); // Hide the row
    }
display Property:
// Show the element
$(element).css('display', 'block');

// Hide the element
$(element).css('display', 'none');
color Property:
// Set text color to red
$(element).css('color', 'red');
font-size Property:
Example:
$(element).css('font-size', '16px');
background-color Property:
Example:
$(element).css('background-color', 'lightblue');
width Property:
Example:
$(element).css('width', '200px');
height Property:
$(element).css('height', '100px');
border Property:
$(element).css('border', '1px solid black');
margin Property:
$(element).css('margin', '10px');
padding Property:
$(element).css('padding', '5px');
opacity Property:
$(element).css('opacity', '0.5');
font-weight Property:
$(element).css('font-weight', 'bold');
text-align Property:
$(element).css('text-align', 'center');
cursor Property:
$(element).css('cursor', 'pointer');
border-radius Property:
Example:
// Set border radius to 5 pixels
$(element).css('border-radius', '5px');
transition Property:
Example:
// Set a transition for smooth changes over 0.3 seconds
$(element).css('transition', 'all 0.3s ease');
Practical Example
<div class="col-lg-6 col-md-6 col-sm-12 col-12">
                            <div class="input-group mb-3">
                                <div class="input-group-prepend">
                                    <span class="input-group-text fab fa-wordpress" id="basic-addon1" style="font-size:24px"></span>
                                </div>
                                <input type="text" name="wordpress" id="wordpress_url" class="form-control" placeholder="Enter your wordpress url" value="{{$profile_user_url->wordpress}}">
                            </div>
                        </div>
                    </div>
$(`#${platform}_url`).addClass('error-border');
   .error-border {
    border: 2px solid red;
}
for (var platform in socialUrls) {
    if (socialUrls.hasOwnProperty(platform)) {
        if (!validateSocialUrl(socialUrls[platform], platform)) {

            let htmlCode = ` <h5 class="text-center" style="margin: 10px 0; color: red;">
             please put correct url and fill empty field in ${platform} field .
            </h5>`;

            $(`#${platform}_url`).addClass('error-border');
    $('#updateno').html(htmlCode);
            // If validation fails for any platform, set isValid to false
            isValid = false;
            break; // No need to continue checking other platforms
        }
    }
}
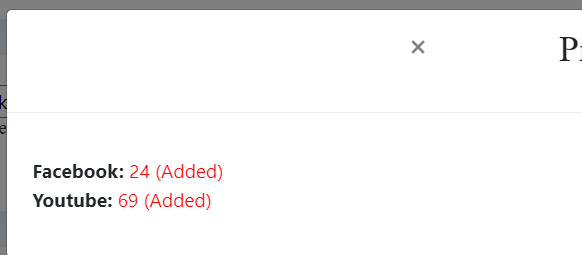
output
Another Example
 success: function(data) {

                console.log('view-button ka data aata hain');
                var users = data.pays;
                var profiles = data.profiles;
                console.log(users);
                console.log(profiles);
                var addcarts=profiles.addcarts;
                console.log(addcarts);
 $('#facebook').text(facebook);
                if (addcarts !== 'no') {
                    $('#facebook').append(' (Added)').css('color', 'red');
            }
                $('#facebookContainer').show();

                } else {

                // Hide the container if pintrest is null
                $('#facebookContainer').hide();

                }
}
output
Adding a Class:
Use the addClass() method to add a predefined CSS class.
input element
$('#elementId').addClass('highlight');
dropdown element
$('select').addClass('highlight');
html code
<!DOCTYPE html>
<html lang="en">
<head>
  <meta charset="UTF-8">
  <meta name="viewport" content="width=device-width, initial-scale=1.0">
  <title>jQuery addClass() and removeClass() Example</title>
  <style>
    .highlight {
      background-color: yellow;
    }
    .italic {
      font-style: italic;
    }
  </style>
  <script src="https://code.jquery.com/jquery-3.6.4.min.js"></script>
</head>
<body>

  <div id="myDiv">This is a div element</div>

  <script>
    // Adding a class when a button is clicked
    $('#myDiv').on('click', function() {
      $(this).addClass('highlight');
    });

    // Removing a class after a delay
    setTimeout(function() {
      $('#myDiv').removeClass('highlight');
    }, 2000);

    // Adding and removing classes on another event
    $('#myDiv').hover(
      function() {
        $(this).addClass('italic');
      },
      function() {
        $(this).removeClass('italic');
      }
    );
  </script>

</body>
</html>
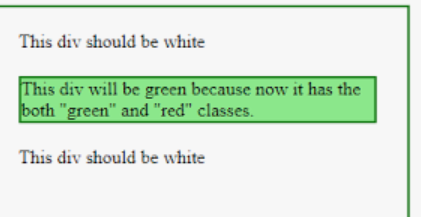
output
Toggle a Class:
Use the toggleClass() method to add or remove a class based on its presence.
$('#elementId').toggleClass('highlight');
Removing Styles:
Remove a Single Style:
Use the css() method with an empty string to remove a single style.
input element
$('#inputElement').css('border', '');
$('#elementId').css('color', '');
dropdown element
$('select').css('border', '');
Remove All Styles:
Use the removeAttr() method to remove all inline styles.
$('#elementId').removeAttr('style');
The attr() function in jQuery is used to get or set the value of an attribute for the selected elements. To add or remove styles dynamically, you can use attr('style', 'value') to add a style attribute and removeAttr('style') to remove it. Here's an example code:
<!DOCTYPE html>
<html lang="en">
<head>
  <meta charset="UTF-8">
  <meta name="viewport" content="width=device-width, initial-scale=1.0">
  <title>jQuery addAttr() and removeAttr() Example</title>
  <script src="https://code.jquery.com/jquery-3.6.4.min.js"></script>
</head>
<body>

  <div id="myDiv">This is a div element</div>

  <script>
    // Adding inline styles when a button is clicked
    $('#myDiv').on('click', function() {
      $(this).attr('style', 'background-color: yellow; color: blue;');
    });

    // Removing inline styles after a delay
    setTimeout(function() {
      $('#myDiv').removeAttr('style');
    }, 2000);
  </script>

</body>
</html>
In this example:
When you click on the #myDiv element, the style attribute is added with specific inline styles (background-color and color).
After a delay of 2000 milliseconds (2 seconds), the style attribute is removed, reverting the element to its original styling.
Please note that using attr('style', 'value') will overwrite any existing inline styles, so you may want to consider using css() method for more fine-grained control or adding/removing specific classes for styling changes.
Remove a Class:
Use the removeClass() method to remove a predefined CSS class.
$('#elementId').removeClass('highlight');
remove on dropdown element
$('select').removeClass('highlight');
remove on dropdown element
$('select').removeAttr('style');
Remove All Classes:
Use the removeClass() method without specifying a class to remove all classes.
$('#elementId').removeClass();
remove on dropdown element
$('select').removeClass();
Remove Class with a Callback:
Use the removeClass() method with a callback function to conditionally remove a class.
$('#elementId').removeClass(function (index, className) {
    return (className.match(/highlight-\d+/) || []).join(' ');
});
Modifying Styles:
Modifying Specific Style Property:
Use the css() method to modify a specific style property.
// Get the current width and increase it
$('#inputElement').css('font-size', '+=2px')
var currentWidth = $('#elementId').css('width');
$('#elementId').css('width', parseInt(currentWidth) + 10);
Modifying Multiple Properties:
Use the css() method with an object to modify multiple style properties.
$('#elementId').css({
    'color': 'blue',
    'font-size': '18px'
});
Chaining Style Methods:
Chain multiple style methods for concise code.
$('#elementId')
    .css('color', 'green')
    .addClass('highlight');
Animate Styles:
Use the animate() method for smooth transitions.
$('#elementId').animate({
    'opacity': 0.5,
    'height': 'toggle'
}, 1000);
These examples cover various scenarios for adding, removing, and modifying styles using jQuery. Choose the method that best fits your use case.
Modifying Styles:
Modifying Specific Style Property:
Use the css() method to modify a specific style property.
// Get the current width and increase it
var currentWidth = $('#elementId').css('width');
$('#elementId').css('width', parseInt(currentWidth) + 10);
Modifying Multiple Properties:
Use the css() method with an object to modify multiple style properties.
$('#elementId').css({
    'color': 'blue',
    'font-size': '18px'
});
Chaining Style Methods:
Chain multiple style methods for concise code.
$('#elementId')
    .css('color', 'green')
    .addClass('highlight');
Animate Styles:
Use the animate() method for smooth transitions.
$('#elementId').animate({
    'opacity': 0.5,
    'height': 'toggle'
}, 1000);
These examples cover various scenarios for adding, removing, and modifying styles using jQuery. Choose the method that best fits your use case.
Multiselect
Adding Styles to a Multiselect Element:
By Multiselect ID:
Target the multiselect element with a specific id and add styles.
// Add a single style to the multiselect with id 'multiselectId'
$('#multiselectId').css('border', '2px solid red');

// Add multiple styles to the multiselect with id 'multiselectId'
$('#multiselectId').css({
    'color': 'blue',
    'font-size': '16px'
});
Removing Styles from a Multiselect Element:
By Multiselect ID:
Use the css() method with an empty string to remove a single style from the multiselect with a specific id.
// Remove the 'border' style from the multiselect with id 'multiselectId'
$('#multiselectId').css('border', '');
Modifying Styles on a Multiselect Element:
By Multiselect ID:
Use the css() method to modify a specific style property on the multiselect with a specific id.
// Increase the font size of the multiselect with id 'multiselectId' by 2 pixels
$('#multiselectId').css('font-size', '+=2px');
By Multiselect ID (Chaining):
Chain multiple style methods for concise code on the multiselect with a specific id.
$('#multiselectId')
    .css('color', 'red')
    .addClass('highlight');
Adding Styles to Options within Multiselect:
By Option ID within Multiselect:
Target the options within the multiselect and add styles.
// Add a style to the option with id 'optionId' within the multiselect
$('#multiselectId option#optionId').css('background-color', 'yellow');
Modifying Styles on Options within Multiselect:
By Option ID within Multiselect:
Use the css() method to modify styles on the option with a specific id within the multiselect.
// Change the color of the option with id 'optionId' within the multiselect
$('#multiselectId option#optionId').css('color', 'green');
Practical Examples
How to change form height using form-horizontal based on on change event listener
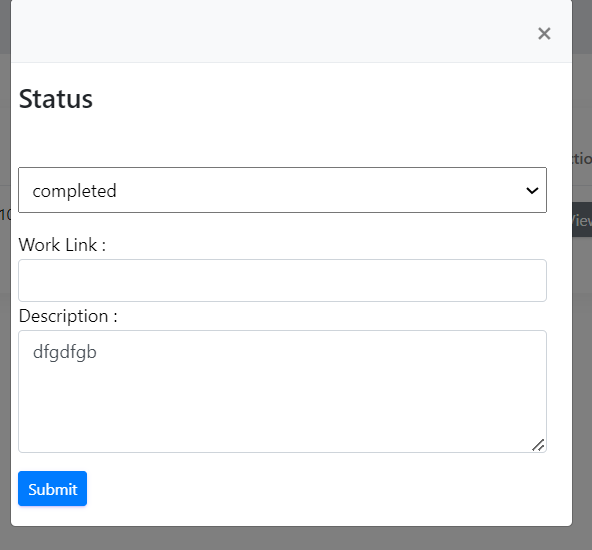
By default popupmodal height
$(document).ready(function()
                 {
 $('.form-horizontal').css('height', '150px');
}
**Based on selected dropdown height**

  success: function(data)
                 {
                console.log('view-button ka data aata hain');
                    var approvetask = data.approvetask;
                    var infl_email = data.influencer_email;
                    var infl_admin = data.influencer_admin_id;
                    var status = data.approvetask.status;
if (status === 'approve') {

}
 else if (status === 'completed') {
                    $('.form-horizontal').css('height', '300px');
                    $('#urlFields').show();
                    $('#approves-data').modal('show');

                    $('#urltask').html(`
                    <option value="completed">completed</option>
                    <option value="InProgress">In Progress</option>


                `);

                }
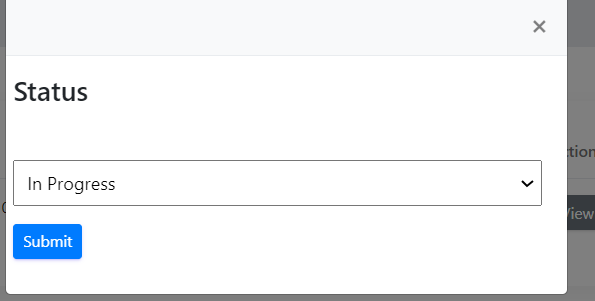
                else if (status === 'InProgress') {
                    $('.form-horizontal').css('height', '300px');
                    $('#approves-data').modal('show');
                    $('#urlFields').show();
                    $('#urltask').html(`

                    <option value="completed">completed</option>

                    `);


                }
 else if (status === 'completed') {
                    $('.form-horizontal').css('height', '300px');
 else if (status === 'InProgress') {
                    $('.form-horizontal').css('height', '300px');
                    $('#approves-data').modal('show');
                    $('#urlFields').show();
                    $('#urltask').html(`

                    <option value="completed">completed</option>

                    `);
                }
<div id="approves-data" class="modal fade" role="dialog">
<div class="modal-dialog">
<div class="modal-content">
<div class="modal-header bg-light">
<button type="button" class="close" data-dismiss="modal">×</button>
<br>
</div>
<div class="modal-body">
<form method="post" id="task_form" style="margin-left:-30px;" class="form-horizontal" enctype="multipart/form-data">
@csrf
<div class="form-group">
<h4>Status</h4>
<label class="control-label ">Status</label>
<select name="urlinfluencertask" id="urlinfluencertask" class="w-100 p-2">
</select>
</div>
<div class="form-group" id="urlFields">
<span id="urlErrorMessage" class="text-danger"></span>
<label for="video_upload" class="control-label" style="color: black;" required>Work Link :</label>
<input type="text" name="video_upload" id="video_upload" class="form-control" value="" placeholder="" required>
<label for="text_area" class="control-label" style="color: black;">Description :</label>
<textarea id="write_up" name="write_up" id="write_up" rows="4" cols="4" class="form-control" placeholder="" required></textarea>
</div>
<!-- Sending admin_id and admin_email in hidden input box -->
<input type="hidden" value="{{ Auth::user()->id }}" name="admin_id" id="admin_id" />
<input type="hidden" value="{{ Auth::user()->email }}" id="admin_email" name="admin_email" />
<input type="hidden" name="influencer_email" id="influencer_email">
<input type="hidden" name="influencer_admin_id" id="influencer_admin_id">
<input type="hidden" name="action" id="action" />
<input type="hidden" name="hidden_id" id="hidden_id" />
<input type="hidden" name="share_id" id="share_id" />
<button type="submit" name="action_button" id="action_button" class="btn btn-sm py-1 btn-primary me-2" value="Add">Submit</button>
<input type="hidden" name="payment_id" id="payment_id">
</div>
</form>
</div>
</div>
</div>
</div>
when event listner urlinfluencertask change function apply then change height
  $(document).ready(function()
                 {
                    $('.form-horizontal').css('height', '150px');
                    $('#urlFields').hide();
                    $('#urlinfluencertask').on('change', function () {
            var selectedOption = $(this).val();
            console.log(selectedOption)
            $('#urlinfluencertask').val(selectedOption);
            // Check if the selected option is 'completed'
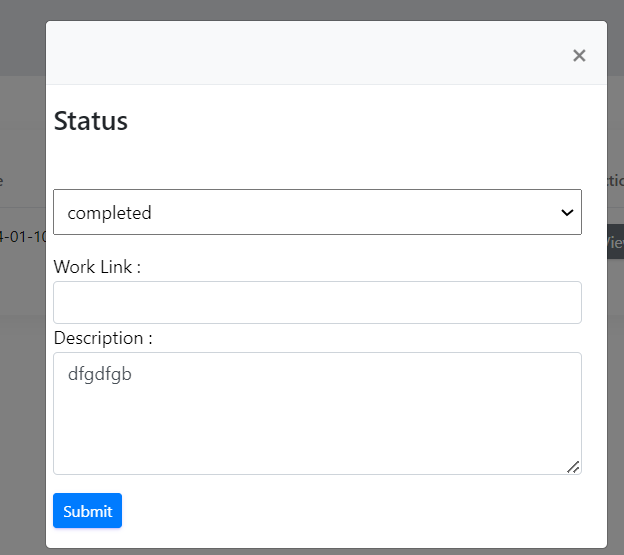
            if (selectedOption === 'completed') {
                $('.form-horizontal').css('height', '300px');
                // Show the input fields

                $('#urlFields').show();
            } else {
                $('.form-horizontal').css('height', '100px');
                // Hide the input fields for other options
                $('#urlFields').hide();
            }
        });
Modifying Styles:
Toggle Styles with toggle() Method:
Use the toggle() method to toggle between two or more styles.
$('#elementId').toggle(function() {
    $(this).css('color', 'red');
}, function() {
    $(this).css('color', 'blue');
});
Modifying Styles with Callback:
Use a callback function with the css() method for dynamic modifications.
$('#elementId').css('width', function(index, value) {
    return parseInt(value) + 50 + 'px';
});
Using toggleClass() for Conditional Styling:
Use toggleClass() with a condition to add or remove a class.
$('#elementId').toggleClass('large', condition);
Changing Classes with toggleClass():
Toggle between multiple classes using toggleClass().
$('#elementId').toggleClass('oldClass newClass');
These examples demonstrate additional ways to manipulate styles using jQuery. Choose the method that aligns with your specific requirements and coding style.
Write a code to adjust height dynamically when i type long text on input field
<!DOCTYPE html>
<html lang="en">
<head>
  <meta charset="UTF-8">
  <meta name="viewport" content="width=device-width, initial-scale=1.0">
  <title>jQuery CSS Example</title>
  <script src="https://code.jquery.com/jquery-3.6.4.min.js"></script>
</head>
<body>

<div id="elementId" style="width: 100px; border: 1px solid black;">
  This is the target element.
</div>

<script>
  $(document).ready(function() {
    // Get the current width of the element with ID "elementId"
    var currentWidth = $('#elementId').css('width');

    // Update the width by adding 50 pixels
    var newWidth = parseInt(currentWidth) + 50 + 'px';

    // Set the new width using jQuery's css() method
    $('#elementId').css('width', newWidth);

    // Display the updated width in the console for demonstration purposes
    console.log('Updated width:', newWidth);
  });
</script>

</body>
</html>
<!DOCTYPE html>
<html lang="en">
<head>
  <meta charset="UTF-8">
  <meta name="viewport" content="width=device-width, initial-scale=1.0">
  <title>Dynamic Input Size</title>
  <script src="https://code.jquery.com/jquery-3.6.4.min.js"></script>
  <style>
    #textInput {
      resize: none; /* Disable textarea resizing */
    }
  </style>
</head>
<body>

<input type="text" id="textInput" placeholder="Type here...">

<script>
  $(document).ready(function() {
    // Get the input element with ID "textInput"
    var $textInput = $('#textInput');

    // Set initial width and height
    adjustSize();

    // Add input event listener to dynamically adjust size
    $textInput.on('input', adjustSize);

    function adjustSize() {
      // Get the current input value
      var inputValue = $textInput.val();

      // Set the width based on the content
      $textInput.css('width', 'auto');
      var newWidth = $textInput.width();

      // Set the height based on the content
      $textInput.css('height', 'auto');
      var newHeight = $textInput.height();

      // Update the input element size
      $textInput.css({
        'width': newWidth + 'px',
        'height': newHeight + 'px'
      });
    }
  });
</script>

</body>
</html>


Top comments (0)