Below is a checklist of real-time applications for AWS Lambda functions with examples and expected outputs:
1. Event-Driven Image Processing:
Example:
Trigger Lambda on an S3 upload event to resize images.
Output:
Resized images stored back in S3.
2. Real-Time Data Stream Processing:
Example:
Process real-time data streams using AWS Kinesis.
Output:
Analyzed data insights or transformations.
3. Scheduled Data Cleanup:
Example:
Schedule Lambda to clean up temporary data.
Output:
Regular cleanup of unnecessary data.
4. Serverless API Endpoint:
Example:
Create an API endpoint using API Gateway and Lambda.
Output:
Accessible and scalable API endpoint.
5. Chatbot Integration:
Example:
Implement a chatbot using Lambda for natural language processing.
Output:
Chatbot responses based on user queries.
6. Real-Time Analytics:
Example:
Use Lambda to process analytics events from a website.
Output:
Real-time analytics dashboard updates.
7. Custom Authentication:
Example:
Implement custom authentication logic using Lambda.
Output:
Secure access with custom authentication.
8. Background Email Processing:
Example:
Trigger Lambda for email processing tasks.
Output:
Automated email processing and responses.
9. Serverless File Conversion:
Example:
Convert files (e.g., CSV to JSON) using Lambda.
Output:
Transformed files stored in S3.
10. Custom CloudWatch Metrics:
- **Example:**
  - Create Lambda for custom CloudWatch metrics.
- **Output:**
  - Additional metrics for monitoring.
11. IoT Data Processing:
- **Example:**
  - Process data from IoT devices using Lambda.
- **Output:**
  - Real-time insights from IoT devices.
12. Automated Resource Scaling:
- **Example:**
  - Automatically scale resources based on Lambda triggers.
- **Output:**
  - Optimized resource usage.
13. Automated Backup Tasks:
- **Example:**
  - Schedule Lambda for automated backups.
- **Output:**
  - Regularly backed up data.
14. A/B Testing and Feature Flags:
- **Example:**
  - Use Lambda for A/B testing or feature toggling.
- **Output:**
  - Controlled feature releases.
15. Serverless Data APIs:
- **Example:**
  - Create GraphQL or RESTful APIs using Lambda and AppSync.
- **Output:**
  - Accessible and scalable data APIs.
16. Webhooks and Integrations:
- **Example:**
  - Implement webhooks for external integrations using Lambda.
- **Output:**
  - Seamless data exchange between systems.
17. Machine Learning Inference:
- **Example:**
  - Deploy Lambda for real-time inference with SageMaker.
- **Output:**
  - Predictions based on machine learning models.
18. User Authentication and Authorization:
- **Example:**
  - Implement Lambda for user authentication and authorization.
- **Output:**
  - Secure user access control.
19. Custom Business Logic:
- **Example:**
  - Use Lambda for custom business logic in a serverless architecture.
- **Output:**
  - Scalable and efficient business logic execution.
20. Continuous Integration and Deployment (CI/CD):
- **Example:**
  - Trigger Lambda functions as part of CI/CD pipelines.
- **Output:**
  - Automated testing and deployment processes.
These examples showcase the versatility and real-world applications of AWS Lambda functions in various domains, providing efficient, scalable, and cost-effective solutions.
Event-Driven Image Processing
Example: Trigger Lambda on S3 Upload Event to Resize Images
Scenario:
Imagine you have an S3 bucket where users upload images, and you want to automatically resize these images when they are uploaded. You'll use AWS Lambda to trigger on S3 upload events and resize the images, storing the resized versions back in S3.
Solution Overview:
Setting Up S3 Bucket:
Create an S3 bucket named ImageUploads.
Configure the bucket to trigger a Lambda function on an "ObjectCreated" event.
Lambda Function for Image Resizing:
Create an AWS Lambda function named ResizeImages.
Configure the Lambda function to be triggered by the S3 bucket's "ObjectCreated" event.
Implement the image resizing logic within the Lambda function.
const AWS = require('aws-sdk');
const sharp = require('sharp');

const s3 = new AWS.S3();

exports.handler = async (event, context) => {
    try {
        const bucket = event.Records[0].s3.bucket.name;
        const key = decodeURIComponent(event.Records[0].s3.object.key.replace(/\+/g, ' '));

        // Download the image from S3
        const imageData = await s3.getObject({ Bucket: bucket, Key: key }).promise();

        // Resize the image using Sharp library
        const resizedImage = await sharp(imageData.Body)
            .resize({ width: 300, height: 300 })
            .toBuffer();

        // Upload the resized image back to S3
        await s3.putObject({
            Bucket: bucket,
            Key: `resized/${key}`,
            Body: resizedImage,
            ContentType: 'image/jpeg',  // Adjust as needed
        }).promise();

        return {
            statusCode: 200,
            body: JSON.stringify('Image resized and stored successfully'),
        };
    } catch (error) {
        console.error(error);
        return {
            statusCode: 500,
            body: JSON.stringify('Error resizing and storing the image'),
        };
    }
};
Testing the Solution:
- Upload an image to the ImageUploads S3 bucket.
- The Lambda function is triggered, resizes the image to a width and height of 300 pixels, and stores the resized image in the resized folder within the same S3 bucket.
- Expected Output:
- When an image is uploaded to the S3 bucket, the Lambda function resizes it.
- The resized image is stored back in the S3 bucket under the resized folder .
Example Result:
Suppose you upload an image named example.jpg to the ImageUploads bucket. After the Lambda function is triggered, the resized version (resized/example.jpg) will be stored in the same S3 bucket.
This example illustrates how AWS Lambda can be used to automate image processing tasks, such as resizing, in response to S3 upload events. The specific resizing dimensions and additional configurations can be adjusted based on your requirements.
output after uploading resized image
{
  "Contents": [
    {
      "Key": "resized/your-original-image.jpg",
      "LastModified": "2022-01-01T00:00:00.000Z",
      "Size": 1024,
      "ETag": "0123456789abcdef0123456789abcdef",
      "StorageClass": "STANDARD"
    }
  ],
  "IsTruncated": false,
  "Name": "your_bucket_name",
  "Prefix": "",
  "Delimiter": "/",
  "MaxKeys": 1000,
  "CommonPrefixes": [],
  "KeyCount": 1
}
This output represents a simplified version of what you might see when listing objects in an S3 bucket. Here's an explanation of the fields:
bucket = event['Records'][0]['s3']['bucket']['name']
{
  "Records": [
    {
      "eventVersion": "2.1",
      "eventSource": "aws:s3",
      "awsRegion": "us-east-1",
      "eventTime": "2022-01-01T00:00:00.000Z",
      "eventName": "ObjectCreated:Put",
      "userIdentity": {
        "principalId": "AWS:123456789012:user/lambda-function-role"
      },
      "requestParameters": {
        "sourceIPAddress": "1.2.3.4"
      },
      "responseElements": {
        "x-amz-request-id": "1234567890ABCDEF",
        "x-amz-id-2": "EXAMPLE123/5678abcdefghijklambdaisawesome/mnopqrstuvwxyzABCDEFGH"
      },
      "s3": {
        "s3SchemaVersion": "1.0",
        "configurationId": "testConfigRule",
        "bucket": {
          "name": "your_bucket_name",
          "ownerIdentity": {
            "principalId": "A3NL1KOZZKExample"
          },
          "arn": "arn:aws:s3:::your_bucket_name"
        },
        "object": {
          "key": "your_object_key",
          "size": 1024,
          "eTag": "0123456789abcdef0123456789abcdef",
          "versionId": "096fKKXTRTtl3on89fVO.nfljtsv6qko"
        }
      }
    }
  ]
}
2. Real-Time Data Stream Processing
Scenario:
Imagine you have a fleet of IoT devices that send temperature and humidity data in real-time to AWS. Your goal is to process these data streams using AWS Kinesis and derive insights or perform transformations on the data.
Solution Overview:
Setting Up Kinesis Stream:
- Create an AWS Kinesis Data Stream named IoTDataStream.
- Configure the stream with an appropriate number of shards based on the expected volume of data . Sending Data to the Stream:
Configure your IoT devices to send temperature and humidity data to the IoTDataStream in real-time.
Lambda Function for Real-Time Processing:
- Create an AWS Lambda function named ProcessIoTData.
- Configure the Lambda function to be triggered by the Kinesis stream . Implement the processing logic within the Lambda function. Lambda Function Code (Python):
import json

def lambda_handler(event, context):
    for record in event['Records']:
        # Parse the record payload (assuming it's JSON)
        payload = json.loads(record['kinesis']['data'])

        # Extract temperature and humidity data
        temperature = payload['temperature']
        humidity = payload['humidity']

        # Perform processing or analytics (Example: Detecting anomalies)
        if temperature > 30 or humidity > 80:
            result = f"High temperature or humidity detected: {temperature}°C, {humidity}%"
            # Perform further actions
    if temperature > 30:
        # Send temperature alert
        send_temperature_alert(temperature)

    if humidity > 80:
        # Send humidity alert
        send_humidity_alert(humidity)

    # Store data in DynamoDB
    store_data_in_dynamodb(temperature, humidity)

            print(result)

    return {
        'statusCode': 200,
        'body': json.dumps('Data processed successfully')
    }
def send_temperature_alert(temperature):
    # Replace the following lines with the code to send a temperature alert (e.g., via email, SMS, notification service).
    alert_message = f"High temperature detected: {temperature}°C. Take necessary actions!"
    print("Sending temperature alert:", alert_message)
    # Example: Send alert via email
    send_email_alert(alert_message)

def send_email_alert(message):
    # Replace this with your actual email sending logic (e.g., using a third-party library or service).
    print("Sending email alert:", message)
    # Example: Use an email sending library or service
    # email_sender.send_email(to='recipient@example.com', subject='Temperature Alert', body=message)
def send_humidity_alert(humidity):
    # Replace the following lines with the code to send a humidity alert (e.g., via email, SMS, notification service).
    alert_message = f"High humidity detected: {humidity}%. Take necessary actions!"
    print("Sending humidity alert:", alert_message)
    # Example: Send alert via SMS
    send_sms_alert(alert_message)

def send_sms_alert(message):
    # Replace this with your actual SMS sending logic (e.g., using a third-party SMS gateway).
    print("Sending SMS alert:", message)
    # Example: Use an SMS gateway API to send SMS
    # sms_gateway.send_sms(to='recipient_number', message=message)
import boto3

def store_data_in_dynamodb(temperature, humidity):
    # Replace the following lines with the code to store data in DynamoDB.
    dynamodb = boto3.resource('dynamodb', region_name='your_region')
    table = dynamodb.Table('your_dynamodb_table_name')

    # Example: Store data in DynamoDB
    table.put_item(Item={'temperature': temperature, 'humidity': humidity})
    print("Data stored in DynamoDB:", {'temperature': temperature, 'humidity': humidity})
from twilio.rest import Client

def send_sms_alert(message, to_phone_number):
    # Replace these values with your Twilio credentials
    account_sid = 'your_twilio_account_sid'
    auth_token = 'your_twilio_auth_token'
    twilio_phone_number = 'your_twilio_phone_number'

    try:
        # Initialize the Twilio client
        client = Client(account_sid, auth_token)

        # Send SMS using Twilio API
        message = client.messages.create(
            body=message,
            from_=twilio_phone_number,
            to=to_phone_number
        )

        print("SMS sent successfully. SID:", message.sid)

    except Exception as e:
        print("Error sending SMS:", str(e))

# Example usage
sms_alert_message = "High temperature detected: 35°C. Take necessary actions!"
recipient_number = '+1234567890'  # Replace with the recipient's actual phone number
send_sms_alert(sms_alert_message, recipient_number)
import smtplib
from email.mime.text import MIMEText
from email.mime.multipart import MIMEMultipart

def send_email_alert(message, to_email):
    # Replace these values with your email server credentials
    email_server = 'your_email_server'
    email_port = 587
    email_username = 'your_email_username'
    email_password = 'your_email_password'

    try:
        # Set up the email server
        server = smtplib.SMTP(email_server, email_port)
        server.starttls()
        server.login(email_username, email_password)

        # Compose the email message
        subject = 'Temperature Alert'
        body = message
        sender_email = 'your_sender_email@example.com'

        msg = MIMEMultipart()
        msg['From'] = sender_email
        msg['To'] = to_email
        msg['Subject'] = subject
        msg.attach(MIMEText(body, 'plain'))

        # Send the email
        server.sendmail(sender_email, to_email, msg.as_string())

        print("Email sent successfully.")

    except Exception as e:
        print("Error sending email:", str(e))

    finally:
        # Close the server connection
        server.quit()

# Example usage
email_alert_message = "High temperature detected: 35°C. Take necessary actions!"
recipient_email = 'recipient@example.com'  # Replace with the recipient's actual email address
send_email_alert(email_alert_message, recipient_email)
explanation
Sample Lambda Event (event parameter)
{
  "Records": [
    {
      "kinesis": {
        "data": "eyJ0emperature": 25.5, "humidity": 60.2 }'
      }
    },
    {
      "kinesis": {
      "data": "eyJ0emperature": 27.5, "humidity": 61.2 }'
      }
    }
  ]
}
For each record in the Records list, the function will decode the Base64-encoded JSON data:
  encoded_data = record['kinesis']['data']
 decoded_data = base64.b64decode(encoded_data).decode('utf-8')
# After decoding the Base64-encoded data
[
  {"id": "1", "name": "John"},
  {"id": "2", "name": "Test"}
]
temperature = payload['temperature']
 humidity = payload['humidity']
 temperature = 25.5
 humidity = 60.2
Real-Time Analytics and Transformation:
As data arrives in the Kinesis stream, the Lambda function processes it in real-time.
In this example, the Lambda function checks for high temperature or humidity and logs an alert.
Expected Output:
When the Lambda function detects high temperature or humidity in the data stream, it logs an alert.
The Lambda function can be extended to perform various transformations, such as aggregations, filtering, or storing data in other AWS services like DynamoDB or S3.
Example Result:
Suppose an IoT device sends the following data to the Kinesis stream:
{
  "temperature": 32,
  "humidity": 85
}
The Lambda function processes this data, detects high temperature and humidity, and logs:
High temperature or humidity detected: 32°C, 85%
This example showcases how AWS Kinesis enables real-time processing of streaming data, and the Lambda function can perform analytics or transformations based on the incoming data. The specific processing logic can be customized according to the use case and business requirements.
Example: Schedule Lambda to Clean Up Temporary Data
Scenario:
In a cloud environment, temporary data or files may accumulate over time, consuming storage resources. To address this, you can use AWS Lambda to schedule periodic cleanup tasks to remove unnecessary data.
Solution Overview:
Lambda Function for Cleanup:
Create an AWS Lambda function named CleanupTemporaryData.
Configure the Lambda function to be triggered by a CloudWatch Events rule on a scheduled basis.
Lambda Execution Logic:
Implement the cleanup logic within the Lambda function to identify and delete temporary data based on specified criteria (e.g., files older than a certain period).
import boto3
from datetime import datetime, timedelta

def lambda_handler(event, context):
    try:
        # Set up S3 client (adjust for other services if needed)
        s3 = boto3.client('s3')

        # Specify the bucket and prefix for temporary data
        bucket_name = 'your-temporary-bucket'
        prefix = 'temporary-data/'

        # Calculate cutoff date (e.g., files older than 7 days)
        cutoff_date = datetime.now() - timedelta(days=7)

        # List objects in the specified prefix
        objects_to_delete = []
        response = s3.list_objects_v2(Bucket=bucket_name, Prefix=prefix)
        for obj in response.get('Contents', []):
            if obj['LastModified'] < cutoff_date:
                objects_to_delete.append({'Key': obj['Key']})

        # Delete the identified objects
        if objects_to_delete:
            s3.delete_objects(Bucket=bucket_name, Delete={'Objects': objects_to_delete})

        return {
            'statusCode': 200,
            'body': 'Temporary data cleanup successful',
        }
    except Exception as e:
        print(f"Error during cleanup: {str(e)}")
        return {
            'statusCode': 500,
            'body': 'Error during temporary data cleanup',
        }
Explanation
Example values
bucket_name = 'your-temporary-bucket'
prefix = 'temporary-data/'

# Make a request to list objects in the specified S3 bucket and prefix
response = s3.list_objects_v2(Bucket=bucket_name, Prefix=prefix)
{
    'Contents': [
        {'Key': 'temporary-data/file1.txt', 'LastModified': datetime(2023, 1, 1), ...},
        {'Key': 'temporary-data/file2.txt', 'LastModified': datetime(2023, 1, 2), ...},
        {'Key': 'temporary-data/folder/', 'LastModified': datetime(2023, 1, 3), ...},
        # Additional objects...
    ],
    'IsTruncated': False,
    'Marker': '...',
    # Other metadata...
}
output
[{'Key': 'temporary-data/file1.txt'}, {'Key': 'temporary-data/file2.txt'}]
CloudWatch Events Rule:
Create a CloudWatch Events rule to schedule the Lambda function at the desired frequency (e.g., daily or weekly).
Expected Output:
- The Lambda function is triggered by the CloudWatch Events rule at the scheduled intervals.
- It scans the specified storage location (e.g., S3 bucket) for temporary data older than a specified threshold.
- Unnecessary data is deleted, ensuring regular cleanup and optimizing storage usage . Example Result: Suppose you schedule the Lambda function to run daily. It identifies and deletes files in the specified S3 bucket's temporary-data/ prefix that are older than 7 days. The CloudWatch Events rule ensures this cleanup process occurs automatically.
This example illustrates how AWS Lambda can be used to automate routine cleanup tasks, ensuring that temporary or outdated data does not accumulate and impact storage resources over time. Adjust the criteria and schedule based on your specific requirements.
Serverless API Endpoint:
Example: Create an API Endpoint Using API Gateway and Lambda in Python
Scenario:
You want to create a simple API endpoint in Python that returns a customizable greeting. AWS Lambda will handle the backend logic, and API Gateway will expose the endpoint to the internet.
Solution Overview:
Lambda Function for API Logic:
Create an AWS Lambda function named GreetingApi.
Implement logic to generate a customizable greeting message.
Lambda Function Code (Python):
def lambda_handler(event, context):
    try:
        # Extract parameters from the API request
        name = event['queryStringParameters']['name'] if 'name' in event['queryStringParameters'] else 'Guest'

        # Generate a personalized greeting
        greeting_message = f"Hello, {name}! Welcome to the API."

        return {
            'statusCode': 200,
            'body': greeting_message,
        }
    except Exception as e:
        print(f"Error processing API request: {str(e)}")
        return {
            'statusCode': 500,
            'body': 'Error processing API request',
        }
API Gateway Configuration:
- Create an API in API Gateway.
- Define a resource and method (e.g., GET) for the /greeting endpoint.
Configure the method integration to use the Lambda function (GreetingApi)
.
Deploy API:Deploy the API to a stage (e.g., "prod").
Obtain the API endpoint URL
.
Expected Output:The API endpoint /greeting is accessible via the generated URL.
When a GET request is made to the endpoint with an optional name parameter, the Lambda function is triggered, generates a greeting message, and returns the response
.
Example Request:
Suppose the API Gateway URL is https://your-api-id.execute-api.your-region.amazonaws.com/prod. To get a personalized greeting for the name "John," you would make a GET request like:
https://your-api-id.execute-api.your-region.amazonaws.com/prod/greeting?name=John
Example Response:
{
    "statusCode": 200,
    "body": "Hello, John! Welcome to the API."
}
Benefits:
- The API endpoint is accessible over the internet, allowing clients to receive personalized greetings.
- The solution is scalable as AWS Lambda automatically scales based on the incoming requests.
- API Gateway provides features like security, request/response transformation, and monitoring . This example demonstrates the integration of AWS Lambda and API Gateway to create a serverless and scalable API endpoint in Python. Adjust the Lambda function logic and API Gateway configuration based on your specific use case and desired API functionality.
Chatbot Integration
Example: Implement a Chatbot Using Lambda for Natural Language Processing
Scenario:
You want to create a simple chatbot that can respond to user queries. AWS Lambda will handle the backend logic for natural language processing, and API Gateway will expose an API for interaction.
Solution Overview:
- Lambda Function for Natural Language Processing:
- Create an AWS Lambda function named ChatbotProcessor.
- Implement logic to process user queries using a natural language processing (NLP) library or service (e.g., AWS Comprehend, Google Cloud Natural Language Processing) . Lambda Function Code (Python):
import boto3

comprehend = boto3.client('comprehend')

def process_user_query(query):
    # Use AWS Comprehend for sentiment analysis
    response = comprehend.detect_sentiment(Text=query, LanguageCode='en')
    sentiment = response['Sentiment']

    # Determine the appropriate response based on sentiment
    if sentiment == 'POSITIVE':
        return "I'm glad you're feeling positive!"
    elif sentiment == 'NEGATIVE':
        return "I'm sorry to hear that. How can I assist you?"
    else:
        return "I'm here to help. What can I do for you?"

def lambda_handler(event, context):
    try:
        # Extract user query from the API request
        user_query = event['queryStringParameters']['query']

        # Process the user query
        response = process_user_query(user_query)

        return {
            'statusCode': 200,
            'body': response,
        }
    except Exception as e:
        print(f"Error processing user query: {str(e)}")
        return {
            'statusCode': 500,
            'body': 'Error processing user query',
        }
API Gateway Configuration:
- Create an API in API Gateway.
- Define a resource and method (e.g., GET) for the /chatbot endpoint.
- Configure the method integration to use the Lambda function (ChatbotProcessor) . Deploy API:
Deploy the API to a stage (e.g., "prod").
Obtain the API endpoint URL.
Expected Output:
The API endpoint /chatbot is accessible via the generated URL.
When a GET request is made to the endpoint with a query parameter, the Lambda function is triggered, processes the user query, and returns a response.
Example Request:
Suppose the API Gateway URL is https://your-api-id.execute-api.your-region.amazonaws.com/prod. To interact with the chatbot and query its sentiment, you would make a GET request like:
user_query = event['queryStringParameters']['query']
GET /your-api-endpoint?query=I love this product
In this case, the value of event['queryStringParameters']['query'] would be "I love this product". This value is then passed to the process_user_query function for sentiment analysis.
https://your-api-id.execute-api.your-region.amazonaws.com/prod/chatbot?query=How are you today?
Example Response:
{
    "statusCode": 200,
    "body": "I'm glad you're feeling positive!"
}
Benefits:
- The chatbot provides responses based on the sentiment of user queries.
- AWS Lambda enables serverless and scalable processing of user queries.
- AWS Comprehend is used for sentiment analysis, showcasing the integration of different AWS services . This example demonstrates the integration of AWS Lambda, API Gateway, and AWS Comprehend to implement a chatbot for natural language processing. Adjust the Lambda function logic, NLP service, and API Gateway configuration based on your specific chatbot requirements.
Real-Time Analytics:
Example: Use Lambda to Process Analytics Events from a Website
Scenario:
You want to process analytics events generated by a website in real-time and update a dashboard with the relevant information. AWS Lambda will handle the backend processing, and the processed data will be sent to a data store or visualization tool.
Solution Overview:
- Lambda Function for Analytics Processing:
- Create an AWS Lambda function named AnalyticsProcessor.
- Implement logic to process analytics events, extract relevant information, and update a data store or trigger updates to a real-time analytics dashboard . Lambda Function Code (Python):
import json
import boto3

def process_analytics_event(event):
    # Extract relevant information from the analytics event
    user_id = event['user_id']
    page_visited = event['page_visited']
    timestamp = event['timestamp']

    store_in_database(user_id, page_visited, timestamp)
    trigger_dashboard_update(user_id, page_visited, timestamp)

def store_in_database(user_id, page_visited, timestamp):
    # Example: Store analytics data in a hypothetical database
    # Replace this with your actual database storage logic
    print(f"Storing analytics data in the database - User ID: {user_id}, Page Visited: {page_visited}, Timestamp: {timestamp}")

def trigger_dashboard_update(user_id, page_visited, timestamp):
    # Example: Trigger updates to a dashboard or analytics system
    # Replace this with your actual logic for updating dashboards
    print(f"Triggering dashboard update - User ID: {user_id}, Page Visited: {page_visited}, Timestamp: {timestamp}")

# Example usage:
analytics_event = {
    'user_id': '12345',
    'page_visited': '/example-page',
    'timestamp': '2023-01-01T12:34:56',
}


def lambda_handler(event, context):
    try:
        # Iterate through analytics events
        for record in event['Records']:
            # Parse the payload (assuming it's JSON)
            analytics_event = json.loads(record['body'])

            # Process the analytics event
            process_analytics_event(analytics_event)

        return {
            'statusCode': 200,
            'body': 'Analytics events processed successfully',
        }
    except Exception as e:
        print(f"Error processing analytics events: {str(e)}")
        return {
            'statusCode': 500,
            'body': 'Error processing analytics events',
        }
Event Source:
Configure an event source that triggers the Lambda function when analytics events occur. This could be an Amazon Kinesis stream, an Amazon S3 bucket, or another source where analytics events are logged.
Data Store or Dashboard Updates:
Depending on your use case, update a data store (e.g., Amazon DynamoDB) with processed analytics data or trigger updates to a real-time analytics dashboard.
Expected Output:
- Analytics events from the website trigger the AnalyticsProcessor Lambda function in real-time.
- The Lambda function processes each event, extracting relevant information.
- Depending on your implementation, the processed data is stored in a data store or used to update a real-time analytics dashboard . Example Result: Suppose analytics events include information about user activity, such as page visits and timestamps. The AnalyticsProcessor Lambda function processes these events, and the processed data is stored in an Amazon DynamoDB table for further analysis or displayed on a real-time analytics dashboard.
This example demonstrates how AWS Lambda can be used to process real-time analytics events, providing flexibility in handling and analyzing data from a website. Adjust the Lambda function logic and integration based on your specific analytics requirements and data visualization tools.
Custom Authentication
Example: Implement Custom Authentication Logic Using Lambda (Python)
Scenario:
You need to implement custom authentication logic for secure access to your application or API. AWS Lambda will be used to handle the custom authentication process in Python, allowing you to implement specific authentication requirements.
Solution Overview:
Lambda Function for Custom Authentication:
- Create an AWS Lambda function named CustomAuthenticator.
- Implement logic to perform custom authentication checks, such as verifying user credentials, checking authorization, or integrating with an external authentication service . Lambda Function Code (Python):
import json

def lambda_handler(event, context):
    try:
        # Extract user credentials from the authentication request
        username = event['headers']['username']
        password = event['headers']['password']

        # Perform custom authentication logic (example: check hardcoded credentials)
        valid_credentials = check_credentials(username, password)

        if valid_credentials:
            return {
                'statusCode': 200,
                'body': json.dumps({'message': 'Authentication successful'}),
            }
        else:
            return {
                'statusCode': 401,
                'body': json.dumps({'error': 'Authentication failed'}),
            }
    except Exception as e:
        print(f"Error processing authentication request: {str(e)}")
        return {
            'statusCode': 500,
            'body': json.dumps({'error': 'Internal Server Error'}),
        }

def check_credentials(username, password):
    # Example: Hardcoded credentials for demonstration purposes
    valid_username = 'demoUser'
    valid_password = 'demoPassword'

    return username == valid_username and password == valid_password
API Gateway Configuration:
- Create an API in API Gateway.
- Define a resource and method (e.g., POST) for the /authenticate endpoint.
- Configure the method integration to use the Lambda function (CustomAuthenticator)
 username = event['headers']['username']
        password = event['headers']['password']
{
    "resource": "/your-endpoint",
    "path": "/your-endpoint",
    "httpMethod": "POST",
    "headers": {
        "username": "john_doe",
        "password": "secure_password",
        // other headers...
    },
    // other fields...
}
Client Authentication Request:
Clients (e.g., web or mobile applications) send authentication requests to the /authenticate endpoint with the required credentials.
Expected Output:
- Clients send authentication requests to the /authenticate endpoint.
- The CustomAuthenticator Lambda function processes the requests, performs custom authentication checks, and returns a response indicating whether authentication is successful or not . Example Request: Suppose the API Gateway URL is https://your-api-id.execute-api.your-region.amazonaws.com/prod. A client might send a POST request to:
https://your-api-id.execute-api.your-region.amazonaws.com/prod/authenticate
with headers:
{
    "username": "demoUser",
    "password": "demoPassword"
}
Example Response:
{
    "statusCode": 200,
    "body": "{\"message\":\"Authentication successful\"}"
}
or
{
    "statusCode": 401,
    "body": "{\"error\":\"Authentication failed\"}"
}
Benefits:
Custom authentication logic allows you to implement specific security requirements.
AWS Lambda ensures serverless and scalable execution of the authentication process.
API Gateway acts as a secure entry point for client requests.
This example demonstrates how AWS Lambda can be used to implement custom authentication logic in Python, providing a flexible and secure way to authenticate users accessing your application or API. Adjust the Lambda function logic based on your specific authentication requirements and integrate with other AWS services or external authentication providers as needed.
Background Email Processing
Scenario:
You want to automate email processing tasks using AWS Lambda. Whenever a new email arrives, Lambda will be triggered to perform specific processing tasks, such as extracting information or sending automated responses.
Solution Overview:
Lambda Function for Email Processing:
Create an AWS Lambda function named EmailProcessor.
Configure an event source to trigger the Lambda function whenever a new email arrives. This could be achieved using services like Amazon Simple Notification Service (SNS) or Amazon Simple Queue Service (SQS).
import json

def lambda_handler(event, context):
    try:
        # Extract email content from the event
        email_subject = event['Records'][0]['Sns']['Subject']
        email_body = event['Records'][0]['Sns']['Message']

        # Perform email processing tasks (example: log, extract information, send response)
        process_email(email_subject, email_body)

        return {
            'statusCode': 200,
            'body': json.dumps({'message': 'Email processing successful'}),
        }
    except Exception as e:
        print(f"Error processing email: {str(e)}")
        return {
            'statusCode': 500,
            'body': json.dumps({'error': 'Internal Server Error'}),
        }

def process_email(subject, body):
    # Example: Log email content
    print(f"Subject: {subject}")
    print(f"Body: {body}")

    # Add your specific email processing logic here
    # For example, extract information, update a database, or send automated responses
Email Notification Configuration:
Configure an email notification service (e.g., Amazon SNS) to send notifications to the Lambda function whenever a new email arrives.
Email Arrival Trigger:
Whenever a new email arrives, the configured email notification service triggers the EmailProcessor Lambda function.
Expected Output:
Whenever a new email arrives, the EmailProcessor Lambda function is triggered
The Lambda function processes the email content, which may include logging, extracting information, and performing specific tasks based on your requirements.
Example Result:
Suppose you have an email notification service (e.g., Amazon SNS) configured to send notifications to the EmailProcessor Lambda function. When a new email is received, the Lambda function is triggered, and it logs the email content. Additionally, you could extend the logic to extract information or send automated responses.
This example demonstrates how AWS Lambda can be used to automate email processing tasks. Adjust the Lambda function logic based on your specific requirements, such as extracting specific information from emails, updating databases, or triggering additional actions based on the email content.
Serverless File Conversion
Example: Convert Files (e.g., CSV to JSON) using Lambda
Objective:
Implement a serverless solution using AWS Lambda to convert files, such as CSV to JSON, and store the transformed files in Amazon S3.
Steps:
Create an AWS Lambda Function:
- Write a Lambda function in Python using the AWS Lambda console, AWS CLI, or an AWS SDK.
- Configure the Lambda function to trigger on a specific event, such as an S3 bucket upload .
import json
import boto3
import csv
def lambda_handler(event, context):
s3 = boto3.client('s3')
for record in event['Records']:
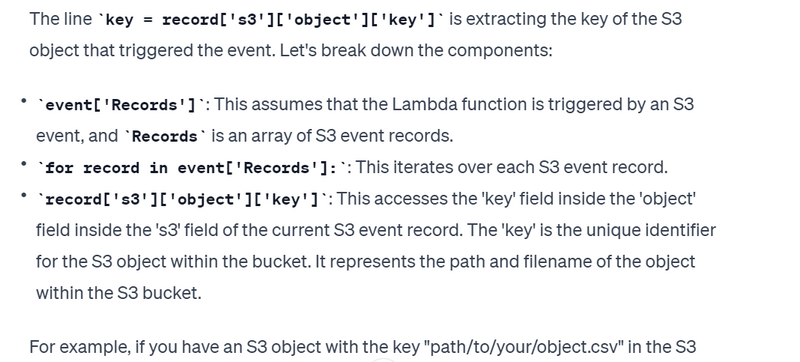
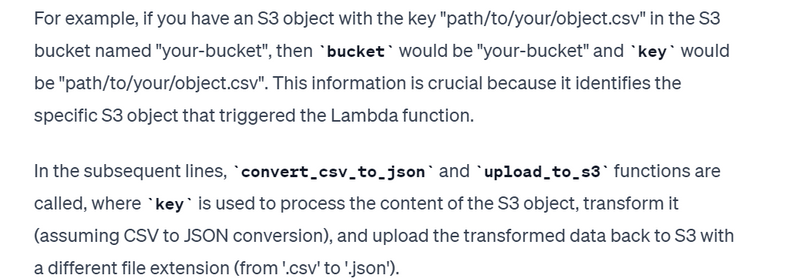
bucket = record['s3']['bucket']['name']
key = record['s3']['object']['key']
transformed_data = convert_csv_to_json(bucket, key)
upload_to_s3(transformed_data, bucket, key.replace('.csv', '.json'))
def convert_csv_to_json(bucket, key):
s3 = boto3.client('s3')
response = s3.get_object(Bucket=bucket, Key=key)
csv_content = response['Body'].read().decode('utf-8')
csv_reader = csv.DictReader(csv_content.splitlines())
json_data = json.dumps(list(csv_reader))
return json_data
def upload_to_s3(data, bucket, key):
s3 = boto3.client('s3')
s3.put_object(Body=data, Bucket=bucket, Key=key)
Set up an S3 Bucket:
- Create an S3 bucket where the original CSV files will be uploaded.
- Configure the bucket to trigger the Lambda function on new file uploads . Upload a CSV File:
Upload a CSV file to the designated S3 bucket.
Lambda Execution:
Lambda function is triggered by the S3 bucket upload event.
The function reads the CSV file, converts it to JSON, and uploads the transformed JSON file back to S3.
Output:
Transformed JSON files are stored in the same S3 bucket.
Explanation:
The Lambda function is designed to respond to S3 events. When a new CSV file is uploaded to the specified S3 bucket, the Lambda function is triggered.
The convert_csv_to_json function reads the CSV content, converts it to a JSON format, and returns the transformed data.
The upload_to_s3 function uploads the transformed JSON data back to the same S3 bucket with a new file extension.
4.This example demonstrates the serverless processing of file transformations, providing an efficient and scalable solution using AWS Lambda and S3
Explanation
{
  "Records": [
    {
      "eventVersion": "2.1",
      "eventSource": "aws:s3",
      "awsRegion": "us-east-1",
      "eventTime": "2023-12-01T00:00:00.000Z",
      "eventName": "ObjectCreated:Put",
      "userIdentity": {
        "principalId": "AWS:EXAMPLE_USER"
      },
      "requestParameters": {
        "sourceIPAddress": "203.0.113.1"
      },
      "responseElements": {
        "x-amz-request-id": "EXAMPLE123456789",
        "x-amz-id-2": "EXAMPLE5678abcdef0"
      },
      "s3": {
        "s3SchemaVersion": "1.0",
        "configurationId": "EXAMPLEConfig",
        "bucket": {
          "name": "your-bucket",
          "ownerIdentity": {
            "principalId": "EXAMPLE_USER"
          },
          "arn": "arn:aws:s3:::your-bucket"
        },
        "object": {
          "key": "path/to/your/object.csv",
          "size": 1024,
          "eTag": "0123456789abcdef0123456789abcdef",
          "sequencer": "0A1B2C3D4E5F678901"
        }
      }
    }
  ]
}
Name,Age,Location
John,30,New York
Jane,25,San Francisco
You can call the convert_csv_to_json function with these parameters:
bucket_name = 'your-bucket'
csv_file_key = 'example.csv'
resulting_json = convert_csv_to_json(bucket_name, csv_file_key)

print(resulting_json)
The resulting_json would be a JSON-formatted string:
[
    {"Name": "John", "Age": "30", "Location": "New York"},
    {"Name": "Jane", "Age": "25", "Location": "San Francisco"}
]
Custom CloudWatch Metrics:
Scenario:
You want to create custom CloudWatch metrics using AWS Lambda. The Lambda function will generate custom metrics based on specific business logic or application performance, providing additional insights for monitoring and analysis.
Solution Overview:
Lambda Function for Custom Metrics:
Create an AWS Lambda function named CustomMetricsGenerator.
Implement logic to generate custom metrics and publish them to Amazon CloudWatch.
import json
import boto3
from datetime import datetime

def lambda_handler(event, context):
    try:
        # Implement custom logic to generate metrics (example: random metric values)
        custom_metric_value = generate_custom_metric()

        # Publish the custom metric to CloudWatch
        publish_custom_metric(custom_metric_value)

        return {
            'statusCode': 200,
            'body': json.dumps({'message': 'Custom metric generation and publishing successful'}),
        }
    except Exception as e:
        print(f"Error generating or publishing custom metric: {str(e)}")
        return {
            'statusCode': 500,
            'body': json.dumps({'error': 'Internal Server Error'}),
        }

def generate_custom_metric():
    # Example: Generate a random metric value (replace with your specific business logic)
    import random
    return random.randint(1, 100)

def publish_custom_metric(metric_value):
    # Example: Publish the custom metric to CloudWatch
    cloudwatch = boto3.client('cloudwatch')
    metric_name = 'CustomMetric'
    namespace = 'YourNamespace'

    response = cloudwatch.put_metric_data(
        MetricData=[
            {
                'MetricName': metric_name,
                'Dimensions': [
                    {
                        'Name': 'LambdaFunction',
                        'Value': 'CustomMetricsGenerator',
                    },
                ],
                'Timestamp': datetime.utcnow(),
                'Value': metric_value,
                'Unit': 'Count',
            },
        ],
        Namespace=namespace
    )

    print(f"Custom metric published: {response}")
CloudWatch Configuration:
Create a custom namespace in CloudWatch (e.g., YourNamespace).
Define a custom metric (e.g., CustomMetric) within the namespace.
Scheduled Event Trigger:
Configure a CloudWatch Events rule to trigger the CustomMetricsGenerator Lambda function at a scheduled interval.
Expected Output:
The CustomMetricsGenerator Lambda function is triggered at the scheduled interval.
It generates a custom metric value (e.g., based on business logic or performance measurements).
The custom metric is published to CloudWatch under the specified namespace and metric name.
Example Result:
Suppose you schedule the CustomMetricsGenerator Lambda function to run every 5 minutes. The Lambda function generates a random metric value and publishes it to CloudWatch under the namespace YourNamespace with the metric name CustomMetric. You can then visualize and monitor this custom metric in the CloudWatch console.
This example demonstrates how AWS Lambda can be used to generate and publish custom metrics to CloudWatch, providing additional insights for monitoring and analysis. Adjust the logic in the Lambda function to generate metrics based on your specific use case or business requirements.
Another Example
The code you provided is for publishing a custom metric to Amazon CloudWatch, not for interacting with an S3 bucket. However, if you want to visualize the CloudWatch response in JSON format, you can print or log the response after calling the put_metric_data method. Here's an example of how you might do that:
import boto3
from datetime import datetime

def publish_order_processing_metric(successful_order):
    cloudwatch = boto3.client('cloudwatch')
    metric_name = 'OrdersProcessed'
    namespace = 'MyApplication'

    # Count the number of orders processed (1 for successful, 0 for unsuccessful)
    metric_value = 1 if successful_order else 0

    response = cloudwatch.put_metric_data(
        MetricData=[
            {
                'MetricName': metric_name,
                'Dimensions': [
                    {
                        'Name': 'Environment',
                        'Value': 'Production',
                    },
                ],
                'Timestamp': datetime.utcnow(),
                'Value': metric_value,
                'Unit': 'Count',
            },
        ],
        Namespace=namespace
    )

    # Print or log the CloudWatch response
    print("CloudWatch Response:")
    print(response)

# Example usage:
# Assuming a successful order processing
publish_order_processing_metric(True)
In this example, the response variable contains the CloudWatch response after publishing the metric data. The print(response) statement will display the CloudWatch response in the console or log it, and you can see the JSON structure of the response.
Note: The actual structure of the response will depend on the success or failure of the put_metric_data operation and the specific details of the request. The printed response will include metadata such as ResponseMetadata and may also include information about any errors, if applicable.
IoT Data Processing:
Scenario:
You want to process data from IoT devices in real-time using AWS Lambda. The Lambda function will be triggered by IoT events, and it will process the incoming data, extract insights, and store or visualize the results for further analysis.
Solution Overview:
Lambda Function for IoT Data Processing:
Create an AWS Lambda function named IoTDataProcessor.
Configure an IoT rule to trigger the Lambda function whenever data is received from IoT devices.
Lambda Function Code (Python):
import json
import boto3

def lambda_handler(event, context):
    try:
        # Extract IoT data from the event
        iot_data = event['records'][0]['value']

        # Perform data processing (example: extract insights, analyze, store results)
        processed_data = process_iot_data(iot_data)

        return {
            'statusCode': 200,
            'body': json.dumps({'message': 'IoT data processing successful'}),
        }
    except Exception as e:
        print(f"Error processing IoT data: {str(e)}")
        return {
            'statusCode': 500,
            'body': json.dumps({'error': 'Internal Server Error'}),
        }

def process_iot_data(iot_data):
    # Example: Perform data processing (replace with your specific logic)
    insights = analyze_iot_data(iot_data)

    # Example: Store or visualize the results (replace with your storage or visualization logic)
    store_results(insights)

    return insights

def analyze_iot_data(iot_data):
    # Example: Analyze IoT data and extract insights (replace with your specific analysis logic)
    insights = {
        'temperature': iot_data['temperature'],
        'humidity': iot_data['humidity'],
        'status': 'Normal' if iot_data['temperature'] < 30 else 'High Temperature Alert',
    }

    return insights

def store_results(results):
    # Example: Store or visualize the results (replace with your storage or visualization logic)
    # In a real-world scenario, you might store the results in a database or send them to another service.
    print(f"Processed IoT data insights: {results}")
IoT Rule Configuration:
- Create an IoT rule that specifies the conditions for triggering the IoTDataProcessor Lambda function.
- Configure the rule to match incoming messages from IoT devices . IoT Device Simulation (Optional):
Simulate data from IoT devices or use real IoT devices to send data to AWS IoT.
Expected Output:
- IoT devices send data to AWS IoT.
- The configured IoT rule triggers the IoTDataProcessor Lambda function.
- The Lambda function processes the incoming IoT data, extracts insights, and optionally stores or visualizes the results
Example Result:
Suppose you have IoT devices sending temperature and humidity data to AWS IoT. The IoTDataProcessor Lambda function is triggered whenever new data is received. It analyzes the data, extracts insights (e.g., temperature, humidity, status), and optionally stores or visualizes the results. You can monitor the processed insights for real-time information about your IoT devices.
This example illustrates how AWS Lambda can be used to process data from IoT devices in real-time, providing insights and enabling further analysis or actions based on the received data. Adjust the Lambda function logic to suit your specific use case or business requirements.
So, in the provided JSON-like example, iot_data would be assigned the value:
Explanation
iot_data = event['records'][0]['value']
{
  "sensor_id": "123",
  "temperature": 25.5,
  "humidity": 50
}
import boto3 # Import necessary library for AWS S3
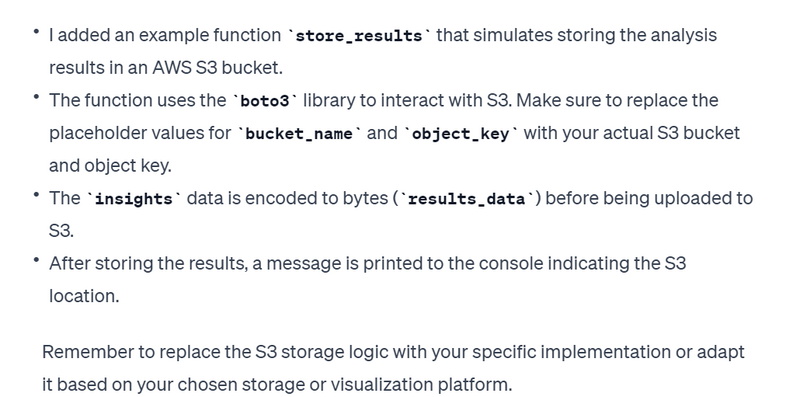
def store_results(insights):
# Placeholder for storing or visualizing results logic
# Replace this with your actual storage or visualization implementation
# Example: Store results in an S3 bucket (replace with your specific storage logic)
s3 = boto3.client('s3')
bucket_name = 'your-results-bucket'
object_key = 'results.txt'
# Convert insights to bytes for storage
results_data = insights.encode('utf-8')
# Upload results to S3
s3.put_object(Body=results_data, Bucket=bucket_name, Key=object_key)
print(f"Results stored in S3: s3://{bucket_name}/{object_key}")
# Updated code with the storage example
def process_iot_data(iot_data):
# Example: Perform data processing (replace with your specific logic)
# In this example, let's assume we want to check if the temperature is above a certain threshold
temperature_threshold = 30.0
if iot_data['temperature'] > temperature_threshold:
processing_result = "High Temperature Alert!"
else:
processing_result = "Normal Temperature"
# Call the data analysis function
insights = analyze_iot_data(iot_data)
# Example: Store or visualize the results (replace with your storage or visualization logic)
store_results(insights)
return processing_result
# Example usage:
# Assuming iot_data is provided as a dictionary
sample_iot_data = {
"sensor_id": "123",
"temperature": 35.5, # Assume high temperature for this example
"humidity": 50
}
result = process_iot_data(sample_iot_data)
print("Processing Result:", result)
Automated Resource Scaling:
Scenario:
You want to automatically scale resources, such as an Amazon EC2 Auto Scaling Group, based on triggers from AWS Lambda. The Lambda function monitors specific metrics, and when certain conditions are met, it triggers the scaling action to optimize resource usage.
Solution Overview:
Lambda Function for Scaling:
Create an AWS Lambda function named AutoScaler.
Implement logic to monitor metrics (e.g., queue size, CPU utilization) and trigger the scaling action when thresholds are exceeded.
Lambda Function Code (Python):
import json
import boto3

def lambda_handler(event, context):
    try:
        # Extract relevant metrics or conditions from the event
        queue_size = get_queue_size()

        # Check if scaling is needed based on the metric (example: scale up if queue size exceeds a threshold)
        if queue_size > 100:
            scale_up()
        elif queue_size < 10:
            scale_down()

        return {
            'statusCode': 200,
            'body': json.dumps({'message': 'Auto-scaling check completed'}),
        }
    except Exception as e:
        print(f"Error during auto-scaling check: {str(e)}")
        return {
            'statusCode': 500,
            'body': json.dumps({'error': 'Internal Server Error'}),
        }

def get_queue_size():
    # Example: Get relevant metric (replace with your specific metric retrieval logic)
    # In a real-world scenario, you might use CloudWatch metrics or another monitoring service.
    return 80  # Replace with actual queue size retrieval logic

def scale_up():
    # Example: Implement logic to scale resources up (replace with your specific scaling logic)
    print("Scaling up resources")

    # In a real-world scenario, you might increase the desired capacity of an Auto Scaling Group.

def scale_down():
    # Example: Implement logic to scale resources down (replace with your specific scaling logic)
    print("Scaling down resources")

    # In a real-world scenario, you might decrease the desired capacity of an Auto Scaling Group.
Auto Scaling Configuration:
- Set up an Auto Scaling Group with the desired resources (e.g., EC2 instances).
- Define CloudWatch Alarms to monitor relevant metrics (e.g., queue size, CPU utilization) . CloudWatch Alarms:
Configure CloudWatch Alarms to trigger the AutoScaler Lambda function when specific conditions are met.
Expected Output:
- The AutoScaler Lambda function is triggered based on CloudWatch Alarms.
- It retrieves relevant metrics (e.g., queue size) and decides whether to scale resources up or down.
- The Auto Scaling Group adjusts the number of resources (e.g., EC2 instances) based on the scaling action . Example Result: Suppose you have an Auto Scaling Group managing EC2 instances. CloudWatch Alarms are set up to monitor a specific metric, such as queue size. When the queue size exceeds a certain threshold, the AutoScaler Lambda function is triggered, and it scales up the resources by increasing the desired capacity of the Auto Scaling Group. Conversely, if the queue size is below a certain threshold, the Lambda function scales down the resources.
This example demonstrates how AWS Lambda can be used to automatically scale resources based on specific triggers, optimizing resource usage and ensuring efficient scaling in response to changing conditions. Adjust the Lambda function logic and scaling conditions based on your specific use case and resource requirements.
Explanation
import boto3
def scale_up():
# Example: Implement logic to scale resources up using AWS Auto Scaling
print("Scaling up resources")
# Specify your Auto Scaling Group name
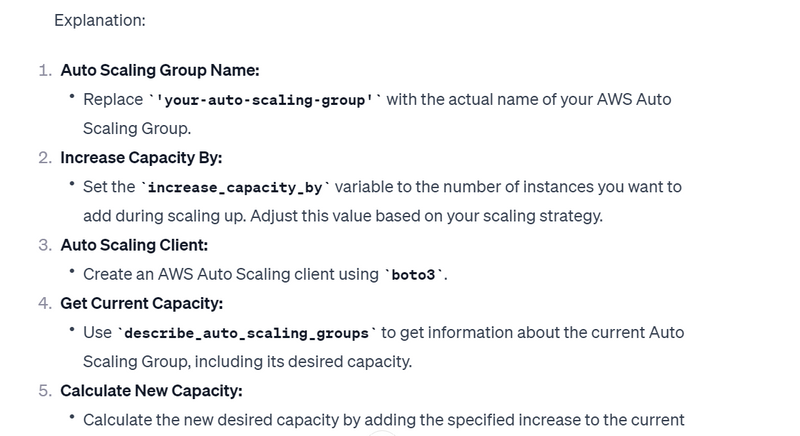
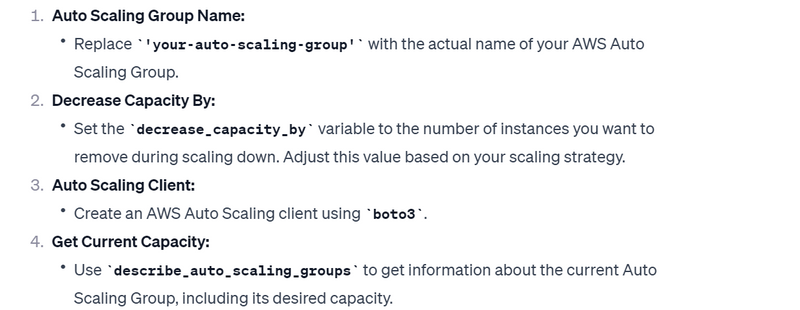
auto_scaling_group_name = 'your-auto-scaling-group'
# Specify the number of instances to add during scaling up
increase_capacity_by = 1
# Create an AWS Auto Scaling client
autoscaling_client = boto3.client('autoscaling')
# Get the current capacity of the Auto Scaling Group
response = autoscaling_client.describe_auto_scaling_groups(
AutoScalingGroupNames=[auto_scaling_group_name]
)
current_capacity = response['AutoScalingGroups'][0]['DesiredCapacity']
# Calculate the new desired capacity after scaling up
new_capacity = current_capacity + increase_capacity_by
# Set the new desired capacity for the Auto Scaling Group
autoscaling_client.set_desired_capacity(
AutoScalingGroupName=auto_scaling_group_name,
DesiredCapacity=new_capacity
)
# Example usage:
# Call this function when scaling up is required, e.g., based on the result of get_queue_size()
# scale_up()
import boto3
def scale_down():
# Example: Implement logic to scale resources down using AWS Auto Scaling
print("Scaling down resources")
# Specify your Auto Scaling Group name
auto_scaling_group_name = 'your-auto-scaling-group'
# Specify the number of instances to remove during scaling down
decrease_capacity_by = 1
# Create an AWS Auto Scaling client
autoscaling_client = boto3.client('autoscaling')
# Get the current capacity of the Auto Scaling Group
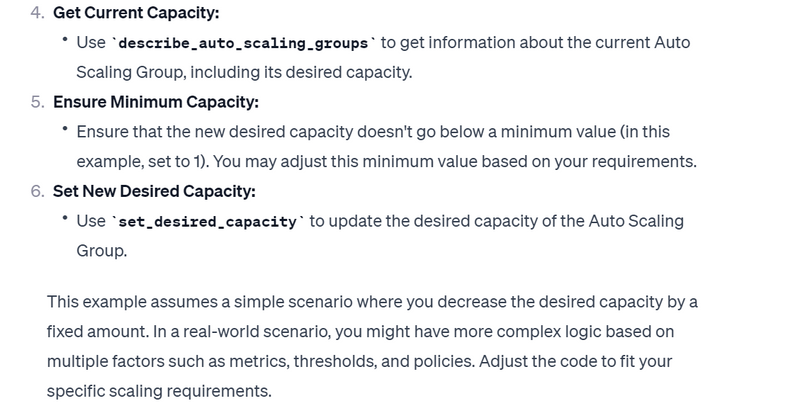
response = autoscaling_client.describe_auto_scaling_groups(
AutoScalingGroupNames=[auto_scaling_group_name]
)
current_capacity = response['AutoScalingGroups'][0]['DesiredCapacity']
# Ensure the desired capacity doesn't go below a minimum value
new_capacity = max(current_capacity - decrease_capacity_by, 1)
# Set the new desired capacity for the Auto Scaling Group
autoscaling_client.set_desired_capacity(
AutoScalingGroupName=auto_scaling_group_name,
DesiredCapacity=new_capacity
)
# Example usage:
# Call this function when scaling down is required, e.g., based on the result of get_queue_size()
# scale_down()
Automated Backup Tasks:
Scenario:
You want to schedule AWS Lambda to perform automated backups at regular intervals. The Lambda function will be triggered by a CloudWatch Events rule, and it will execute backup tasks such as copying data, creating snapshots, or exporting data to a backup location.
Solution Overview:
- Lambda Function for Backup:
- Create an AWS Lambda function named AutomatedBackup.
- Implement backup logic to copy or snapshot data, ensuring regular backups are performed
Lambda Function Code (Python):
import json
import boto3
from datetime import datetime

def lambda_handler(event, context):
    try:
        # Implement backup logic (example: create a backup, copy data, or take a snapshot)
        backup_result = perform_backup()

        return {
            'statusCode': 200,
            'body': json.dumps({'message': 'Automated backup completed'}),
        }
    except Exception as e:
        print(f"Error during automated backup: {str(e)}")
        return {
            'statusCode': 500,
            'body': json.dumps({'error': 'Internal Server Error'}),
        }

def perform_backup():
    # Example: Implement backup logic (replace with your specific backup tasks)
    # In a real-world scenario, you might copy data, create snapshots, or export data to a backup location.
    backup_timestamp = datetime.utcnow().strftime('%Y%m%d%H%M%S')
    backup_location = f'/backup/data_backup_{backup_timestamp}.zip'

    # Perform backup tasks (replace with your backup logic)
    # For example, copy files to the backup location or create a snapshot of a database.

    print(f"Backup completed. Backup stored at: {backup_location}")
    return backup_location
CloudWatch Events Rule:
Create a CloudWatch Events rule to schedule the AutomatedBackup Lambda function at regular intervals.
CloudWatch Events Rule Configuration:
{
  "source": "aws.events",
  "scheduleExpression": "cron(0 2 * * ? *)",  // Example: Schedule daily at 2 AM UTC
  "targets": [
    {
      "id": "BackupTarget",
      "arn": "arn:aws:lambda:your-region:your-account-id:function:AutomatedBackup"
    }
  ]
}
Expected Output:
The CloudWatch Events rule triggers the AutomatedBackup Lambda function at the specified schedule.
The Lambda function performs backup tasks, creating backups or snapshots as needed.
Example Result:
Suppose you schedule the AutomatedBackup Lambda function to run daily at 2 AM UTC. The CloudWatch Events rule triggers the Lambda function at the specified time, and the function performs backup tasks, creating a backup of data or taking snapshots. You can adjust the schedule expression in the CloudWatch Events rule based on your desired backup frequency.
This example illustrates how AWS Lambda can be scheduled to perform automated backups at regular intervals, ensuring data is regularly backed up and providing a reliable and automated backup solution. Customize the backup logic in the Lambda function based on your specific use case and data storage requirements.
A/B Testing and Feature Flags:
Scenario:
You want to use AWS Lambda to facilitate A/B testing or feature toggling in your application. The Lambda function will be responsible for determining which features or variations a user should experience based on certain criteria.
Solution Overview:
- Lambda Function for Feature Toggling:
- Create an AWS Lambda function named FeatureToggler.
- Implement logic to decide which features or variations to enable for a given user . Lambda Function Code (Python):
import json
import random

def lambda_handler(event, context):
    try:
        # Extract user information from the event (replace with your user context retrieval logic)
        user_id = get_user_id(event)

        # Determine which features or variations to enable for the user
        enabled_features = decide_enabled_features(user_id)

        return {
            'statusCode': 200,
            'body': json.dumps({'enabled_features': enabled_features}),
        }
    except Exception as e:
        print(f"Error during feature toggling: {str(e)}")
        return {
            'statusCode': 500,
            'body': json.dumps({'error': 'Internal Server Error'}),
        }

def get_user_id(event):
    # Example: Extract user information from the event (replace with your user context retrieval logic)
    # In a real-world scenario, you might get user information from an authentication token or session.
    return event.get('user_id', None)

def decide_enabled_features(user_id):
    # Example: Implement logic to decide which features or variations to enable for the user
    # In this example, randomly enable features for demonstration purposes.
    available_features = ['featureA', 'featureB', 'featureC']
    enabled_features = random.sample(available_features, k=random.randint(1, len(available_features)))

    print(f"Enabled features for user {user_id}: {enabled_features}")
    return enabled_features
Integration with Application:
- Integrate the FeatureToggler Lambda function with your application.
- Call the Lambda function when determining which features to enable for a user . Expected Output: The FeatureToggler Lambda function is invoked when deciding which features or variations to enable for a user. The function returns a list of enabled features. Example Result: Suppose you integrate the FeatureToggler Lambda function into your application. When a user accesses the application, the application calls the Lambda function to determine which features should be enabled for that user. In this example, the Lambda function randomly selects features to enable, simulating a controlled A/B testing environment or feature toggling mechanism.
This example demonstrates how AWS Lambda can be used to control feature releases, enabling experimentation with different features or variations for users. Adapt the feature toggling logic in the Lambda function to align with your specific A/B testing or feature rollout requirements.
Webhooks and Integrations
Scenario:
You want to use AWS Lambda to implement webhooks for external integrations. The Lambda function will be responsible for processing incoming webhook payloads and facilitating seamless data exchange between systems.
Solution Overview:
Lambda Function for Webhooks:
- Create an AWS Lambda function named WebhookProcessor.
- Implement logic to handle incoming webhook payloads from external systems
import json

def lambda_handler(event, context):
    try:
        # Extract data from the incoming webhook payload
        webhook_data = extract_webhook_data(event)

        # Process the webhook data (replace with your specific processing logic)
        process_webhook_data(webhook_data)

        return {
            'statusCode': 200,
            'body': json.dumps({'message': 'Webhook processing completed'}),
        }
    except Exception as e:
        print(f"Error during webhook processing: {str(e)}")
        return {
            'statusCode': 500,
            'body': json.dumps({'error': 'Internal Server Error'}),
        }

def extract_webhook_data(event):
    # Example: Extract data from the incoming webhook payload
    # In a real-world scenario, the event might contain JSON or other data from the webhook.
    return event.get('body', {})

def process_webhook_data(webhook_data):
    # Example: Implement logic to process the webhook data
    # In this example, print the received data. Replace with your specific processing logic.
    print(f"Received webhook data: {webhook_data}")
    # Process the data further, update databases, trigger actions, etc.
Integration with External Systems:
- Share the endpoint of the WebhookProcessor Lambda function with external systems.
- Configure external systems to send webhook payloads to the Lambda function's endpoint . Expected Output: External systems send webhook payloads to the WebhookProcessor Lambda function's endpoint. The Lambda function extracts and processes the incoming data, facilitating seamless data exchange. Example Result: Suppose you integrate the WebhookProcessor Lambda function into your architecture. External systems configured to use webhooks send payloads to the Lambda function's endpoint. The Lambda function processes the incoming data, allowing for seamless data exchange between your application and external systems.
This example showcases how AWS Lambda can be used to implement webhooks, enabling integration with external systems and providing a mechanism for real-time data exchange. Customize the webhook processing logic in the Lambda function based on the data formats and processing requirements of your specific integration scenario.
Explanation
# Assume the incoming event object looks like this:
event = {
    'body': '{"key1": "value1", "key2": "value2"}',
    'other_data': 'additional information'
}

# Extract the value associated with the 'body' key from the event
event_body = event.get('body', '{}')

# Output the extracted 'body' value
print("Extracted 'body' value:", event_body)
Extracted 'body' value: {"key1": "value1", "key2": "value2"}
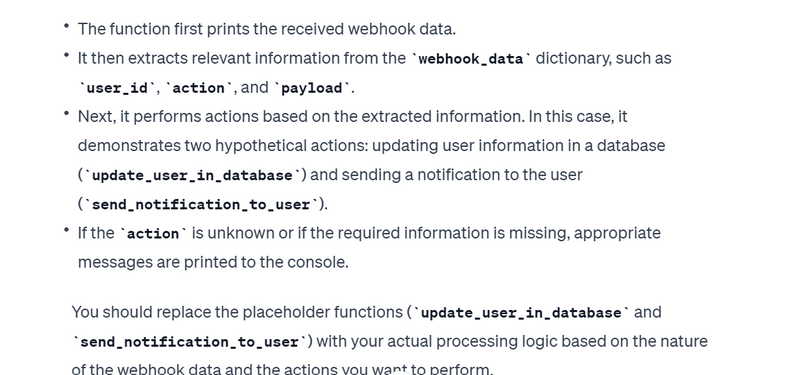
def process_webhook_data(webhook_data):
    # Example: Implement logic to process the webhook data
    # In this example, print the received data. Replace with your specific processing logic.
    print(f"Received webhook data: {webhook_data}")

    # Extract relevant information from the webhook data
    user_id = webhook_data.get('user_id')
    action = webhook_data.get('action')
    payload = webhook_data.get('payload')

    # Validate and process the extracted information
    if user_id and action and payload:
        # Perform actions based on the webhook data
        if action == 'update_user':
            update_user_in_database(user_id, payload)
            print(f"User {user_id} updated with payload: {payload}")
        elif action == 'send_notification':
            send_notification_to_user(user_id, payload)
            print(f"Notification sent to user {user_id} with payload: {payload}")
        else:
            print("Unknown action in webhook data. Ignoring.")

    else:
        print("Webhook data is missing required information. Ignoring.")

# Placeholder functions for processing actions based on webhook data
def update_user_in_database(user_id, payload):
    # Example: Update user information in the database
    # Replace this with your actual database update logic
    pass

def send_notification_to_user(user_id, payload):
    # Example: Send a notification to the user
    # Replace this with your actual notification logic
    pass
Machine Learning Inference:
Scenario:
You want to deploy an AWS Lambda function for real-time inference using Amazon SageMaker. The Lambda function will be responsible for invoking a SageMaker endpoint to make predictions based on machine learning models.
Solution Overview:
SageMaker Model Deployment:
Train and deploy a machine learning model using Amazon SageMaker.
Obtain the SageMaker endpoint URL.
Lambda Function for Inference:
Create an AWS Lambda function named InferenceLambda.
Implement logic to invoke the SageMaker endpoint for real-time predictions.
Lambda Function Code (Python):
import json
import boto3

def lambda_handler(event, context):
    try:
        # Extract input data from the event (replace with your specific input data extraction logic)
        input_data = extract_input_data(event)

        # Invoke SageMaker endpoint for real-time inference
        prediction = invoke_sagemaker_endpoint(input_data)

        return {
            'statusCode': 200,
            'body': json.dumps({'prediction': prediction}),
        }
    except Exception as e:
        print(f"Error during real-time inference: {str(e)}")
        return {
            'statusCode': 500,
            'body': json.dumps({'error': 'Internal Server Error'}),
        }

def extract_input_data(event):
    # Example: Extract input data from the event (replace with your specific input data extraction logic)
    # In a real-world scenario, the event might contain JSON or other input data.
    return event.get('body', {})

def invoke_sagemaker_endpoint(input_data):
    # Example: Invoke SageMaker endpoint for real-time inference
    sagemaker_client = boto3.client('sagemaker-runtime', region_name='your-region')

    # Replace 'your-endpoint-name' and 'your-endpoint-variant' with your SageMaker endpoint details
    endpoint_name = 'your-endpoint-name'
    endpoint_variant = 'your-endpoint-variant'

    response = sagemaker_client.invoke_endpoint(
        EndpointName=endpoint_name,
        ContentType='application/json',
        TargetVariant=endpoint_variant,
        Body=json.dumps(input_data)
    )

    # Parse and return the prediction from the SageMaker endpoint response
    prediction = json.loads(response['Body'].read().decode('utf-8'))
    return prediction
Integration with Application:
- Integrate the InferenceLambda Lambda function with your application.
- Configure your application to call the Lambda function when real-time predictions are required . Expected Output: The InferenceLambda Lambda function is invoked with input data. The Lambda function invokes the SageMaker endpoint, and the response contains predictions based on the machine learning model. Example Result: Suppose you deploy the InferenceLambda Lambda function as part of your application architecture. When your application requires real-time predictions, it calls the Lambda function with input data. The Lambda function, in turn, invokes the specified SageMaker endpoint, and the predictions are returned to the application.
This example demonstrates how AWS Lambda can be used in conjunction with Amazon SageMaker for real-time inference, providing a scalable and serverless solution for making predictions based on machine learning models. Customize the input data extraction and SageMaker endpoint invocation logic in the Lambda function based on the requirements of your specific machine learning use case
User Authentication and Authorization
Scenario:
You want to use AWS Lambda to implement user authentication and authorization in your application. The Lambda function will be responsible for validating user credentials, checking user roles, and ensuring secure access control.
Solution Overview:
User Authentication Lambda Function:
- Create an AWS Lambda function named AuthenticationLambda for user authentication.
- Implement logic to validate user credentials (e.g., username and password)
import json

def lambda_handler(event, context):
    try:
        # Extract user credentials from the event (replace with your specific credential extraction logic)
        user_credentials = extract_user_credentials(event)

        # Validate user credentials (replace with your authentication logic)
        is_authenticated, user_roles = validate_user_credentials(user_credentials)

        if is_authenticated:
            return {
                'statusCode': 200,
                'body': json.dumps({'authenticated': True, 'user_roles': user_roles}),
            }
        else:
            return {
                'statusCode': 401,
                'body': json.dumps({'authenticated': False, 'error': 'Invalid credentials'}),
            }
    except Exception as e:
        print(f"Error during user authentication: {str(e)}")
        return {
            'statusCode': 500,
            'body': json.dumps({'error': 'Internal Server Error'}),
        }

def extract_user_credentials(event):
    # Example: Extract user credentials from the event (replace with your specific credential extraction logic)
    # In a real-world scenario, the event might contain username and password fields.
    return {
        'username': event.get('username', ''),
        'password': event.get('password', ''),
    }

def validate_user_credentials(user_credentials):
    # Example: Validate user credentials (replace with your authentication logic)
    # In this example, assume valid authentication for demonstration purposes.
    # In a real-world scenario, you would verify the credentials against a user database.
    user_roles = ['user']  # Example user roles

    return True, user_roles
Authorization Lambda Function:
- Create an AWS Lambda function named AuthorizationLambda for user authorization.
- Implement logic to check user roles and determine access permissions . Authorization Lambda Function Code (Python):
import json

def lambda_handler(event, context):
    try:
        # Extract user roles from the event (replace with your specific role extraction logic)
        user_roles = extract_user_roles(event)

        # Check user roles and determine access permissions (replace with your authorization logic)
        has_access = check_user_access(user_roles)

        if has_access:
            return {
                'statusCode': 200,
                'body': json.dumps({'access_granted': True}),
            }
        else:
            return {
                'statusCode': 403,
                'body': json.dumps({'access_granted': False, 'error': 'Insufficient permissions'}),
            }
    except Exception as e:
        print(f"Error during user authorization: {str(e)}")
        return {
            'statusCode': 500,
            'body': json.dumps({'error': 'Internal Server Error'}),
        }

def extract_user_roles(event):
    # Example: Extract user roles from the event (replace with your specific role extraction logic)
    # In a real-world scenario, the event might contain user roles assigned during authentication.
    return event.get('user_roles', [])

def check_user_access(user_roles):
    # Example: Check user roles and determine access permissions (replace with your authorization logic)
    # In this example, assume access is granted for demonstration purposes.
    # In a real-world scenario, you would perform more granular access checks based on user roles.
    return True
Integration with Application:
- Integrate the authentication and authorization Lambda functions with your application.
- Configure your application to call these Lambda functions when user authentication and access control are required
Expected Output:
- The AuthenticationLambda Lambda function is invoked with user credentials.
- The function validates the credentials and returns authentication status along with user roles.
- The AuthorizationLambda Lambda function is invoked with user roles.
- The function checks user roles and returns access permission status
Example Result:
Suppose you integrate the AuthenticationLambda and AuthorizationLambda Lambda functions into your application. When a user attempts to log in, the application calls the AuthenticationLambda function to validate the user's credentials. Upon successful authentication, the application calls the AuthorizationLambda function to check the user's roles and determine access permissions.
This example illustrates how AWS Lambda can be used to implement user authentication and authorization, providing a secure and scalable solution for controlling user access in your application. Customize the authentication and authorization logic in the Lambda functions to align with your specific security requirements and user management system.
Custom Business Logic
Scenario:
You want to leverage AWS Lambda to implement custom business logic within a serverless architecture. The Lambda function will handle specific business processes, ensuring scalable and efficient execution.
Solution Overview:
Lambda Function for Business Logic:
Create an AWS Lambda function named BusinessLogicLambda.
Implement custom business logic to handle specific processes.
Business Logic Lambda Function Code (Python):
import json

def lambda_handler(event, context):
    try:
        # Extract input data from the event (replace with your specific input data extraction logic)
        input_data = extract_input_data(event)

        # Implement custom business logic to handle specific processes
        result = process_business_logic(input_data)

        return {
            'statusCode': 200,
            'body': json.dumps({'result': result}),
        }
    except Exception as e:
        print(f"Error during business logic execution: {str(e)}")
        return {
            'statusCode': 500,
            'body': json.dumps({'error': 'Internal Server Error'}),
        }

def extract_input_data(event):
    # Example: Extract input data from the event (replace with your specific input data extraction logic)
    # In a real-world scenario, the event might contain JSON or other input data.
    return event.get('body', {})

def process_business_logic(input_data):
    # Example: Implement custom business logic to handle specific processes
    # In this example, assume a simple business logic that concatenates two strings.
    result = f"Processed data: {input_data.get('string1', '')} {input_data.get('string2', '')}"
    return result
Integration with Application:
- Integrate the BusinessLogicLambda Lambda function with your application.
Configure your application to call the Lambda function when the custom business logic needs to be executed
.
Expected Output:The BusinessLogicLambda Lambda function is invoked with input data.
The function executes custom business logic and returns the result
.
Example Result:
Suppose you deploy the BusinessLogicLambda Lambda function as part of your serverless architecture. When your application requires execution of specific business processes, it calls the Lambda function with input data. The Lambda function executes the custom business logic, providing a scalable and efficient solution for handling those processes.
This example demonstrates how AWS Lambda can be utilized for implementing custom business logic within a serverless architecture. Customize the business logic in the Lambda function based on the specific processes and requirements of your application. The serverless nature of Lambda ensures efficient execution, and the architecture scales automatically to handle varying workloads.

Top comments (0)