Why use Vue Router
Vue Router Basics
Installing from Vue CLI
Named Routes
Dynamic Segments
Handling 404 Not Found
explain concept of base and mode and linkExactActiveClass in router
differene between router-link and router-view
differene between router-link and router-push
Why use Vue Router
Vue is powerful for creating Single Page Applications: highly interactive webpages that don’t refresh when you change from page to page. If your website has multiple pages (or “views”) and you’re using Vue, that’s why you need Vue Router.
Installing routing
$ npm install -g @vue/cli
or
$ yarn global add @vue/cli
Then we’ll create our basic Vue 3 app.
$ vue create my-router-project
This will give us a screen where we’re going to choose to use “Vue 3 Preview”:
https://firebasestorage.googleapis.com/v0/b/vue-mastery.appspot.com/o/flamelink%2Fmedia%2F1.opt.1598048249547.jpg?alt=media&token=706f37cc-3729-4ec7-9dde-79c2b535ec54
This will create a base Vue 3 application, and we can ensure it works by going into the directory and running the server:
$ cd my-router-project
then
$ npm run serve
Vue Router Basics
To install Vue Router into our base Vue 3 project (as we created above) or into an existing project that already uses Vue 3, we’ll follow the steps below:
Install the Vue 3 Router from the Command Line
$ npm i vue-router@next
Add a routing directory & configuration file
/src/router/index.js
import { createWebHistory, createRouter } from "vue-router";
import Home from "@/views/Home.vue";
import About from "@/views/About.vue";

const routes = [
  {
    path: "/",
    name: "Home",
    component: Home,
  },
  {
    path: "/about",
    name: "About",
    component: About,
  },
];

const router = createRouter({
  history: createWebHistory(),
  routes,
});
export default router;
Notice that we create our routes in an array, where we specify for each route a few important items:
Path - the URL path where this route can be found.
Name - An optional name to use when we link to this route.
Component - Which component to load when this route is called.
Below this array you’ll notice we create the Router itself, using the routes and we also pass in createWebHistory. This is used to switch from using hash to history mode inside your browser, using the HTML5 history API. The way we configure this is a little different then we did in Vue 2.
Notice we export this at the bottom because we’ll need to import it in our main.js file.
- Importing our Routes & using Vue Router
Next we’ll need to edit our main.js file to use our router in our application.
/src/main.js
import { createApp } from 'vue'
import App from './App.vue'
import router from './router' // <---
createApp(App).use(router).mount('#app')
Here we’re importing our router file, and then we use the router when creating our application. The way our application is created in this file has changed in Vue 3.
- Using and
There are two directives our Vue application gives us to use in our template:
- When a route is navigated to in the browser, this is where the component is rendered. For example, in our code going to / will render the Home component where we list .
- This is the directive we use to create links between our different component pages, instead of using . See below.
These both can be used in our simple example in App.vue like so: (FYI, I erased what was already in the App.vue).
/src/App.vue
<template>
  <div id="nav">
      <router-link to="/">Home</router-link> |
      <router-link to="/about">About</router-link>
  </div>
  <router-view />
</template
We’ll need to create our Home and About components which we referenced above. Instead of putting them in our /components/ directory, I’m going to create a new /views directory. They’re going to be really simple for our example:
/src/views/Home.vue
<template>
  <h1>Home Page</h1>
</template>
/src/views/About.vue

<template>
  <h1>About Page</h1>
</template>
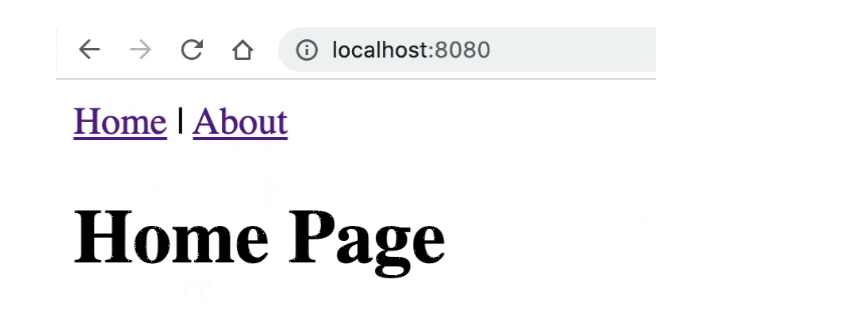
And now if we fire up our server and head up to
[http://localhost:8080](http://localhost:8080) we should see the following:
Named Routes
In our router we specified optional names in our routes: Home and About. If we wanted to use route names instead of paths, we could write our router-links like so:
/src/App.vue
<router-link :to="{ name: 'Home' }">Home</router-link> |
<router-link :to="{ name: 'About' }">About</router-link>
Now our navigation works the same as before, but we’re not using paths. This can be useful if our URL paths change in the future. We wouldn’t have to change all the router-links if the path changes, since they’re referencing using name.
Dynamic Segments
If we want to create a path URL which has a variable, like /user/gregg or event/5 where the ‘gregg’ or ‘5’ can be any name or any number, we need a Dynamic Segment. This is done JUST like we used to do it in Vue 2.
In the router, we specify in our route with the : denoting the variable.
/src/router/index.js
{
  path: "/user/:name",  // <-- notice the colon
  name: "User",
  component: User,
},
(Don’t forget to import the User view in our route if you’re following along)
To access that dynamic segment in the view itself, we could now write:
/src/views/User.vue
<template>
  <h1>The user is {{ $route.params.name }}</h1>
</template>
And sure enough we get:
https://firebasestorage.googleapis.com/v0/b/vue-mastery.appspot.com/o/flamelink%2Fmedia%2F6.opt.1598048266907.jpg?alt=media&token=2e15bee9-70f6-48ea-a944-842511249e06
Also just like Vue 2, I can opt to have the dynamic segment passed into my component as a prop, but specifying props = true.
/src/router/index.js
{
    path: "/user/:name", // <-- notice the colon
    name: "User",
    component: User,
    props: true,
 },
Now inside my component, I can have:
/src/views/User.vue
<template>
  <h1>The user is {{ name }}</h1>
</template>
<script>
export default {
  props: ["name"],
};
</script>
Notice I have to specify that my component is expecting a prop.
I get the same result:
Handling 404 Not Found

Since we have a single page application, you’ll notice that if we go to any URL that doesn’t have a route mapped in the routing file we get an incomplete page. It loads up our App.vue, but no component. We’ll need to tell our router what to do when it doesn’t match any routes, and the way we do this is a little different in Vue 3.
We’ll need a route at the bottom of our routing list that looks like this:
/src/router/index.js
{
  path: "/:catchAll(.*)",
  component: NotFound,
},
(If you’re coding along don’t forget to import the NotFound component at the top of your file.)
Notice the dynamic segment and the regular expression. :catchAll is the dynamic segment and (.*) is a regular expression, which essentially matches against anything. So if none of the routes above this one match, it will use this one. Also, I’ve imported a new component called NotFound which looks like this:
/src/views/NotFound.vue
<template>
  <h1>Oops, it looks like the page you're looking for doesn't exist.</h1>
</template>
Now when I try to go to http://localhost:8080/asdf, I get:

explain concept of base and mode in router
base-option-works-in-vue-router
base-option-works-in-vue-router
vue-routers-history-mode
link-active-style
link-active-class
reference4
History Mode
The default mode for vue-router is hash mode - it uses the URL hash to simulate a full URL so that the page won't be reloaded when the URL changes. To get rid of the hash, we can use the router's history mode, which leverages the history.pushState API to achieve URL navigation without a page reload:
using-vue-routers-history-mode
The default mode for Vue Router is hash mode. It uses a URL hash to simulate a full URL so that the page won’t be reloaded when the URL changes.
We can set Vue Router to history mode to get rid of the hash. It uses history.pushState API to let us navigate URLs without a page reload.
For example, we can enable history mode as follows:
*src/index.js *:
const Foo = { template: "<div>foo</div>" };
const Bar = { template: "<div>bar</div>" };
const routes = [
  {
    path: "/foo",
    component: Foo
  },
  {
    path: "/bar",
    component: Bar
  }
];
const router = new VueRouter({
  mode: "history",
  routes
});
new Vue({
  el: "#app",
  router
});
index.html :

<!DOCTYPE html>
<html>
  <head>
    <title>App</title>
    <meta charset="UTF-8" />
    <script src="https://unpkg.com/vue/dist/vue.js"></script>
    <script src="https://unpkg.com/vue-router/dist/vue-router.js"></script>
  </head>
  <body>
    <div id="app">
      <router-view></router-view>
    </div>
    <script src="src/index.js"></script>
  </body>
</html>
Then when we go to /foo and /bar , we’ll see foo and bar displayed respectively. Now we don’t need to add a hash sign in front of the URL anymore.
Server Configuration
The issue with history mode is that we have to configure our server to display our app whenever the user navigates to the folder in our server.
This is because if we didn’t configure our server, we’ll get a 404 error if we go directly to the URL from the browser.
To fix this, we need to redirect to index.html if it doesn’t match any assets uploaded to the server that we want to load.
We can use the following configure in Apache:
<IfModule mod_rewrite.c>
  RewriteEngine On
  RewriteBase /
  RewriteRule ^index\.html$ - [L]
  RewriteCond %{REQUEST_FILENAME} !-f
  RewriteCond %{REQUEST_FILENAME} !-d
  RewriteRule . /index.html [L]
</IfModule>
This configuration assumes that the code is in the root folder. If it’s in a subfolder, we can change RewriteBase / with RewriteBase /subfolder-name/ .
For Nginx, it’s simpler:
location / {
  try_files $uri $uri/ /index.html;
}
Again, we can replace / with the subfolder if the code is in a subfolder.
We should add a 404 route to our app since how 404 errors won’t be displayed.
We can add one as follows:
src/index.js :
const Foo = { template: "<div>foo</div>" };
const Bar = { template: "<div>bar</div>" };
const NotFound = { template: "<div>not found</div>" };
const routes = [
  {
    path: "/foo",
    component: Foo
  },
  {
    path: "/bar",
    component: Bar
  },
  { path: "*", component: NotFound }
];
const router = new VueRouter({
  mode: "history",
  routes
});
new Vue({
  el: "#app",
  router
});
**index.html :**
<!DOCTYPE html>
App
With Node.js, the easiest way to serve a Vue app with history mode set by using Express and the connect-history-api-fallback middleware as follows:

server.js :

const express = require('express');
const history = require('connect-history-api-fallback');
const app = express();
app.use(history());
app.use(express.static('src'));
app.get('/', (req, res) => {
  res.sendFile('src/index.html');
});
app.listen(3000, () => console.log('server started'));
Then the Vue app files can be stored in the src folder.
In the code above, the code:
{ path: "*", component: NotFound }
is the catch-all route for anything other than foo and bar and maps to the NotFound component.
How base option works in vue-router
The base URL of the app. For example, if the entire single page application is served under /app/, then base should use the value "/app/".
But I have tried it like following, It does not seems to work:
const router = new VueRouter({
  base: "/app/",
  routes
})
The base has a default value of '/'. Drawing analogy from how it is used to route:
<router-link to="home">Home</router-link>
or
<router-link :to="{ path: '/abc'}" replace></router-link>
I just omitted the /app and it works. The base doesn't need to be part of the router-link
EDIT
Use of base in vue-router
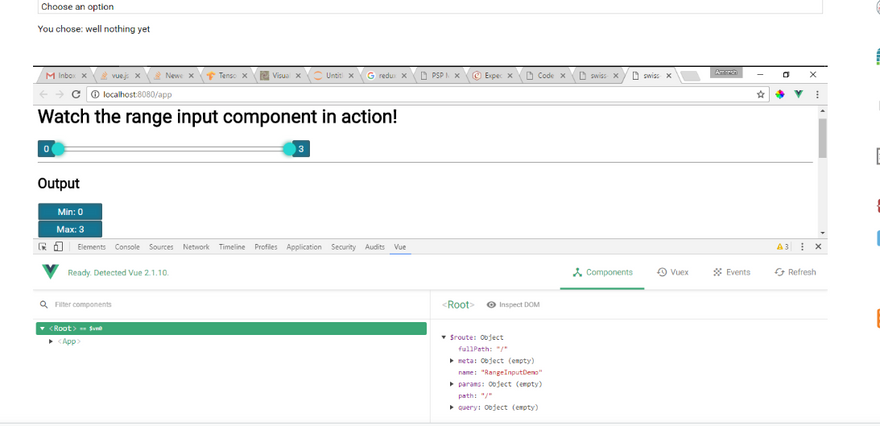
(For this test I had used vue-cli with the webpack template.)
I had my router configurations like so:
export default new Router({
  base: '/app',
  mode: 'history',
  routes: [
    {
      path: '/',
      name: 'RangeInputDemo',
      component: ComponentDemo
    }
  ]
})
Adding base as '/app' made no difference to the routing that happened throughout the project, as if the base was still set to '/'.
I tried to change the url from the server side (the url at which the project is being served).
So in dev-server.js where :
var uri = 'http://localhost:' + port
controls the url of the app, I made a slight modification to:
var uri = 'http://localhost:' + port + '/app'
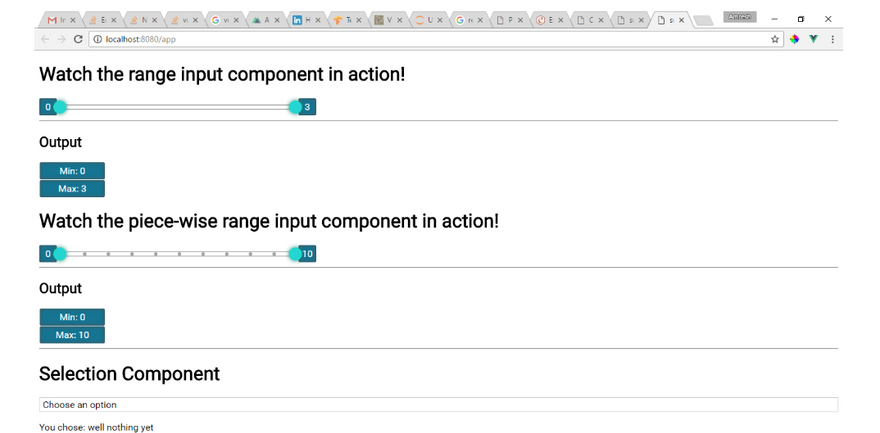
This caused the application to show:
Base option in vue router
This issue has been discussed several times (1 - 2) but I still cannot get it to work. I'm transitioning our project to use vue in some parts. What I want to accomplish is:
If url starts with /v/, look into vue router and match path.
If url starts with anything other than /v/, ignore it (this view will be rendered by current framework from backend).
My router looks like:
const router = new Router({
    base: '/v/',
    mode: 'history',
    routes: routes
});
Where routes are:

const routers = [
    ...
    {
        path: '/wholesale-catalogue/',
        name: 'wholesale-catalogue',
        component: () => import('./views/WholesaleCatalogue.vue')
    }
    ...
]
The second option I tried is nesting the children routes:
const router = new Router({
    mode: 'history',
    routes: [
        { path: 'v', component: BaseView, children: routers }
    ]
});
The problem is that the router reroutes non /v/ urls into /v/ when clicked within the website, such as:
ourwebsite.com/home/ -> has some links on it, such as /about/. When you click on /about/ it actually goes to ourwebsite.com/about/ for a few seconds but then the url changes to /ourwebsite.com/v/about/. This leads to some annoyances as when you refresh the website, this url doesn't exist (on our current backend framework) so it will not render.
differene between router-link and router-view
router-link and router-view
a-router-view-in-a-router-view
A router view in a router view
I have an application with authentication system and a backend dashboard. By default the route show the authentication component :
{
  path: "/",
  name: "Authentication",
  component: Auth
},
The App.view contains the Once logged in I'm redirected to another vue component "home" :
{
  path: "/dashboard",
  name: "home",
  component: Home,
},
So far, so good. In this home component i have some HTML with menu and I want to to show component in the same page.
Here is a sample of html from the home template
<div>
  <router-link :to="'/dashboard/user'">User</router-link>
  <router-link :to="'/dashboard/stats'">Stats</router-link>

  <app-user></app-user>
  <app-stats></app-stats>
</div>
I also created the routes for those components in router but while clicking on the link it shows a white page. I just began vue.js and I'm sure it's an easy stuff to manage. My objective is to display the component according to the page which is displayed.
SOLUTION
Update your routing file like below so parent module can load its children in their respective router outlet.
Place in your dashboard component so it will load its children. If you visit /dashboard/user then UserCompoent will get render in of dashboard component.
{
  path: "/dashboard",
  name: "home",
  component: Home,
     children: [
        {
          path: 'user',
          component: UserComponent,
        },
         {
          path: 'state',
          component: StateComponent,
        }
      ],
},
<script src="https://unpkg.com/vue@3"></script>
<script src="https://unpkg.com/vue-router@4"></script>

<div id="app">
  <h1>Hello App!</h1>
  <p>
    <!-- use the router-link component for navigation. -->
    <!-- specify the link by passing the `to` prop. -->
    <!-- `<router-link>` will render an `<a>` tag with the correct `href` attribute -->
    <router-link to="/">Go to Home</router-link>
    <router-link to="/about">Go to About</router-link>
  </p>
  <!-- route outlet -->
  <!-- component matched by the route will render here -->
  <router-view></router-view>
</div>
router-link#
Note how instead of using regular a tags, we use a custom component router-link to create links. This allows Vue Router to change the URL without reloading the page, handle URL generation as well as its encoding. We will see later how to benefit from these features.
router-view#
router-view will display the component that corresponds to the url. You can put it anywhere to adapt it to your layout.
JavaScript#
// 1. Define route components.
// These can be imported from other files
const Home = { template: '
const About = { template: 'About' }
// 2. Define some routes
// Each route should map to a component.
// We'll talk about nested routes later.
const routes = [
{ path: '/', component: Home },
{ path: '/about', component: About },
]
// 3. Create the router instance and pass the routes option
// You can pass in additional options here, but let's
// keep it simple for now.
const router = VueRouter.createRouter({
// 4. Provide the history implementation to use. We are using the hash history for simplicity here.
  history: VueRouter.createWebHashHistory(),
  routes, // short for `routes: routes`
})
// 5. Create and mount the root instance.
const app = Vue.createApp({})
// Make sure to _use_ the router instance to make the
// whole app router-aware.
app.use(router)

app.mount('#app')
// Now the app has started!
By calling app.use(router), we get access to it as this.$router as well as the current route as this.$route inside of any component:
// Home.vue
export default {
  computed: {
    username() {
      // We will see what `params` is shortly
      return this.$route.params.username
    },
  },
  methods: {
    goToDashboard() {
      if (isAuthenticated) {
        this.$router.push('/dashboard')
      } else {
        this.$router.push('/login')
      }
    },
  },
}
To access the router or the route inside the setup function, call the useRouter or useRoute functions. We will learn more about this in the Composition API
Throughout the docs, we will often use the router instance. Keep in mind that this.$router is exactly the same as directly using the router instance created through createRouter. The reason we use this.$router is because we don't want to import the router in every single component that needs to manipulate routing.
differene between router-link and router-push
differene between router-link and router-push
.
Next.JS "Link" vs "router.push()" vs "a" tag
As of now I know three different methods through which I can achieve this:
- Link component exported by next/link
- router.push() using useRouter exported ny next/router
- Simple HTML
<Link href="/about"><a>About me</a></Link>
<a href="/about">About me</a>
<button onClick={() => router.push("/about")}>About me</button>
All of the methods work and achieve the same exact thing. I just wanted to know what are the differences, if any, among these approaches. Thank you so much in advance!
SOLUTION
router.push
router.push('/push') behaves similarly to window.location. It does not create a tag, which means - if you are concern with SEO, your links will not be detected by crawlers.
However, will create a tag, which means your links will be detected when crawlers scrape your site. Endusers will still navigate with without reloading the page, creating the behavior of a Single Page App.
tag without using next/link's creates a standard hyperlink which directs end user to the url as a new page. (standard behavior).
You should be using throughout all your website, and use router.push for places where you need redirect in order to retain the behaviour of a Single Page App.

Top comments (0)