Why we need to detect edge in CNN
How to detect edge in CNN
Why we need to detect edge in CNN
Edge detection in Convolutional Neural Networks (CNNs) serves several important purposes in computer vision and image processing tasks. Here are some reasons why edge detection is valuable in the context of CNNs:
Feature Extraction:
Edges represent significant transitions in intensity or color in an image. Detecting edges helps in capturing essential features of an image, providing a basis for more complex feature representations.
Object Recognition:
Edges are crucial for recognizing objects in an image. They define the boundaries of objects and aid in distinguishing one object from another. CNNs can learn to recognize these boundaries as part of the overall object recognition process.
Texture Analysis:
Edges contribute to the perception of texture in an image. Texture information is valuable for tasks such as material recognition, where the surface properties of objects are essential for accurate classification.
Segmentation:
Edge information is often used in image segmentation tasks. It helps in identifying the boundaries between different regions in an image, which is essential for dividing the image into meaningful segments.
Shape and Structure Recognition:
The detection of edges is fundamental to recognizing the shapes and structures within an image. Understanding the geometric relationships between different parts of an object or scene is crucial for various computer vision applications.
Object Localization:
Edge information aids in localizing objects within an image. By identifying the boundaries of objects, CNNs can provide more accurate predictions of the location of objects in an image.
Image Enhancement:
Edge detection can be used for image filtering and enhancement. By emphasizing or suppressing certain edges, it is possible to highlight specific features in an image or reduce noise, leading to improved image quality.
Dimensionality Reduction:
Focusing on edges allows for a more compact representation of an image. Instead of working with the entire pixel space, CNNs can concentrate on the most informative features, reducing the dimensionality of the data.
Visual Interpretability:
Edge-detected images often provide a visual representation that is easier for humans to interpret. Highlighting edges can enhance the visibility of important structures and patterns in an image.
Preprocessing for Downstream Tasks:
Edge detection serves as a preprocessing step for various computer vision tasks, such as image recognition, object detection, and segmentation. Extracting relevant features through edge detection can simplify subsequent processing steps.
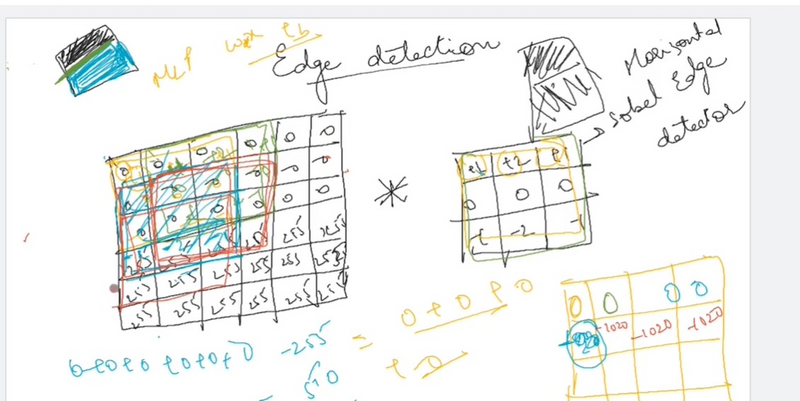
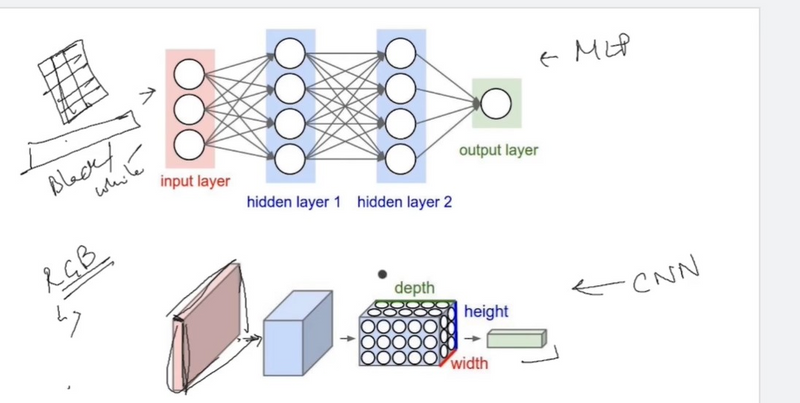
Using the edge detection as a starting point, we will see how the convolution operator works. Usually, earlier layers of the standard neural network can detect the edges, and then some later layers can detect parts of the objects as we can see in the pictures below. Furthermore, later layers can detect parts of complete objects such as faces.

How can we discover the edges in the picture?
Let’s have a look at an example!
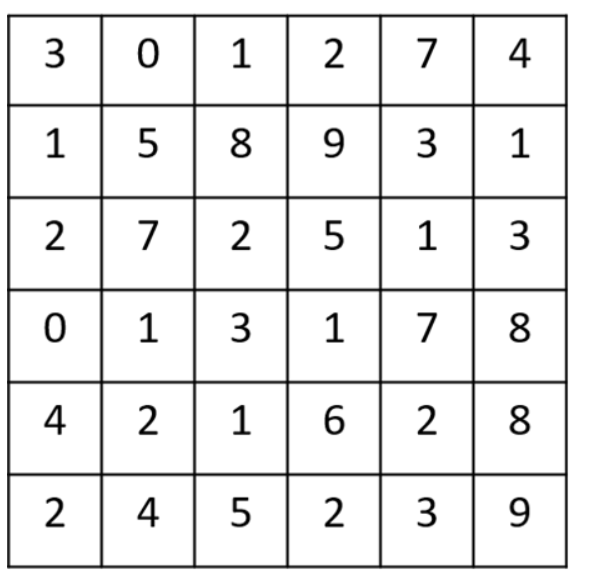
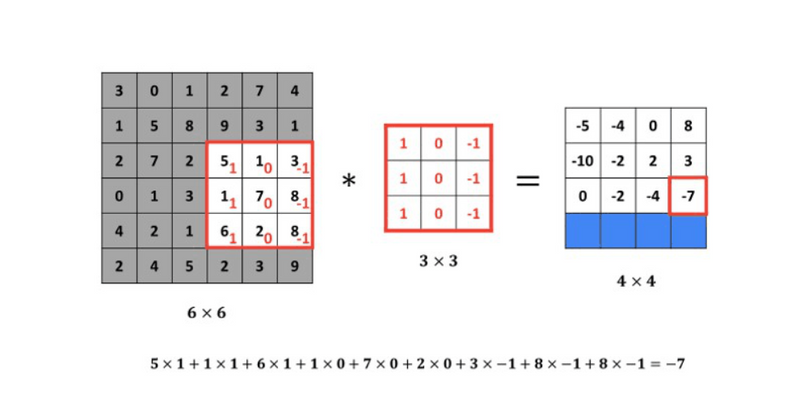
We have a (6 \times 6 ) pixel image. Since this is a gray image, we will have a (6 \times 6 \times 1 ) dimension, instead of (6 \times 6 \times 3 ), because in this case there are no RGB channels.
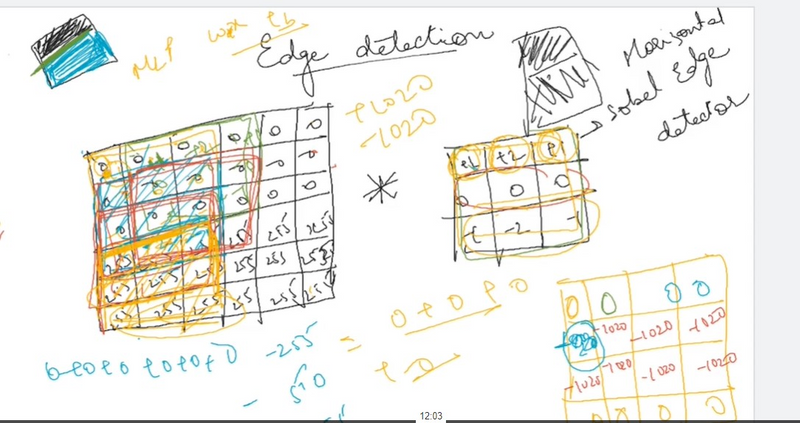
Detecting a vertical edge
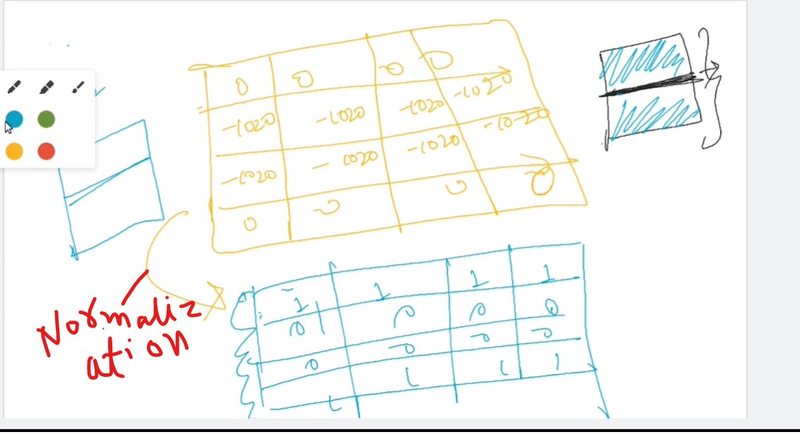
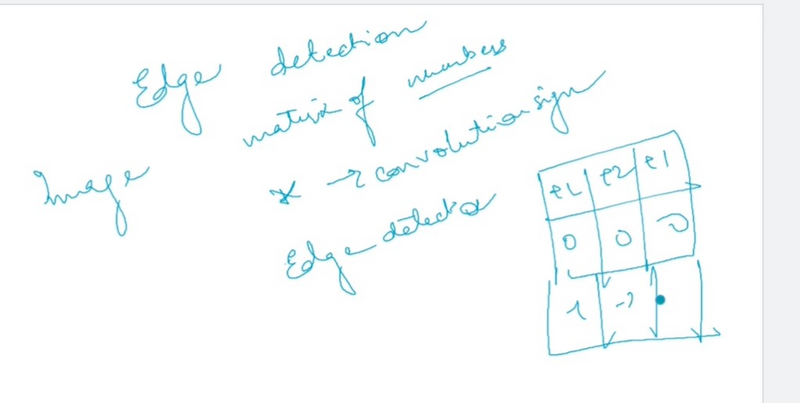
In order to discover the vertical edges in this image, we can construct a (3 \times 3 ) matrix. Using the terminology of the convolutional neural networks, we will call it a filter. Sometimes researchers call this a kernel instead of a filter, but we will use the filter terminology. We take a picture of (6 \times 6 ) pixels and perform a convolution operation with (3 \times 3 ) filter. The convolution operation is marked with an asterisk (*). You may be confused with this mild disagreement in notation. Namely, in mathematics, the star is a standard symbol for a convolution, but in Python this also means the multiplication or perhaps the element by element multiplication. We will be clear in the following posts by indicating when this star refers to the convolution.
The final product of this convolution process will be a (4 \times 4 ) matrix that can be interpreted as a (4 \times 4 ) image. The way we calculate this (4 \times 4 ) output is as follows: in order to calculate the first element (top left-hand corner) of this (4 \times 4 ) matrix, we take a (3 \times 3 ) filter and paste it to the top of the (3 \times 3 ) region of the original input image.
Then we should take a product of elements. The first one will be (3 \times 1 ), the second will be (1 \times 1 ) and so on. Thus, we have calculated the upper left-hand element of the (4 \times 4 ) output matrix, which is (-5 ). By repeating this procedure, we get the remaining elements.

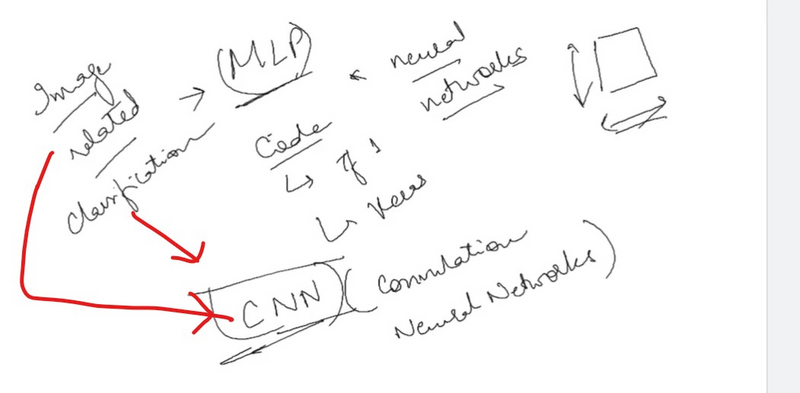
How to detect edge in CNN
import tensorflow as tf
from tensorflow.keras import layers, models
import matplotlib.pyplot as plt
import numpy as np

# Load a sample image
image_path = "path/to/your/image.jpg"
image = plt.imread(image_path)

# Display the original image
plt.figure(figsize=(6, 6))
plt.imshow(image)
plt.title('Original Image')
plt.show()

# Preprocess the image
image = tf.image.rgb_to_grayscale(image)
image = tf.image.resize(image, (256, 256))
image = tf.image.convert_image_dtype(image, tf.float32)
image = tf.expand_dims(image, axis=0)  # Add batch dimension

# Build a simple CNN for edge detection
model = models.Sequential()
model.add(layers.Conv2D(1, (3, 3), activation='relu', input_shape=(256, 256, 1)))

# Compile the model
model.compile(optimizer='adam', loss='mean_squared_error')

# Visualize the filters before training
filters = model.layers[0].get_weights()[0][:, :, 0, 0]
plt.figure(figsize=(8, 8))
for i in range(9):
    plt.subplot(3, 3, i + 1)
    plt.imshow(filters[:, :, i], cmap='gray')
    plt.title(f'Filter {i + 1}')
plt.show()

# Train the model
model.fit(image, image, epochs=10, batch_size=1)

# Visualize the filters after training
filters = model.layers[0].get_weights()[0][:, :, 0, 0]
plt.figure(figsize=(8, 8))
for i in range(9):
    plt.subplot(3, 3, i + 1)
    plt.imshow(filters[:, :, i], cmap='gray')
    plt.title(f'Filter {i + 1}')
plt.show()

# Visualize the original and edge-detected images
edges = model.predict(image)[0, :, :, 0]

plt.figure(figsize=(12, 6))
plt.subplot(1, 2, 1)
plt.imshow(image[0, :, :, 0], cmap='gray')
plt.title('Original Image')

plt.subplot(1, 2, 2)
plt.imshow(edges, cmap='gray')
plt.title('Edge-Detected Image')

plt.show()
Loading and Preprocessing:
Load a sample image and preprocess it (e.g., convert to grayscale, resize, and normalize) for compatibility with the model.
Building the CNN:
Create a simple CNN with a single convolutional layer using a small filter (3x3) and ReLU activation. The model is designed to learn to detect edges in the input image.
Visualizing Filters:
Visualize the initial filters before training. These filters are initialized randomly.
Training the Model:
Train the model using the same image as input and target to learn edge detection features.
Visualizing Filters After Training:
Visualize the filters again after training. The filters are adjusted during training to capture edge-like features in the image.
Visualizing Original and Edge-Detected Images:
Use the trained model to predict the edges in the original image. Compare the original and edge-detected images.

Top comments (0)