django-model
django-model
Refer here
Django Models – Learn to Create Your First Django Model
In this tutorial, we will be covering the Django Models concept. We learned about the Django MTV architecture in the previous tutorial and also got a good idea of the Model Component. Here we will learn about this particular component, model in-depth.
These concepts are very important for beginner web developers, as this will also help you understand other technologies.

Introduction to Django Models
So, what are Django Models exactly? A simple answer would be-
A Model in Django is a class imported from the django.db library that acts as the bridge between your database and server. This class is a representation of the data structure used by your website. It will directly relate this data-structure with the database. So that you don’t have to learn SQL for the database.
Also, every database implements SQL in a different way, because they all are made to complete a different task.
This creates a bit of a problem for the developers, for example:
You may know MySQL very well, but what will you do if your task can only be achieved by MongoDB?
There you can’t invest your time in understanding the new database and also trying to figure out how to integrate your server with the database.
This problem is overseen by Django ORM, which is a great tool and provides you with the ability to write python data-structures instead of a database language. Thus making your work much easier.
As you can see the two data structures/ datasets, which one do you think is more readable? Python is my answer.
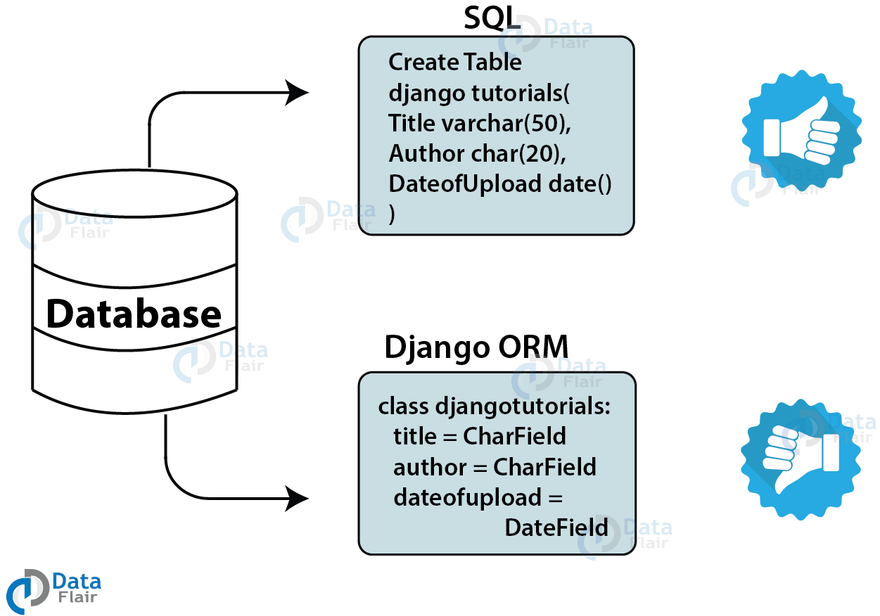
This makes it clear for someone who knows Python well and shows the importance of Django ORM over the SQL.
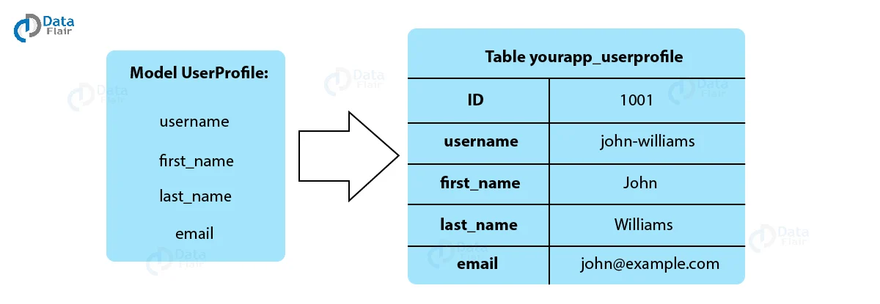
When you create a model, Django executes SQL to design a corresponding table in the database (as shown below) without the need to write even a single line of SQL. Django prefixes the name of the table with your Django application name. Also, the model links related information in the database.
You can also retrieve the data in Python and that gives you all the functionalities of Python, that you will ever need. Also, if you are wondering where the model python code is, it’s in the models.py file in the custom application you have created.
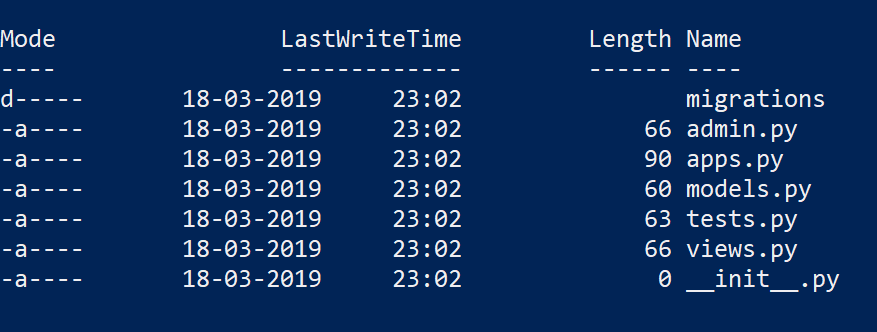
This file is only importing the models file of the django.db library
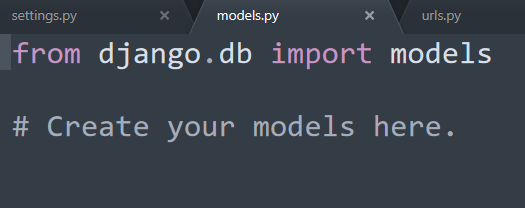
Here, you can create objects of class Model as we have imported the required file. We will create our website on the basis of a dataset which we will define here.
Creating Your First Django Model
Let’s do it step by step, also we are assuming that you have a database connected to your server or project otherwise nothing written here will work.
We are going to create a student model where we will have fields like roll_no., name, class and department.
- Firstly, create a new app by this command:
django-admin startapp student
- After creating the application you must install it in your project. To do that add ‘student’ application to INSTALLED_APPS List in settings.py file.
INSTALLED_APPS = [
‘django.contrib.admin’,
‘django.contrib.auth’,
‘django.contrib.contenttypes’,
‘django.contrib.sessions’,
‘django.contrib.messages’,
‘django.contrib.staticfiles’,
‘student’,
]
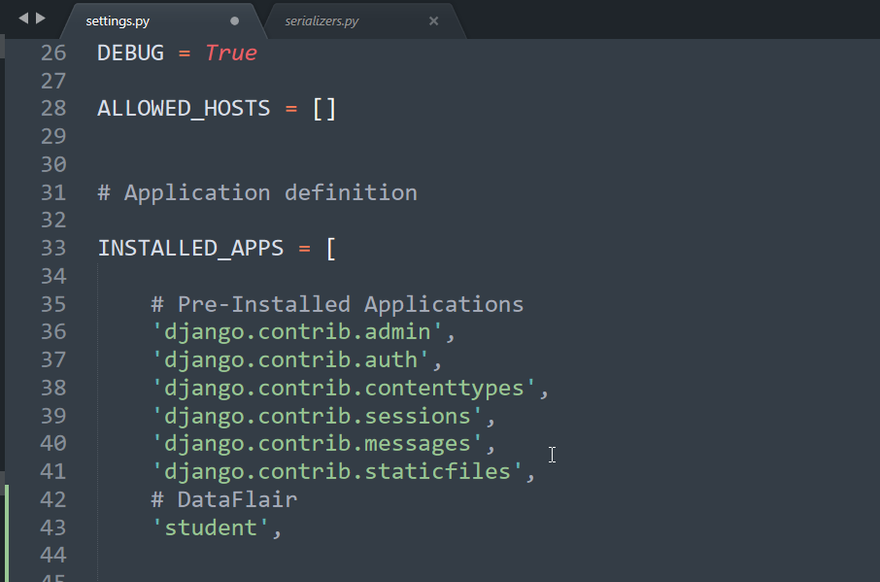
Then save your changes.
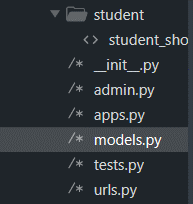
- Open the models.py file in that and write this code in it
from django.db import models
- class Student(models.Model):
- roll_no = models.TextField()
- name = models.TextField(max_length = 40)
- stud_class = models.TextField()
- department = models.TextField()
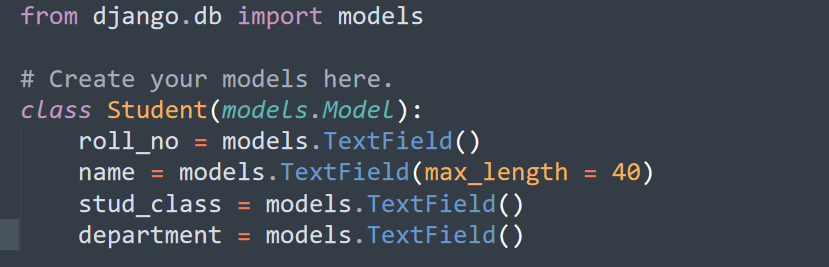
Here you can see that the models class has lots of methods for fields corresponding to web input. We are using text fields here as they are easier to implement and takes in any input.
- Now, execute these commands.
python manage.py makemigrations
python manage.py migrate
Make sure that you have the database connected and you have started the Apache server and MySQL server in the database.
Learn to perform Python Database access.
- Open the localhost/phpmyadmin/
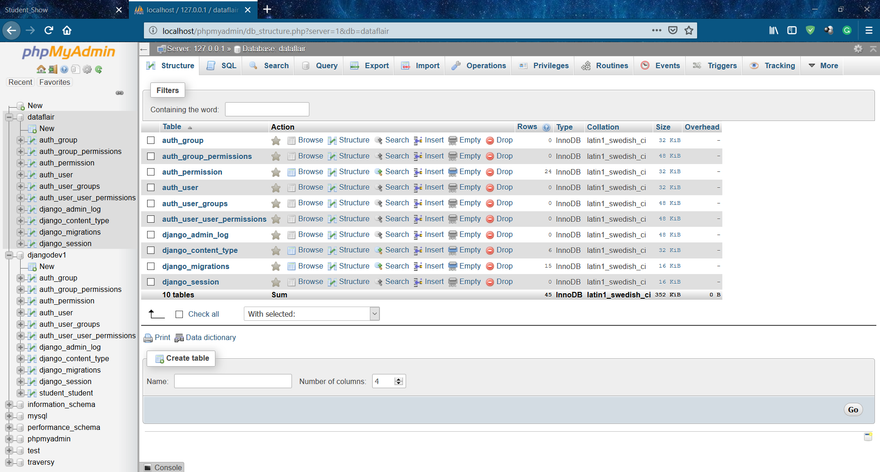
- Now open the main database that you have created for this Django project. Then, check the table student_student
You will see these fields.
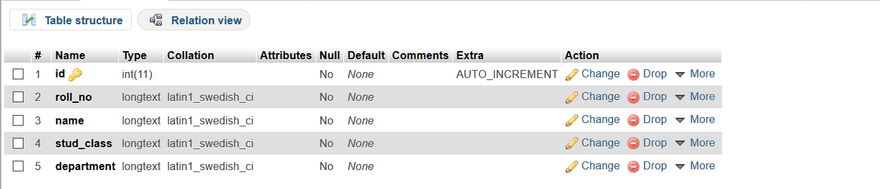
And all your tables can be made just like that, you can insert the data from there itself.
Advantages of Django Models
A model as stated in the definition is the link between the server and your database. Now, whenever you need the data or any operation is performed where data from the server is needed which is essentially just retrieving data from your database, it will need some middleware or bridge which can convert that data in a transmittable/Http response or more generally a web-transmittable format. There, Model comes in and does this important work for you.
If you don’t use the Django models, then you will have to perform a lot of work manually, like writing code that can connect your database with the Django server. In this case, you have to be an expert programmer. So our recommendation is that you shouldn’t bother yourself whether you master any database or not.
Model not only retrieves the data and converts it into the desirable format but execute it by applying business logic, or the logical part/ backend of your website that is actually inside the model component.
Not every operation is executable in the database and therefore we need backend which can actually perform some operation on our retrieved data, in this case, that language is Python.
So, what is different in a Django Model, you will ask?
Well, a lot of things. We will focus on main things though, for now.
Power of Python
If you are familiar with python and its capability to let you create advanced data structures with ease, then you will be pretty confident in using models.
Now, imagine that you have a built-in tool that can turn that python code which you have written directly into any database of any technology with modifying some part in our settings.py file of our project.
Here in this part of settings.py, you just have to modify the values of the dictionary. Here the default database which Django provides you is SQLite and after running these 2 commands in your command line,
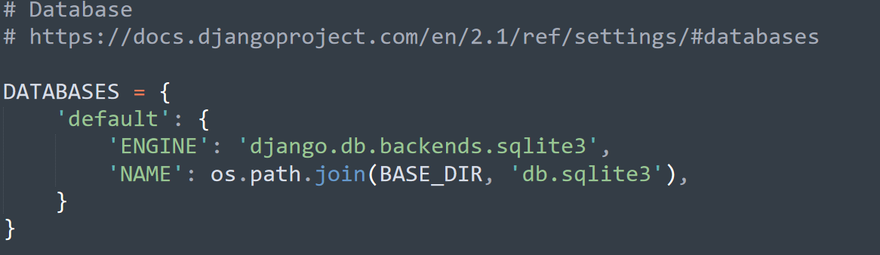
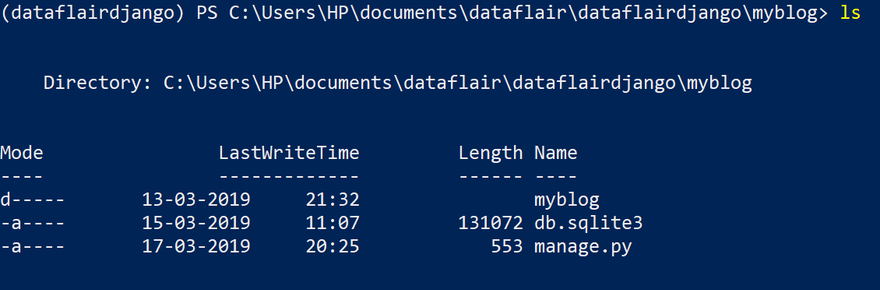
- python manage.py makemigrations
- python manage.py migrate you must have gotten a new file in the project folder by the name db.sqlite3. We write it in the ‘NAME’ index of the dictionary.
Django Models – A Complete Beginner’s Guide
Django models are classes that represent a table or collection in our Database. It contains all the information regarding the table. These models are stored together in Django in a file models.py in our Django App.
There can be many different models for different DB containing different information like User DB, Book DB, or any other table required by the web application.
Basic Structure of Django Models
class Modelname(models.Model):
'''A class representing a model derived from Model class'''
#Fields
Field_name = models.CharField(max_length = , hepl_text = , choices = , Null etc)
#Metadata
class Meta:
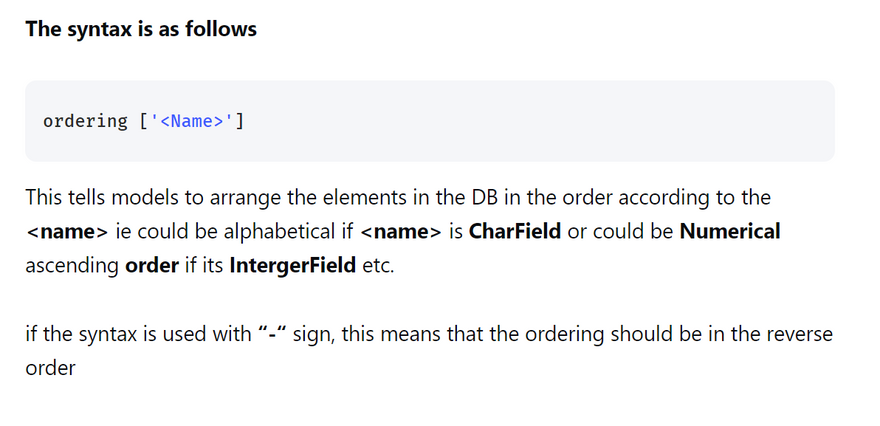
Ordering = [‘field_name’]
#Methods
def __str__(self):
return '<readable_name>'
- Fields in a Model A particular model can have any number of fields, these represent the various attributes of the database table.
There can be many different types of fields
- CharField
- IntegerValue
- Email These fields can also take arguments like
- max_length – The max number of characters possible.
- Primary key – This tells Django that this field is going to be unique for all the entries.
- Foreign key – This is used to connect one model with another model.
- NULL – If true, will convert empty fields into null value, char field take them as empty strings
- Choices – If the field has to be only one of the given options(like a option box)
- Blank – If true, the field can be allowed to be blank,otherwise has to be filled. Model Metadata This metadata has various features; one of the most important being the ordering. It allows you to show the responses in a particular order in the database when you give a request for that.
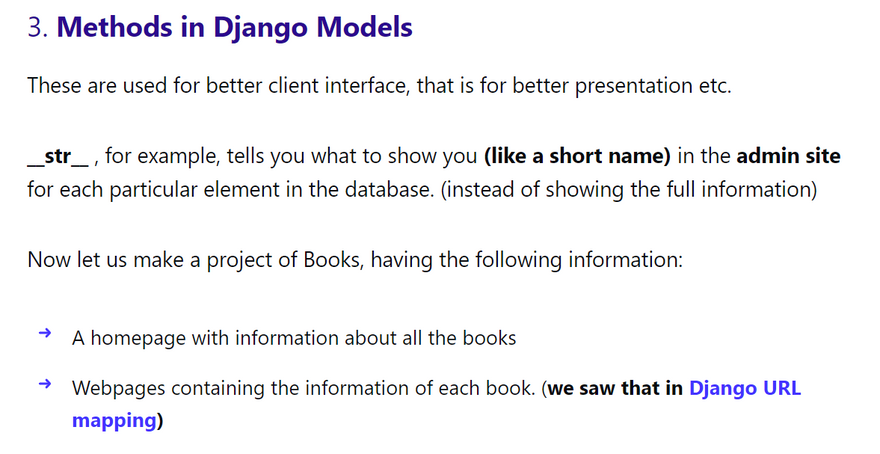
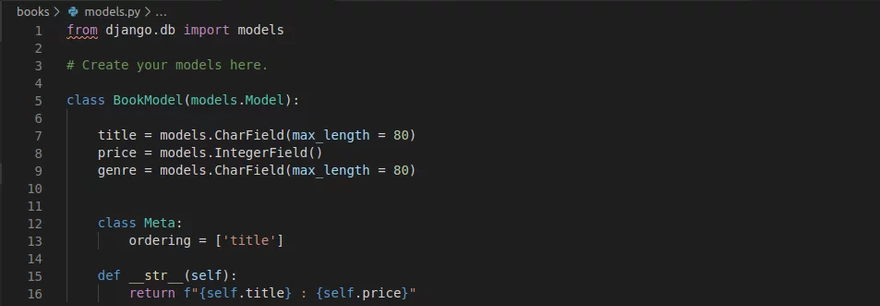
Creating Our First Django Model
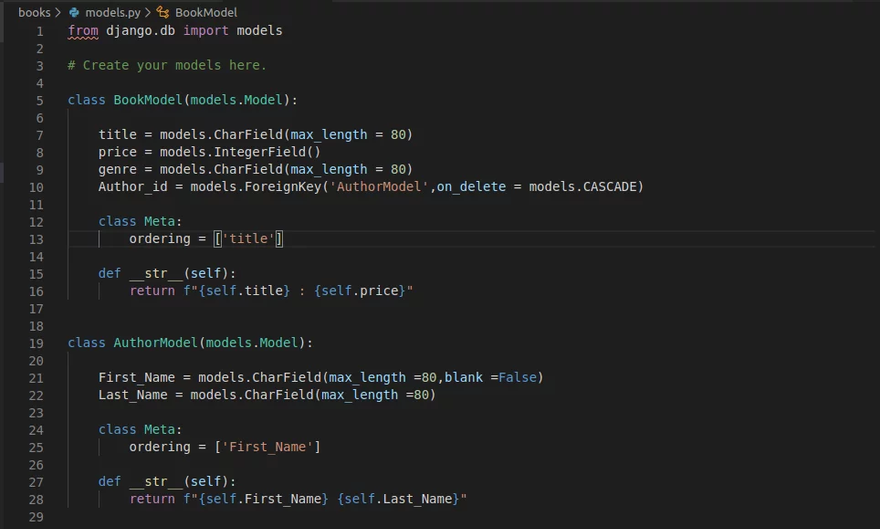
In the books/models.py let’s make a model DB having Title, Price, and Genre as attributes with metadata ordering of Title.
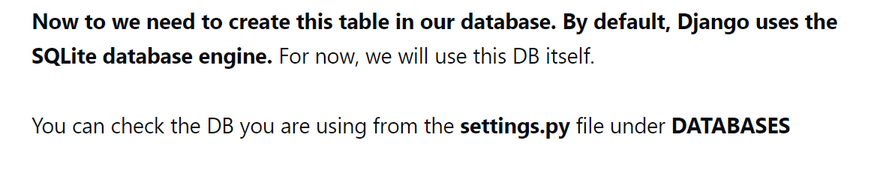

Creating a Table in the Database
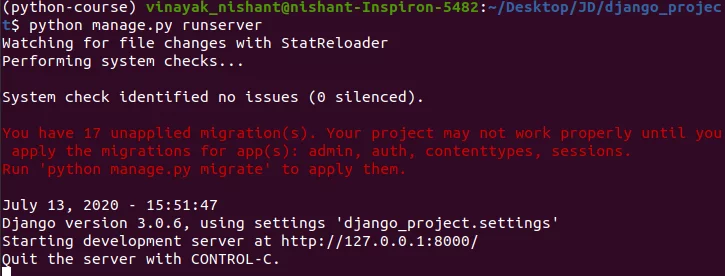
To create the table first we need to apply migrations. Write the code below in the shell
python manage.py migrate
python manage.py makemigrations <app_name>
Python manage.py sqlmigrate <app_name> 0001
And once again, run:
Python manage.py migrate
The output will indicate the successful creation of your database.
Your model table is ready in SQLite. Note that whenever we make changes to our model we need to repeat the steps above in order to make changes in the table in the DB as well.
Now we will learn to get/add data in to the DB
Retrieving information from DB
Now first we need to open python shell inside the directory, using the command:
python manage.py shell
Hence now we will have the python console appearing in the shell. We need to import the model table in order to add/retrieve information from it.
The syntax to import table is:
from <app_name>.models import <model_name>

Get all objects from a table
For this we use the syntax
<model_name>.objects.all()
Hence my code will be :

BookModel.objects.all()
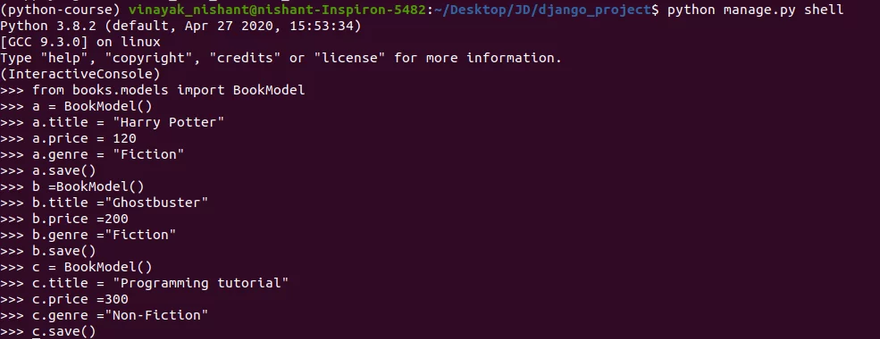
- Add information into the table To add the information, the syntax is similar to object-oriented python syntax. Here first we create a class object with the model name and then add the attributes required.
To create an object, the syntax is:
A = <model_name>()
Example:

A.Title = "Harry Potter"
A.Price = 120
A.Genre = "Fantasy Fiction"
A.save()
Thus we have entered our first book information. Similarly, I will add a few more.
Filtering records from the DB
To filter records from a Django model Database, we run:
<Model_name>.objects.filter(Title =”<Title_Element>”)
Hence for example if I filter out all the Books with genre say Fiction, then
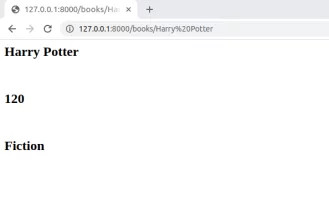
- Getting complete information about an element Note: When we use a filter, we get the element in the short form (in a way as described by def str) But if we want full information about an element we use this method
<model_name>.objects.get(Title = <"title_element">)
Here we can get all the information including the title. price, genre.
That is when we use
a = BookModel.objects.get(title = "Ghostbuster")
Then all the information is stored as an object, so if we implement the following then it will print the corresponding values.
a.title()
a.price()
a.genre()
- Delete an row element from DB To delete a particular element, we use the syntax .delete()
from books.models import BookModel
a =BookModel.objects.get(title="<book_name">)
a.delete()
Connecting to model DB via views.py
Now we will learn how to take up information from the DB and then show it on our webpage.
In Views.py add the code:
def BookView(request):
    books = BookModel.objects.all()

    html = ''
    for book in books:
        var = f'<li> {book.title} </li><br>'
        html = html + var
    return HttpResponse(html,status = 200)
Now from the code, u can understand that we basically retrieved all the DB info into variable books and then we started a loop to get each element from the DB and show on the webpage as HTML.
We must also provide the endpoint (Books/) for this View. Try it on your own from the knowledge gained from the Django-URL mapping article
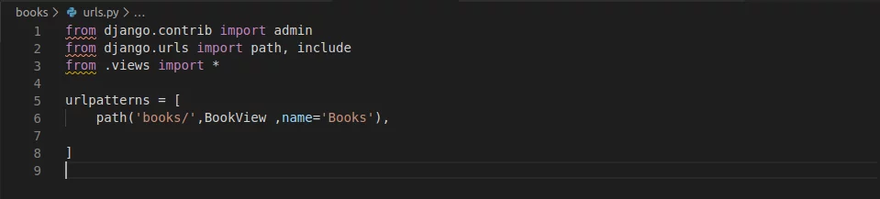
Now for the web page (books/). Look at the code below to understand better.
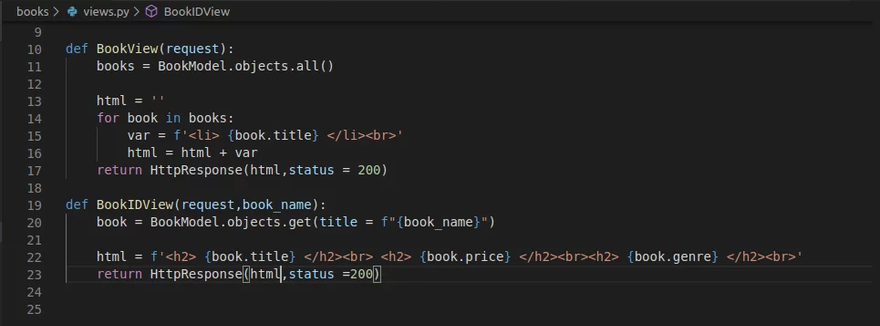
The code is simple; we are just taking all the information about the book_name using Get and then showing it on the webpage as HTML
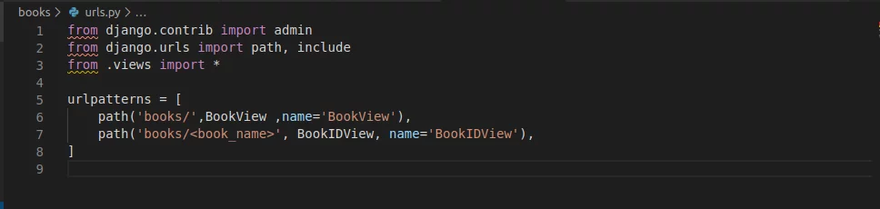
Here we have retrieved specific information from the DB and then displaying it on the Web page. Let us see how the urls.py file looks like for this View.
Now we will run the server and see if its working
Browser page for books/ webpage
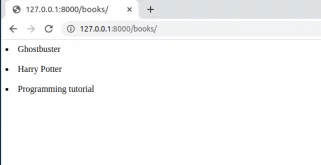
Browser page for books/ webpage

Connecting to other models using Foreign Key
A foreign key(FK) is used to link up two databases that are using some common information. This helps to keep our Databases clean and also ensures we don’t have to enter the same information again and again.
Now in our books app, let us make an Author Model Table and also add the Author_id field in our Book Model. Now note that Several books might have the same Author, so Author_id will act as the Foreign Key in our BookModel.
Using FK, we can search for various books written by a particular author. Also if an Author deletes his account, then all his books will also be deleted automatically thereby reducing the work of deleting them manually from the BookModel.
You might get confused a bit in the starting but after repeated practice, it will start making sense. So Don’t Worry !!
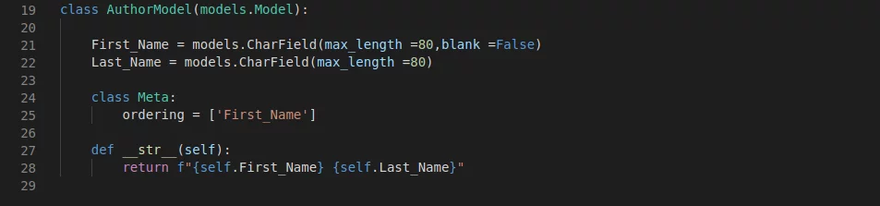
Now we can add the Author field in the BookModel.
================================================================
We have to run migrations for our new AuthorModel. Also Note: we have to run the shellcodes(migrations) as mentioned earlier since we changed our BookModel DB.
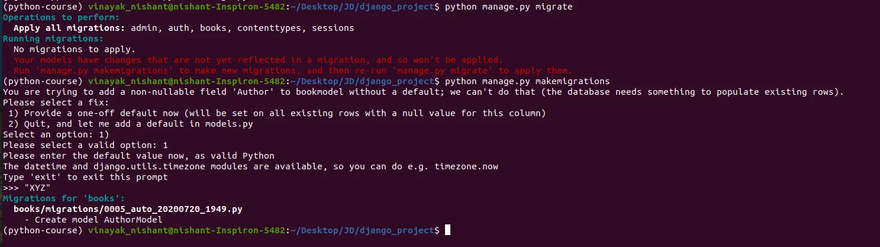
We already had some information in the database without the Author field. So Django asks to enter a default value in the author_id field for them.
It is preferred to delete all the earlier elements before applying the migrations (to change the table) using .delete()
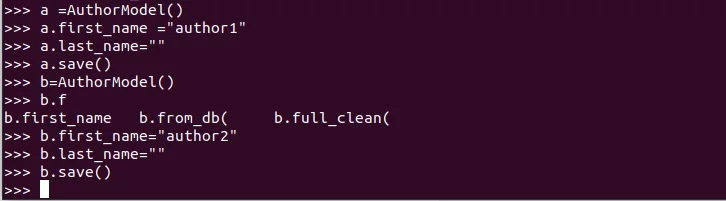
We can now add information to Author DB in the same way we added Book Information.
Also as practice, try to create an Author View yourself similar to the BookView.
We have now learnt to enter data, into tables through shell, but this is not the most efficient way to add data. The easiest way is to add data through admin site. We will learn how to do that in the next article.
Also from the admin site, you will get more information about the working of this whole FK, and how Author DB and Model DB are linked with each other through FK.
==========================================================
Step 1: Set up a Django project
If you haven't already, set up a Django project by following the initial Django project setup steps.
Step 2: Create a Django app
Create a Django app within your project by running the following command in the project directory:
python manage.py startapp myapp
Replace "myapp" with the name of your app.
Step 3: Define a model
Open the myapp/models.py file and define a model for your data. For example, let's create a simple model for a Person:
from django.db import models

class Person(models.Model):
    name = models.CharField(max_length=100)
    age = models.IntegerField()
Step 4: Create migrations and apply them
Generate the necessary migrations for your model by running the following commands:
python manage.py makemigrations myapp
python manage.py migrate
Step 5: Create a view
Open the myapp/views.py file and define a view for rendering the page with the modal. Here's an example:
from django.shortcuts import render

def index(request):
    return render(request, 'myapp/index.html')
Step 6: Create URL patterns
Open the myapp/urls.py file and define the URL patterns for your app. Here's an example:
from django.urls import path
from myapp import views

urlpatterns = [
    path('', views.index, name='index'),
]
Step 7: Create templates
Create a directory named templates inside the myapp directory. Inside the templates directory, create a file named index.html and define the HTML template for your view. Here's an example:
<html>
<head>
<title>Modal Example</title>
<!-- Include necessary CSS and JavaScript files for the modal -->
<link rel="stylesheet" href="https://maxcdn.bootstrapcdn.com/bootstrap/4.0.0/css/bootstrap.min.css">
<script src="https://code.jquery.com/jquery-3.2.1.slim.min.js"></script>
<script src="https://maxcdn.bootstrapcdn.com/bootstrap/4.0.0/js/bootstrap.min.js"></script>
</head>
<body>
<h1>Modal Example</h1>
<button type="button" class="btn btn-primary" data-toggle="modal" data-target="#myModal">Open Modal</button>
<!-- Modal -->
<div class="modal fade" id="myModal" tabindex="-1" role="dialog" aria-labelledby="exampleModalLabel" aria-hidden="true">
<div class="modal-dialog" role="document">
<div class="modal-content">
<div class="modal-header">
<h5 class="modal-title" id="exampleModalLabel">Modal Title</h5>
<button type="button" class="close" data-dismiss="modal" aria-label="Close">
<span aria-hidden="true">×</span>
</button>
</div>
<div class="modal-body">
<p>This is the modal content.</p>
</div>
<div class="modal-footer">
<button type="button" class="btn btn-secondary" data-dismiss="modal">Close</button>
</div>
</div>
</div>
</div>
</body>
</html>
Step 8: Update the project's URL patterns
Open the project's urls.py file and include the URL patterns for your app. Here's an example:
from django

Top comments (0)