What is Notification Permission
Why Do Apps Need Notification Permission?
How to Give Notification Permission in Mobile Apps Using Firebase (Flutter Guide)
Why Do Apps Need Notification Permission?
Notification Permission on Android
Best Practices for Asking Notification Permission
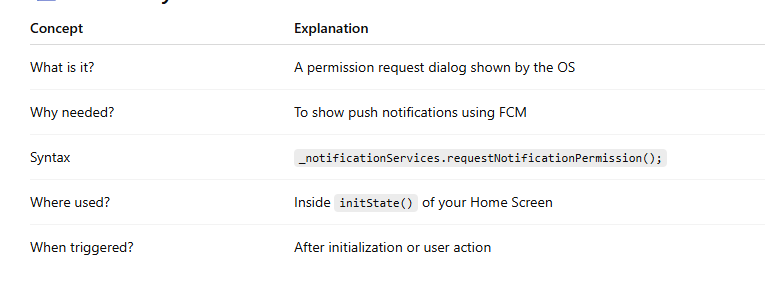
What is Notification Permission?
Notification permission is the authorization given by the user to allow an app to:
✔ Show push notifications
✔ Display banners, alerts, and pop-ups
✔ Play notification sounds
✔ Show badges on the app icon
✔ Deliver critical alerts (iOS only)
Most operating systems treat notifications as privacy-sensitive features.
Because of this, they require explicit user consent before an app can send or display notifications.
When your app needs notification access, you call a function inside your notification service class, usually named:
requestNotificationPermission()
==============or=============
final NotificationServices _notificationServices = NotificationServices();
_notificationServices.requestNotificationPermission();
import 'package:firebase/notification_services.dart';
import 'package:flutter/material.dart';


class HomeScreen extends StatefulWidget {
  final String title;

  const HomeScreen({super.key, required this.title});

  @override
  State<HomeScreen> createState() => _HomeScreenState();
}

class _HomeScreenState extends State<HomeScreen> {
  int _counter = 0;

  // Create Notification Service Instance
  final NotificationServices _notificationServices = NotificationServices();

  @override
  void initState() {
    super.initState();

    // Request permission on app start
    _notificationServices.requestNotificationPermission();

    // Initialize foreground notifications listener
    _notificationServices.firebaseInit(context);

    // Handle notification click when app is opened from notification
    _notificationServices.handleNotificationClick(context);

    // Optional: Print FCM Token
    _notificationServices.getDeviceToken();
  }
This function internally triggers:
🔹 The OS permission dialog
🔹 Firebase Messaging authorization
🔹 Permission statuses (authorized / denied / provisional)
How to Give Notification Permission in Mobile Apps Using Firebase (Flutter Guide)
Push notifications help apps communicate with users in real time. But before sending notifications, the app must first request permission from the user—especially on Android 13+ and all iOS devices.
Here’s a simple step-by-step explanation of how your code gives notification permission in Flutter using Firebase.
1️⃣ Step 1 — Initialize Firebase Before the App Starts
R:\firebase\firebase\lib\main.dart
Future<void> main() async {
  WidgetsFlutterBinding.ensureInitialized();

  await Firebase.initializeApp();

  runApp(const MyApp());
}
👉 Simple Explanation
WidgetsFlutterBinding.ensureInitialized() prepares Flutter before running async code.
Firebase.initializeApp() connects your app to Firebase services.
runApp() starts your Flutter application.
This ensures your app is fully connected to Firebase before requesting notification permission.
2️⃣ Step 2 — Call Notification Permission When Home Screen Loads
R:\firebase\firebase\lib\home_screen.dart
class _HomeScreenState extends State<HomeScreen> {
  final NotificationServices _notificationServices = NotificationServices();

  @override
  void initState() {
    super.initState();

    _notificationServices.requestNotificationPermission();
  }
}
👉 Simple Explanation
A NotificationServices object is created.
initState() runs automatically when the screen loads.
Inside it, the app calls requestNotificationPermission() to show the system permission popup.
This is where the app actually asks the user to allow notifications.
3️⃣ Step 3 — NotificationServices: Request Permission From Firebase Messaging
R:\firebase\firebase\lib\notification_services.dart
class NotificationServices {
  final FirebaseMessaging _messaging = FirebaseMessaging.instance;

  Future<void> requestNotificationPermission() async {
    NotificationSettings settings = await _messaging.requestPermission(
      alert: true,
      badge: true,
      sound: true,
    );

    if (settings.authorizationStatus == AuthorizationStatus.authorized) {
      print("User granted permission");
    } else if (settings.authorizationStatus == AuthorizationStatus.provisional) {
      print("User granted provisional permission");
    } else {
      print("User denied notification permission");
      AppSettings.openAppSettings();
    }
  }
}
output

Why Do Apps Need Notification Permission?
Here are the key reasons:
- Respecting User Privacy
Users should have full control over which apps can interrupt them with alerts.
- Preventing Notification Spam
Without permission control, apps could misuse notifications and annoy users.
- OS Policy Requirements
Android 13+ and iOS require apps to request permission before sending notifications.
If the user denies it → notifications will NOT appear.
- Compliance with Play Store & App Store guidelines
Both Google & Apple enforce strict rules about permission usage.
- Better User Engagement
An app that politely requests permission usually gets a higher approval rate.
📱
Notification Permission on Android
Android ≤ 12
Notifications are allowed by default, unless the user disables them manually.
Android 13+ (API 33+)
Google introduced the POST_NOTIFICATIONS runtime permission.
Apps must explicitly request permission, similar to camera or location.
If permission is not granted:
❌ Firebase messages will not show
❌ Foreground notifications won't appear
❌ No banner, sound, or alerts
🍎
Notification Permission on iOS
Apple requires notification permission for all iOS versions.
When your app requests permission, the user sees a system popup like:
“App wants to send you notifications”
Allow / Don't Allow
If the user denies:
❌ All notifications are blocked
❌ App cannot ask again (unless user changes settings manually)
That’s why a well-designed permission request strategy is very important.
🧠
Best Practices for Asking Notification Permission
✔ Ask permission after explaining why (not on app launch)
✔ Trigger the request after a meaningful user action
✔ Show a custom screen before the first system popup
✔ If denied → redirect user to system settings screen
✔ Never spam the permission dialog
Syntax to Request Notification Permission (Flutter)
Before using it inside your UI, you must understand the syntax:
🔹 Syntax
_notificationServices.requestNotificationPermission();
This means:
_notificationServices → an object of your NotificationServices class
requestNotificationPermission() → a method inside that class
It triggers the notification permission popup
It handles authorized / provisional / denied cases
📌
When Should You Call It?
You typically call it inside initState():
When the Home Screen loads
Or after a user performs a meaningful action
Do NOT call it immediately on app launch (user may deny it).
  void initState() {
    super.initState();

    // Request permission on app start
    _notificationServices.requestNotificationPermission();

    // Initialize foreground notifications listener
    _notificationServices.firebaseInit(context);

    // Handle notification click when app is opened from notification
    _notificationServices.handleNotificationClick(context);

    // Optional: Print FCM Token
    _notificationServices.getDeviceToken();
  }
Example (After Theory)
Now that we understand why permission is needed and what the syntax is, here is how you usually place it inside a Stateful widget:
@override
void initState() {
  super.initState();

  // Asking notification permission
  _notificationServices.requestNotificationPermission();
}
Full code
Step 1: Import Dependencies
Add this to your pubspec.yaml:
dependencies:
  firebase_core: ^3.0.0
  firebase_messaging: ^15.0.0
  app_settings: ^5.1.1
Run:
flutter pub get
📌 Step 2: Create Notification Service Class
Create a file:
lib/notification_services.dart

import 'dart:io';
import 'package:flutter/material.dart';
import 'package:firebase_messaging/firebase_messaging.dart';
import 'package:app_settings/app_settings.dart';

class NotificationServices {
  final FirebaseMessaging _messaging = FirebaseMessaging.instance;

  /// REQUEST PERMISSION
  Future<void> requestNotificationPermission() async {
    NotificationSettings settings = await _messaging.requestPermission(
      alert: true,
      announcement: true,
      badge: true,
      carPlay: false,
      criticalAlert: true,
      provisional: true,
      sound: true,
    );

    if (settings.authorizationStatus == AuthorizationStatus.authorized) {
      print("User granted permission");
    } else if (settings.authorizationStatus == AuthorizationStatus.provisional) {
      print("User granted provisional permission");
    } else {
      print("User denied permission");
      AppSettings.openAppSettings(type: AppSettingsType.notification);
    }
  }

  /// GET FCM TOKEN
  Future<String?> getDeviceToken() async {
    String? token = await _messaging.getToken();
    print("FCM Token: $token");
    return token;
  }

  /// HANDLE FOREGROUND NOTIFICATIONS
  void firebaseInit(BuildContext context) {
    FirebaseMessaging.onMessage.listen((message) {
      if (message.notification != null) {
        _showPopup(
          context,
          message.notification!.title ?? "Notification",
          message.notification!.body ?? "",
        );
      }
    });
  }

  void _showPopup(BuildContext context, String title, String body) {
    showDialog(
      context: context,
      builder: (_) => AlertDialog(
        title: Text(title),
        content: Text(body),
        actions: [
          TextButton(
            onPressed: () => Navigator.pop(context),
            child: const Text("OK"),
          )
        ],
      ),
    );
  }

  /// HANDLE CLICK EVENTS
  void handleNotificationClick(BuildContext context) {
    FirebaseMessaging.onMessageOpenedApp.listen((message) {
      Navigator.push(
        context,
        MaterialPageRoute(
          builder: (_) => NotificationClickScreen(
            title: message.notification!.title ?? "",
            body: message.notification!.body ?? "",
          ),
        ),
      );
    });
  }
}

class NotificationClickScreen extends StatelessWidget {
  final String title;
  final String body;

  const NotificationClickScreen({
    super.key,
    required this.title,
    required this.body,
  });

  @override
  Widget build(BuildContext context) {
    return Scaffold(
      appBar: AppBar(title: const Text("Notification Details")),
      body: Padding(
        padding: const EdgeInsets.all(20),
        child: Column(
          crossAxisAlignment: CrossAxisAlignment.start,
          children: [
            Text("Title: $title",
                style: const TextStyle(
                    fontSize: 20, fontWeight: FontWeight.bold)),
            const SizedBox(height: 10),
            Text("Body: $body", style: const TextStyle(fontSize: 18)),
          ],
        ),
      ),
    );
  }
}
📌 Step 3: Use Notification Service in HomeScreen
Update your HomeScreen:
class _HomeScreenState extends State<HomeScreen> {
  final NotificationServices _notificationServices = NotificationServices();

  @override
  void initState() {
    super.initState();

    _notificationServices.requestNotificationPermission();
    _notificationServices.firebaseInit(context);
    _notificationServices.handleNotificationClick(context);
    _notificationServices.getDeviceToken();
  }
}
📌 Step 4: Initialize Firebase in main.dart
Future<void> main() async {
  WidgetsFlutterBinding.ensureInitialized();
  await Firebase.initializeApp();
  await FirebaseApi().initNotifications(); // optional background handler

  runApp(const MyApp());
}

Top comments (0)